
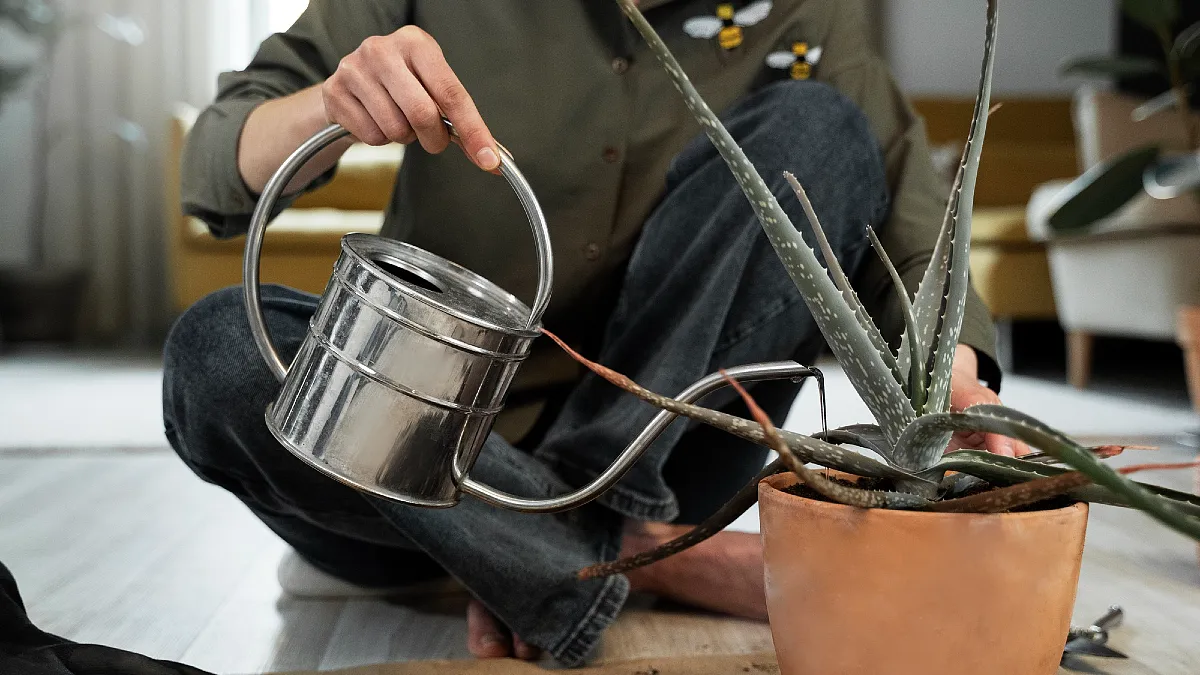
Your aloe vera looks dry, so you give it a little water. Then you water it again a few days later because the leaf tips still look brown.
Soon, the soil smells damp. The leaves feel soft. The plant starts leaning even though you have been caring for it closely.
The problem is often the watering schedule.
Aloe vera does not want a small drink every few days. It stores water inside its thick leaves and can survive dry soil far better than constantly wet roots.
So, how often should you water aloe vera? There is no single number that works in every home. You need to check the soil, pot, light, and season before reaching for the watering can.
Here is how to make the right call.
How Often Should You Water Aloe Vera Indoors?
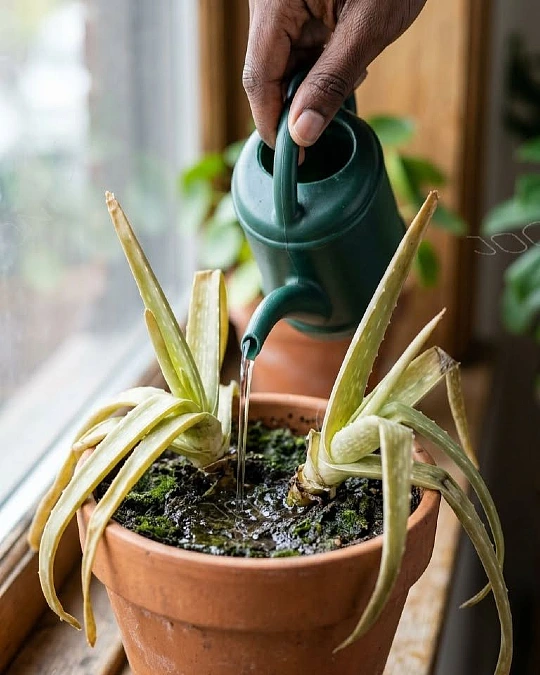
Water your aloe vera only after the potting mix has dried fully or almost fully.
For many indoor plants, that may mean watering once every two to four weeks during warmer months. In winter, the gap may stretch to four weeks or longer.
Treat those numbers as rough estimates. They are not a fixed aloe vera watering schedule.
The University of Minnesota Extension advises allowing cactus and succulent soil to dry completely between watering. North Carolina State Extension gives similar advice for aloe vera and recommends watering less often in winter.
The Royal Horticultural Society also says aloe should be watered deeply but infrequently. Its compost should dry before the next watering, with very little water needed in winter.
Your aloe may dry in ten days in a hot, sunny room. The same plant could stay damp for a month in a cool room with weak winter light.
That is why soil condition matters more than the date.
Use This 3 Step Test Before You Water
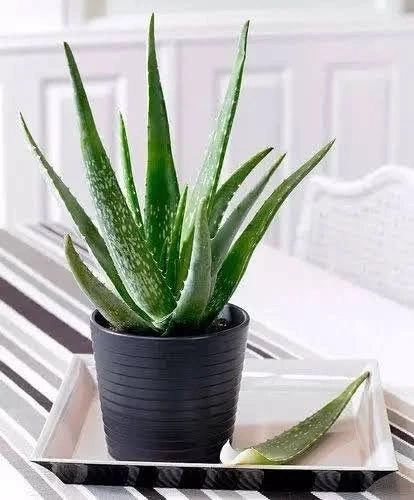
Looking at the top of the pot is not enough.
The surface can appear dry while the soil around the roots is still damp. Use these three checks before watering.
1. Check Below the Surface
Push your finger two or three inches into the potting mix.
Do not water if you feel coolness or moisture. Check again after a few days.
A wooden skewer can help with deeper pots. Push it toward the bottom, leave it for a minute, and pull it out.
Damp soil will darken the wood or stick to it. A clean, dry skewer suggests the mix is ready for water.
Penn State Extension recommends physically checking succulent soil rather than guessing from appearance.
2. Look Through the Drainage Hole
Tilt the pot and inspect the mix near the bottom hole.
If the soil there looks dark or feels damp, wait. The roots near the base still have access to moisture.
This check is useful because the bottom of a pot often stays wet longer than the surface.
3. Lift the Pot
A dry pot feels much lighter than a wet one.
Lift the pot just after watering and notice its weight. Lift it again as the soil dries.
After a few watering cycles, the difference becomes easy to recognize.
Use all three tests when you are unsure. Water when the deeper mix feels dry and the pot feels light.
How to Water Aloe Vera Without Leaving Dry Roots
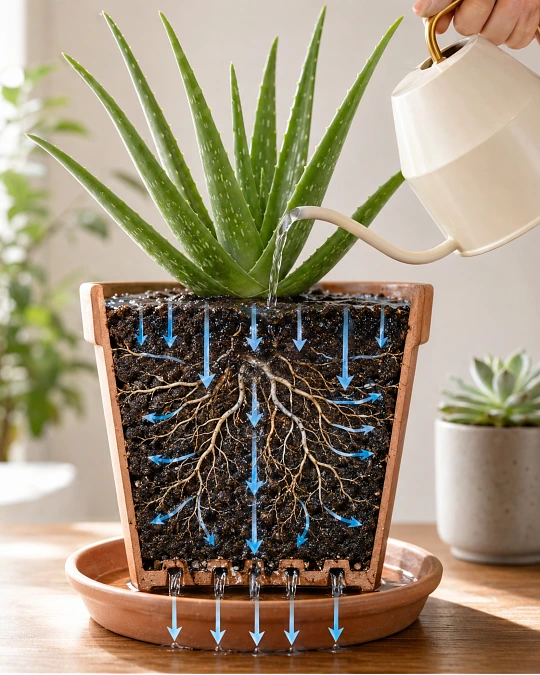
Waiting for the soil to dry does not mean giving the plant a tiny drink.
When it is time to water, wet the full root area.
Place the pot over a sink or tray. Pour water slowly across the soil until it begins flowing through the drainage holes.
Allow the pot to drain fully. Then empty any water left in the saucer or decorative outer pot.
The Royal Horticultural Society recommends watering container plants until water passes through the drainage holes. This shows that moisture has moved through the full pot rather than wetting only the surface.
Avoid these common habits:
- Do not add a few spoonfuls every several days.
- Do not leave the pot standing in water.
- Do not pour water into the center of the leaf rosette.
- Do not water again while the bottom soil is damp.
Small drinks can wet only the top layer. The deeper roots may stay dry while salts build up near the surface.
A full watering followed by a long drying period is much closer to what aloe needs.
6 Things That Change Your Aloe Watering Schedule
Your neighbor may water aloe every two weeks and get great results. That does not mean the same timing will work in your home.
These six conditions control how fast the soil dries.
1. Light Level
Bright light helps aloe use water.
A plant near a bright window will usually dry faster than one sitting across a dim room. However, stronger sun can also raise the pot temperature and increase moisture loss.
Check bright window plants more often, but do not assume they need water every time you check.
2. Indoor Temperature
Warm rooms dry pots faster.
Cool rooms slow evaporation and plant growth. Soil may remain wet much longer during winter, especially near a cold window.
Aloe kept in a warm kitchen may need checking sooner than aloe in a cool spare room.
3. Season
Aloe usually uses more water during active spring and summer growth.
Growth often slows during autumn and winter as daylight falls. The Royal Horticultural Society recommends watering aloe very sparingly during its winter rest.
Continue checking the soil, but expect longer gaps.
4. Pot Material
Unglazed terracotta allows some moisture to escape through its walls.
Plastic, metal, and glazed ceramic hold moisture longer. This does not make them unusable, but you may need to wait longer between watering.
Terracotta can be helpful if you often water too soon.
5. Pot Size
A large amount of soil holds more water than a small amount.
Placing a small aloe in a huge pot can leave wet compost around a limited root system. The plant cannot use that water quickly enough.
Choose a pot only a little wider than the root mass.
6. Soil Type
Dense general potting soil may stay wet for too long.
A cactus or succulent mix drains more freely. The Royal Horticultural Society recommends cactus compost or a loam based mix with added horticultural grit for aloe vera.
If your soil remains wet for several weeks, the mix may be a bigger problem than your schedule.
Signs You Are Watering Aloe Vera Too Often
An overwatered aloe does not always look wet.
It may first appear weak, pale, or oddly soft. Look at the soil and leaves together before deciding what is wrong.
Common signs include:
- Soft or mushy leaves
- Yellow or translucent leaf tissue
- Leaves that fall away with light pressure
- A soft plant base
- Soil that stays damp for many days
- A stale or sour smell from the pot
- Dark, soft roots
- A plant that wobbles because roots have died
Penn State Extension lists yellow leaves, mushy tissue, and leaves that fall with little pressure as common signs of excess water in succulents.
The Royal Horticultural Society identifies overwatering as the most common aloe vera problem and warns that it can lead to root rot.
Do not respond to soft leaves by adding more water.
Push a finger into the soil. If it is damp, stop watering and let the pot dry.
A badly affected plant may need to be removed from its pot so you can inspect the roots.
Signs Your Aloe Vera Actually Needs Water
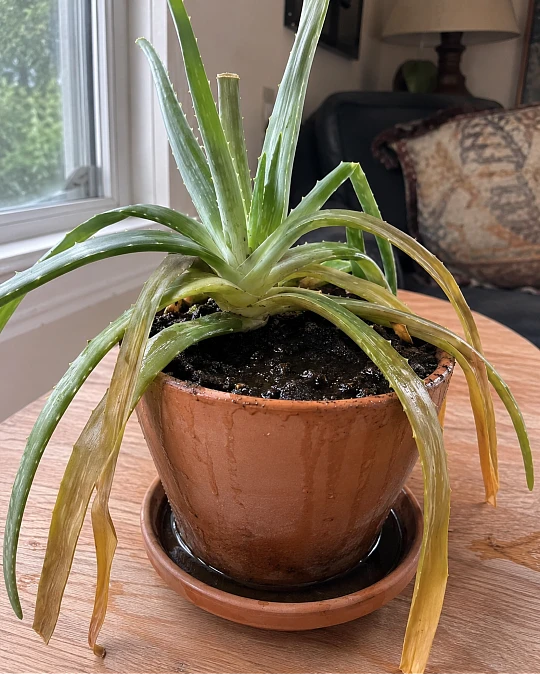
A thirsty aloe usually loses firmness because it is using the water stored in its leaves.
Look for several signs at the same time:
- Leaves feel thinner than normal.
- The surface looks wrinkled.
- Leaf edges curl inward.
- Lower leaves begin to droop.
- The soil is dry from top to bottom.
- The pot feels very light.
A red or dull leaf color can sometimes appear when an aloe is stressed, but color alone is not a reliable watering test. Strong sun, temperature changes, and other problems can also affect leaf color.
Brown tips are another weak clue.
They may develop from long dry periods, root damage, physical injury, mineral buildup, or old age. Do not water solely because one tip has turned brown.
Check the soil first.
When a thirsty aloe receives a full watering, firmer leaves may return over the following days. Severely damaged leaves may not become smooth again, even after the roots recover.
How to Save an Overwatered Aloe Vera Plant
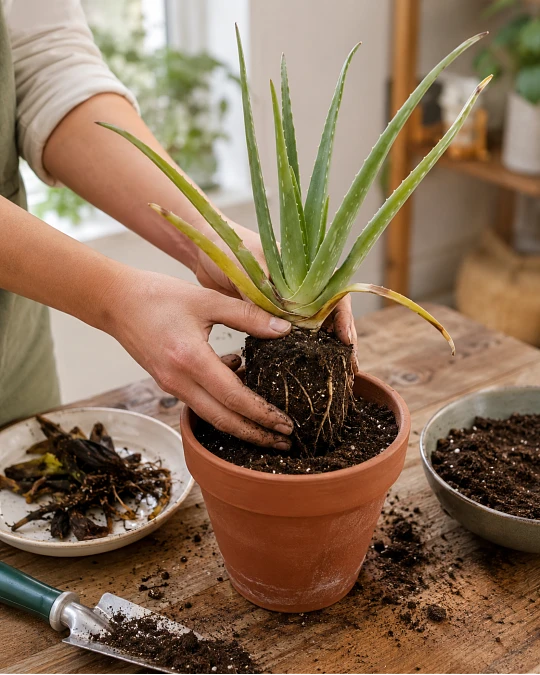
Act quickly if the leaves are soft and the soil remains wet.
1. Stop Watering
Do not add water to test whether the plant improves.
Move the pot away from standing water. Place it in a bright area with normal airflow.
2. Remove the Plant From Its Pot
Slide the root ball out carefully.
Wet soil often falls away on its own. Gently remove enough mix to see the roots.
3. Check the Roots
Healthy aloe roots are usually firm.
Rotten roots may appear dark, soft, hollow, or slimy. They may also smell unpleasant.
4. Remove Rotten Material
Use clean scissors to cut away soft roots.
Remove any collapsed tissue at the base of the plant. Clean the scissors between cuts if rot is widespread.
5. Repot in Fresh, Fast Draining Mix
Use cactus or succulent compost in a clean pot with open drainage holes.
North Carolina State Extension recommends letting aloe soil dry between watering and notes that a pot should have several drainage holes. It also identifies clay as a useful pot material.
Do not reuse soaked soil. It may remain dense and airless around the recovering roots.
6. Delay the Next Watering
Freshly cut roots need time to dry.
Wait several days before adding water. Plants with major root loss may need even longer.
Then water carefully and allow the mix to dry again.
Recovery is not guaranteed. If rot has spread through the full plant base, there may be no healthy tissue left to save.
Choose a Pot and Soil That Make Watering Easier
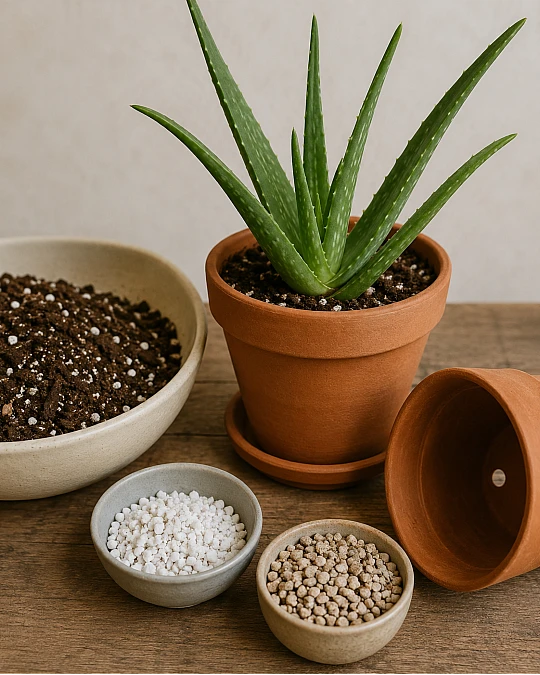
A good setup gives you more room for error.
Start with a pot that has at least one large drainage hole. Several open holes are even better.
A decorative pot without drainage can hold the nursery pot, but remove the inner pot when watering. Let it drain completely before placing it back.
A Practical Pot Setup
Choose:
- An unglazed terracotta pot
- A pot only slightly wider than the roots
- A removable saucer
- Open drainage holes
- A cactus or succulent potting mix
Terracotta dries faster than glazed ceramic or plastic. That can help in cool homes or in rooms with limited light.
The downside is that you may need to check the soil more often during hot weather.
Improve Soil That Stays Wet
A commercial cactus mix is a good starting point.
If it still holds water for too long, add perlite, pumice, or horticultural grit. The goal is a loose mix that accepts water but does not remain soggy.
Do not place a layer of stones in the bottom as a replacement for good drainage.
The water still needs a clear path out of the pot. A proper soil mix and open drainage hole matter more than decorative stones.
A Simple Seasonal Aloe Watering Guide
Use this guide as a reminder to inspect the plant. Do not treat it as a strict calendar.
| Season | How to Handle Watering |
|---|---|
| Spring | Check the soil each week as growth increases. Water only when the full mix is dry. |
| Summer | Check more often in warm, bright rooms. Give a full watering when dry. |
| Autumn | Begin increasing the time between watering as light and growth decrease. |
| Winter | Water very sparingly. Cool soil may remain damp for several weeks. |
The Royal Horticultural Society advises moderate watering while aloe is growing and very limited watering during winter dormancy.
Your home may not follow the seasons perfectly.
Aloe under a strong grow light in a warm room may continue using water through winter. A plant beside a cool window may slow much earlier.
Let the pot tell you what it needs.
Should You Use a Moisture Meter?

A moisture meter can help, but it should not make the final decision for you.
Cheap meters sometimes give odd readings in loose, gritty soil. Salts and soil texture can also affect the result.
Use the meter as one clue.
Compare it with:
- The wooden skewer test
- The pot’s weight
- The drainage hole
- The feel of the deeper soil
- The condition of the leaves
A finger and a wooden skewer are often enough for a small aloe pot.
5 Aloe Watering Mistakes to Stop Making
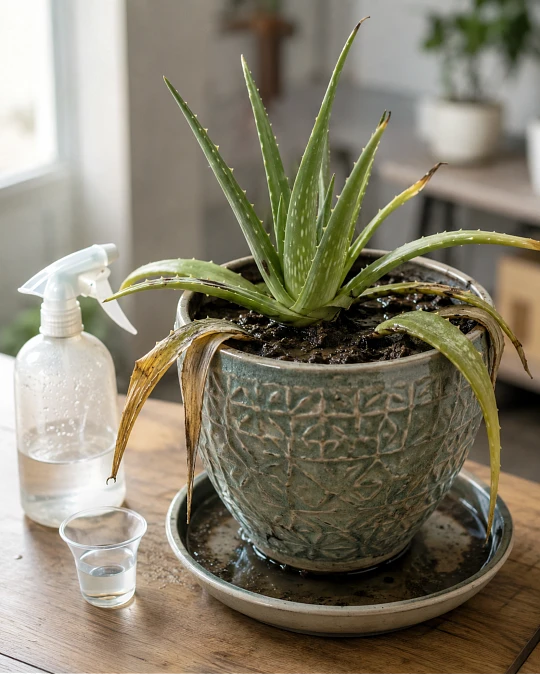
1. Watering on the Same Day Every Week
A weekly reminder can tell you to inspect the plant. It should not tell you to water automatically.
Skip watering when the soil is damp.
2. Giving Frequent Small Sips
A small amount may never reach the deeper roots.
Water the entire pot. Then wait for it to dry.
3. Leaving Water in the Saucer
Roots need both moisture and air.
Empty the saucer after the pot finishes draining. Do not let the base sit in water.
4. Using a Pot Without Drainage
A layer of wet soil can remain hidden at the bottom.
Move the plant into a pot with drainage holes before root problems begin.
5. Misting the Leaves
Aloe vera does not need high humidity.
The Royal Horticultural Society advises against misting aloe because moisture around the leaves can increase the chance of rot.
Clean dusty leaves with a dry or lightly damp cloth instead. Keep water out of the center of the plant.
Quick Aloe Watering Troubleshooter
| What You See | Check First | Likely Next Step |
|---|---|---|
| Soft leaves and wet soil | Roots and drainage | Stop watering and inspect for rot |
| Wrinkled leaves and dry soil | Pot weight and deeper soil | Water thoroughly |
| Brown leaf tips | Soil moisture and root health | Do not water based on tips alone |
| Soil stays wet for weeks | Pot size, light, and soil type | Repot into a faster draining mix |
| Water runs down the sides | Hard, dry soil or a root bound pot | Water slowly in several passes |
| Plant leans at the base | Roots and lower stem | Inspect for rot |
| Lower leaf turns yellow | Soil moisture and leaf age | Check for wet soil before acting |