
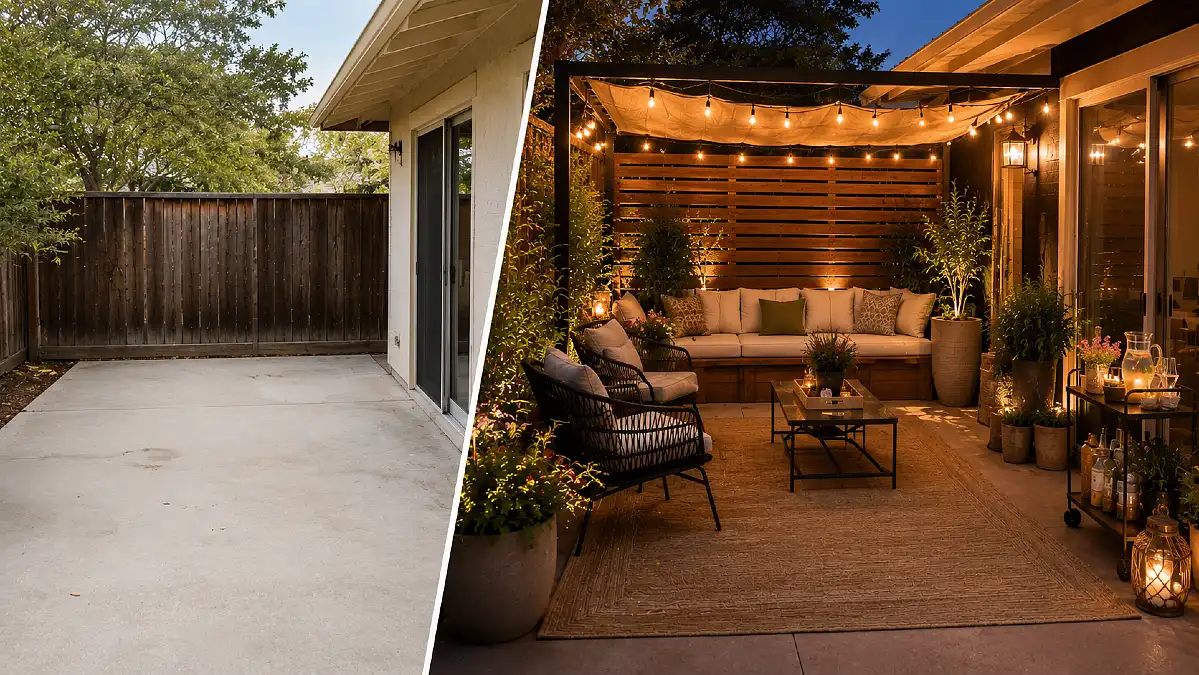
Danny’s patio had enough space for a table and several chairs. Yet no one wanted to sit there.
The concrete looked dull. The afternoon sun made the space too hot. At night, it was dark and exposed. A few random pots only made the patio look more unfinished.
Danny did not need a larger patio. He needed a better plan.
This DIY patio makeover came together through seven separate projects. Each one fixed a clear problem. Together, they turned a bare slab into an outdoor living room where Danny and his family could eat, read, talk, and relax after sunset.
You can use the same ideas on a small balcony, paved courtyard, or basic backyard patio.
Before the DIY Patio Makeover, Danny Fixed the Layout
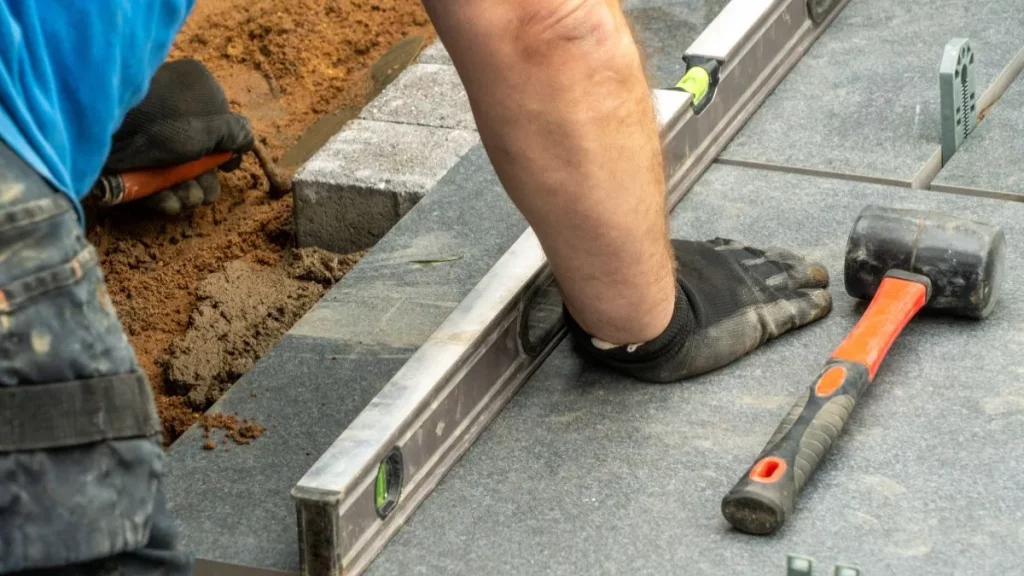
The first change cost almost nothing.
Danny measured the patio and drew it on graph paper. He marked the door, steps, outlets, drains, and the path leading into the yard.
This stopped him from making a common mistake.
Danny had planned to place a large dining table in the center. Once he marked the walking path, he saw that people would have to squeeze around it every time they entered the yard.
He split the patio into two areas instead:
- A main seating zone for four to six people
- A narrow serving zone beside the house
- A clear path between the door and lawn
- Open corners for plants and lighting posts
Lowe’s patio planning guide suggests looking at furniture, rugs, lighting, plants, accessories, and shade as parts of one complete space. It also recommends thinking about smart outdoor lights and several forms of shade.
Danny tested his plan with painter’s tape and old cardboard boxes. The boxes showed the size of the future bench and tables.
That simple test saved him from buying furniture that was too deep.
Before you shop, check your patio at breakfast, midday, and late afternoon. Notice where the sun falls. Watch where rainwater collects. Pay attention to strong wind.
Those facts matter more than a pretty product photo.
Project 1: A Painted Floor Made the Patio Feel Finished
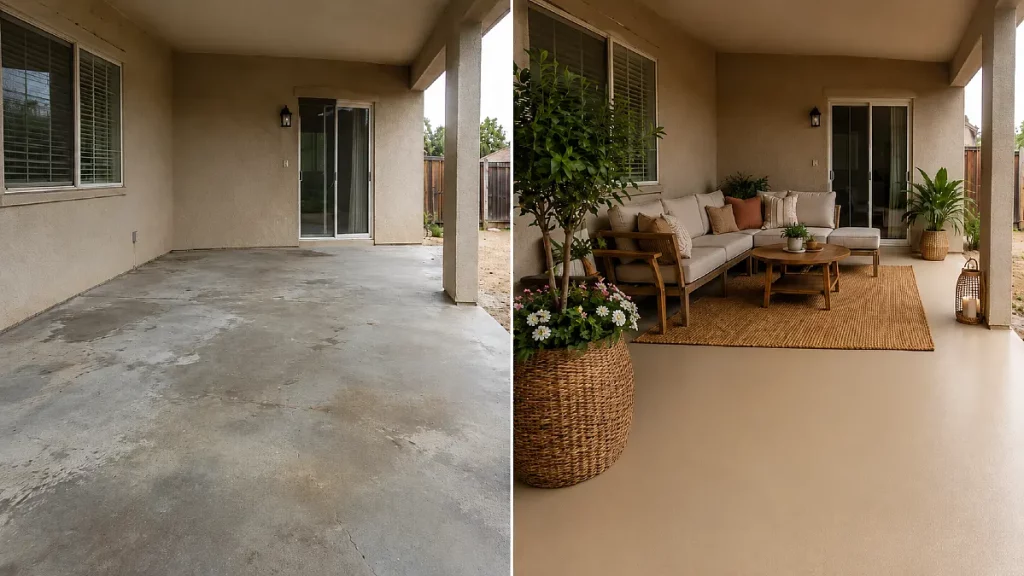
The bare concrete made every chair and planter look temporary.
Painting the floor gave Danny’s patio a clear base. It also helped the outdoor space feel connected to the house.
Danny started by removing the furniture, sweeping the slab, and washing away dirt. Small cracks needed repair before painting.
Paint will not hide a damaged or poorly prepared surface for long.
For an outdoor floor, use a coating made for exterior concrete, porches, patios, or decks. Regular wall paint is not built for foot traffic or standing water.
Sherwin Williams offers exterior coatings for concrete, decks, siding, and other outdoor surfaces. Benjamin Moore also publishes porch, patio, and pool deck color ideas built around outdoor paint products.
Danny wanted a warm, soft base rather than cool gray. Current patio coverage has shifted toward warmer neutrals, clay, olive, wood, and other nature based shades.
Cold gray spaces can feel hard when they lack natural texture.
Good color directions include:
- Warm stone
- Soft sand
- Muted clay
- Deep olive
- Charcoal used in small areas
- A warm white border
Benjamin Moore lists exterior shades such as Copley Gray and Louisburg Green among its exterior color ideas. Sherwin Williams also offers exterior color browsing by surface and feature.
Danny tested the color on the actual patio before painting the whole floor.
That step matters because a shade can look much lighter in strong sun than it does indoors.
Painted floors require care. Furniture legs can scratch them. Moisture can cause failure when surface preparation is poor.
Some patios may be better suited to stain, tile, pavers, or a large outdoor rug.
Still, paint gave Danny the strongest visual change for the least money.
Project 2: A Simple Shade Frame Made Daytime Use Possible
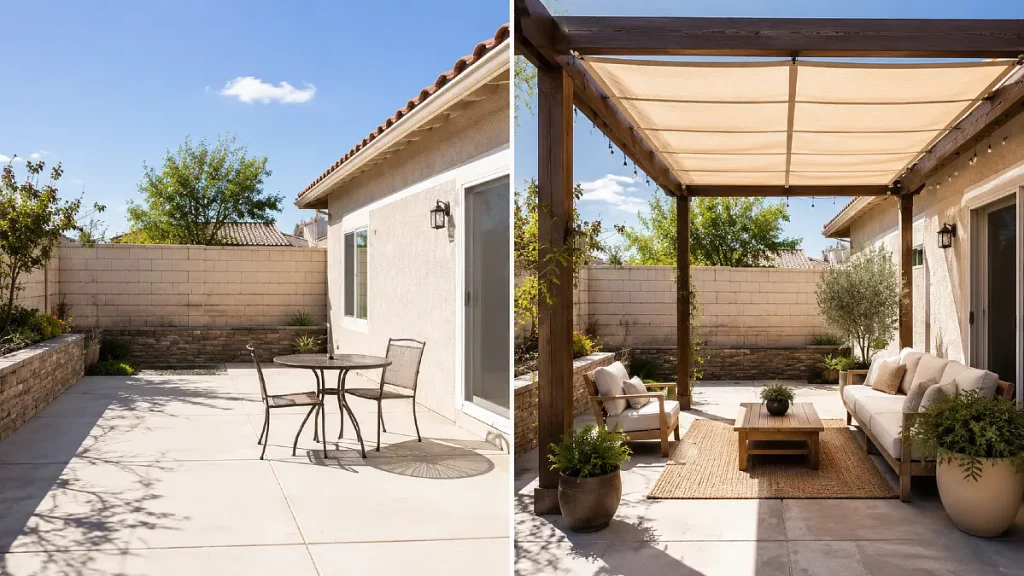
Danny’s patio looked much better after painting. It was still too hot to use in the middle of the afternoon.
Shade fixed the comfort problem.
Your best option depends on your space, budget, wind, and local rules.
Common choices include:
- A freestanding umbrella
- A wall mounted umbrella
- A shade sail
- A simple wood pergola
- A gazebo with a fabric or solid roof
Danny chose a simple frame with a removable outdoor canopy. It covered the seating area without placing a post in the main walking path.
Lowe’s shade guide notes that umbrellas can handle sun and light rain, while shade sails work well over seating and play areas. Retractable roofs and covered structures give more protection when partial shade is not enough.
A pergola can create a strong room shape without fully closing the patio. Curtains, lights, trellis panels, and plants can also be added later.
Lowe’s DIY pergola guide uses these same features to add comfort and privacy.
Do not treat wind as a small detail.
A wide fabric panel can pull hard against posts and fixings. Use outdoor rated hardware and follow the maker’s installation rules.
A permanent roof, large pergola, or structure attached to the house may also need approval. Check local building and property rules before digging holes or fixing beams to the home.
For renters, a heavy umbrella may be the safer choice. It is easier to move and does not require permanent changes.
Project 3: A Built In Bench Created a Real Seating Zone
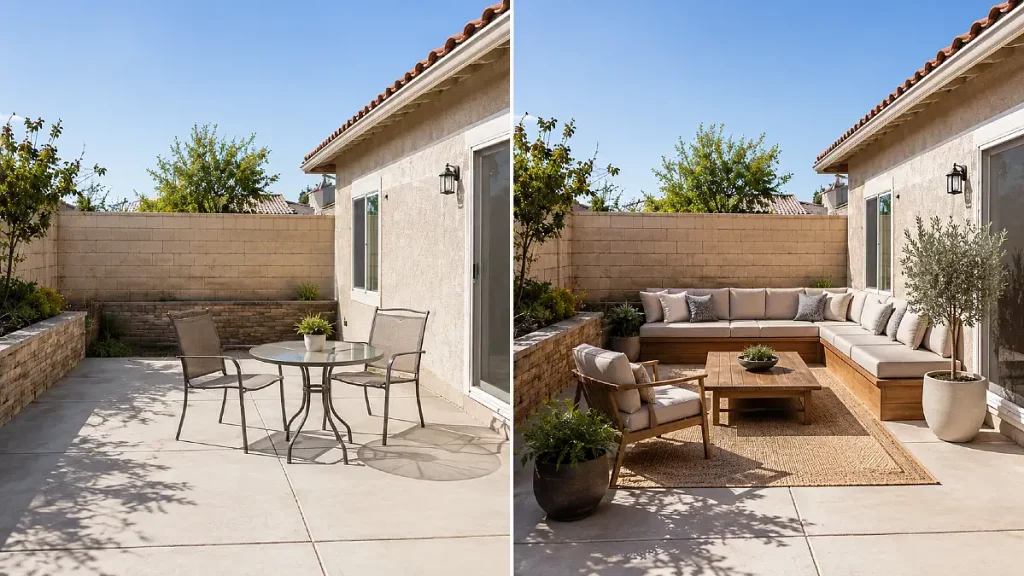
Loose chairs made Danny’s patio feel like a waiting area.
A long bench changed that. It created a clear edge and gave the seating zone a focal point.
Danny placed the bench against the side with the least attractive view. This used a wall that had no other purpose and kept the center open.
The bench was sized for outdoor cushions that would be easy to replace. Danny also left a small gap behind the seat so water and leaves would not remain trapped against the wall.
For a basic DIY bench, you need:
- Wood suited to outdoor use
- Exterior screws and fixings
- A level
- A drill
- A saw
- Outdoor wood finish
- Cushions made for exterior use
Storage under the seat made the project more useful.
It gave Danny a place for small cushions, plant tools, and table items.
Do not place damp fabric inside a sealed wooden box. Add airflow or use a separate weather resistant container inside the bench.
IKEA’s NÄMMARÖ range shows how outdoor benches, storage boxes, tables, and chairs can share the same wood finish. The range also includes an indoor and outdoor storage box that can help keep a small patio organized.
The bench did not need to match every chair. It only needed to share one or two details, such as wood tone, cushion color, or shape.
Danny placed two movable chairs across from it. The seats faced one another rather than facing the yard.
That small choice made conversation easier.
Leave enough space between the seats for a coffee table and people’s legs. Also keep the main walkway clear.
A deep sofa may look comfortable online but overwhelm a narrow patio.
Project 4: A Large Outdoor Rug Joined Everything Together
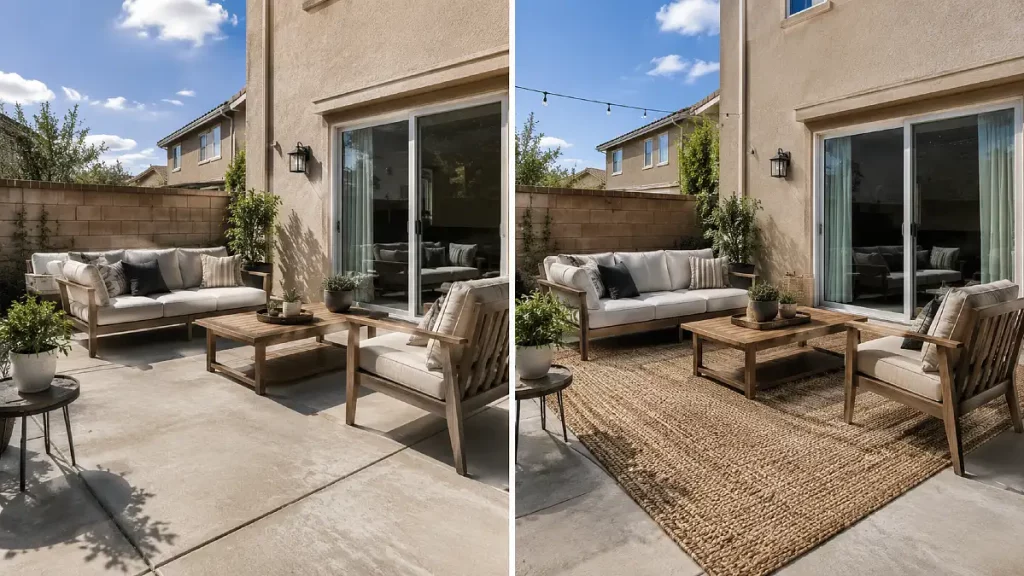
The bench and chairs still looked like separate items sitting on concrete.
A rug made them look like one group.
The right outdoor rug works like a border around the seating area. It tells your eye where the room starts and ends.
Home Depot patio projects often use a large outdoor rug beneath a seating or fire pit area for this reason. Its outdoor decorating guides describe rugs as a strong tool for making a patio feel more like a room.
Danny chose the rug after placing the main furniture.
This helped him avoid buying one that was too small. At least the front legs of the bench and chairs could sit on it.
A tiny rug floating under a coffee table would have made the whole setup feel smaller.
Look for:
- Outdoor material that dries quickly
- A pattern that hides dust and leaves
- A color that works with the patio floor
- A flat surface that will not catch chair legs
- Care instructions that suit your climate
A bold rug can work, but it should not fight with every cushion and planter.
Better Homes and Gardens has reported growing interest in softer patterns and layered textures instead of loud groups of competing prints in updated patio spaces.
Outdoor rugs are not free from care.
Lift the rug after heavy rain. Clean the surface beneath it. In wet climates, storing it during long rainy periods may extend its life.
Project 5: Privacy Panels Hid the View Without Closing the Patio
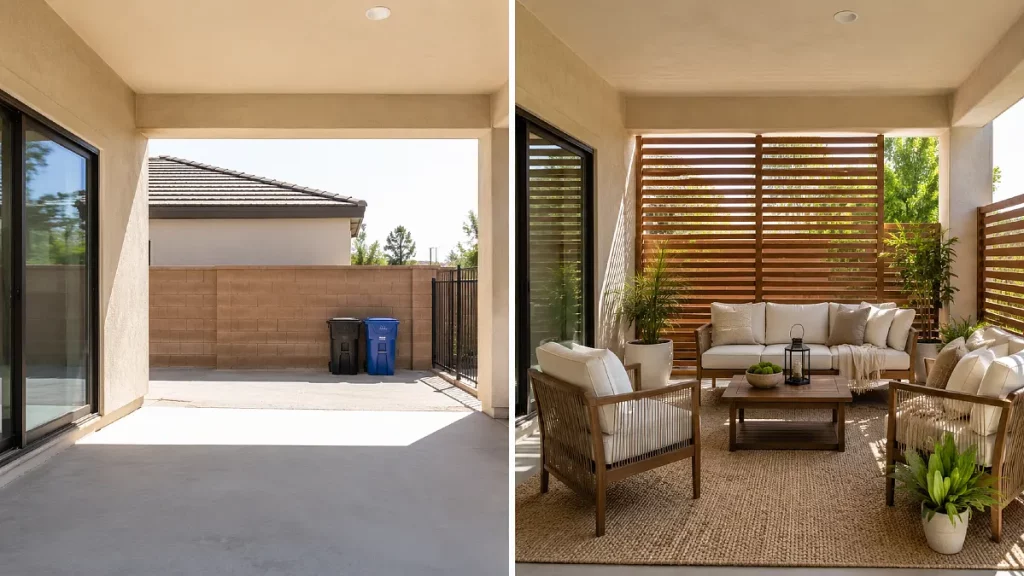
Danny’s patio faced a neighboring wall, bins, and part of the driveway.
He did not need to hide the entire yard. He only needed to block the views that made the seating area feel exposed.
Danny built two narrow slatted screens behind the bench. The gaps allowed air to pass through while softening the view.
Other useful privacy choices include:
- Wood lattice
- Reed or bamboo panels
- Tall planters
- Outdoor curtains
- A trellis with vines
- Freestanding screens
- Narrow evergreen shrubs suited to the climate
Do not cover every side.
A patio can feel cramped when privacy panels become solid walls.
Use screens where they solve a real view problem. Leave the best garden view open.
The screen design should also repeat a material already used nearby.
Danny matched the screen stain to the bench. That made the project feel planned rather than added later.
Lowe’s pergola ideas suggest curtains, trellis screens, lighting, and plants as ways to add privacy and function around an outdoor structure.
Check property lines and fence rules before installing a tall screen.
Renters should use freestanding panels or planters that can be removed.
Plants can be useful, but they require patience and care. A vine may take several seasons to fill a trellis. Some fast growers can also become hard to control.
A screen gives instant cover. Plants can soften it over time.
Project 6: Layered Lighting Made the Patio Useful at Night
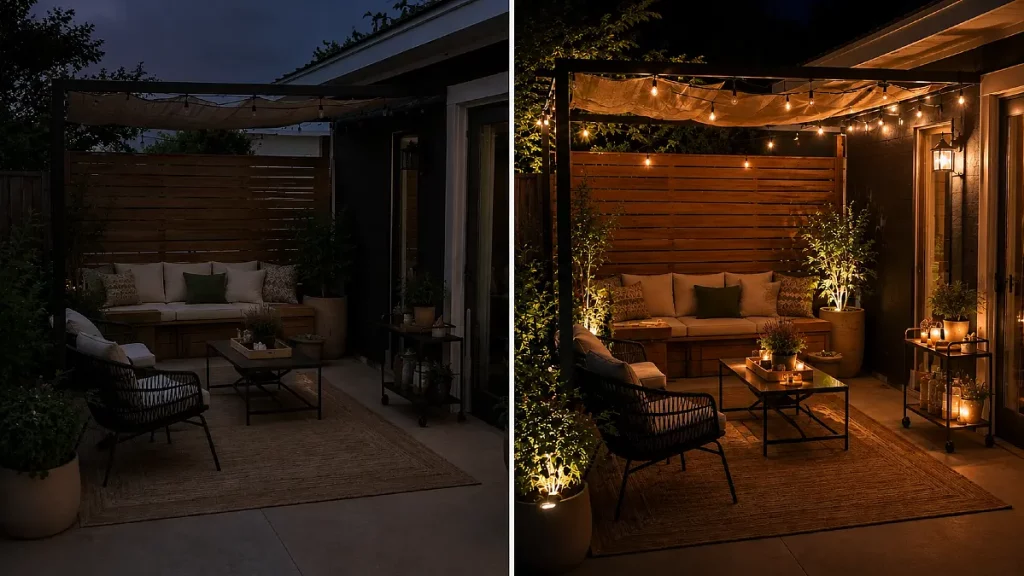
One strand of lights can make a patio look warmer. It cannot safely light every step, table, and doorway.
Danny used three types of light:
- Overhead string lights for a soft glow
- A rechargeable lamp on the serving cart
- Low lights near the step and path
This mix made the patio useful after sunset without making it feel as bright as a parking area.
Lowe’s outdoor lighting guide suggests using string lights on pergolas, gazebos, railings, trees, and trellises. Its string light guide also recommends globe lights for a classic patio look and solar lights for guiding people along paths.
For overhead lights, Danny used posts placed behind the main furniture. The cables stayed above head level and away from tree branches.
Use lights and extension equipment rated for outdoor use.
Keep connections protected from water. Follow the product directions for how many strands can be joined.
For a plug in setup, an outdoor smart plug can make daily use easier.
Lowe’s patio planning guide notes that smart outdoor lights can be dimmed, timed, and controlled through a phone app when the setup supports those features.
Solar lights are easy to place, but their performance depends on direct sun and battery quality.
Rechargeable table lamps offer more control but need regular charging.
Warm, low light usually feels more comfortable near seating. Brighter light belongs near doors, stairs, grills, and work areas.
Project 7: Planters and a Small Serving Station Added Life
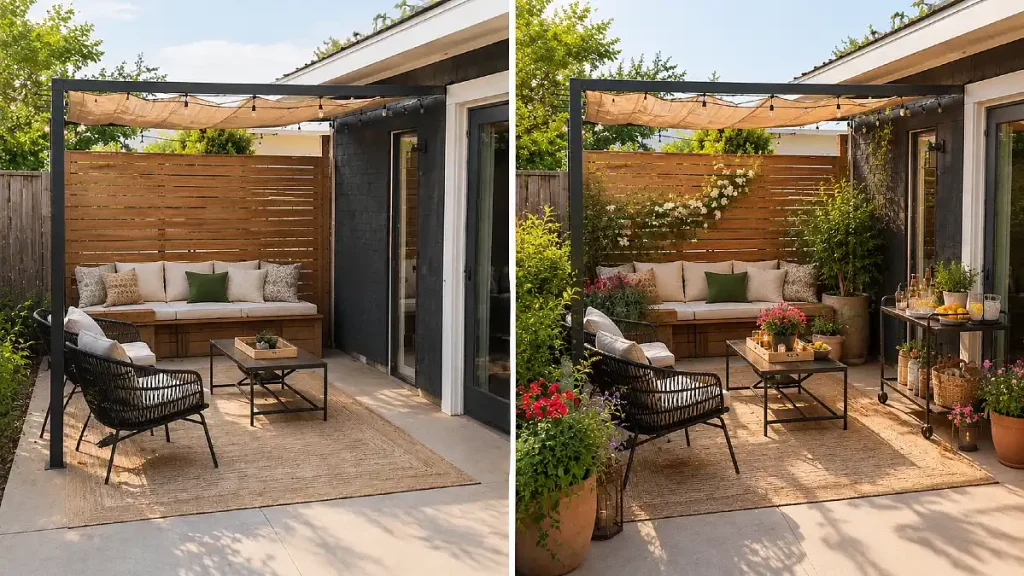
The final project filled the empty edges without adding clutter.
Danny grouped planters in two corners rather than placing one pot beside every chair. Groups look fuller and are easier to water.
He used three heights:
- One large floor planter
- One medium pot
- One smaller pot on a stand
The repeated planter colors kept the group calm. The plants added the variety.
Choose plants based on the real conditions of your patio.
A plant that needs full sun will struggle in deep shade. A shade plant can burn beside a hot wall.
Current patio reports show more interest in nature based layouts, warmer botanical colors, planted edges, and materials that connect the seating area to the garden.
Water use matters too.
The Environmental Protection Agency says residential outdoor water use accounts for a large share of daily household water use, mainly because of landscape irrigation.
Its WaterSense Water Budget Tool can also help users compare landscape and irrigation choices.
For an easier planter setup:
- Choose plants suited to local rain and heat.
- Group plants with similar water needs.
- Use pots with drainage holes.
- Add saucers only where trapped water will not cause damage.
- Check the soil before watering.
- Consider drip irrigation for large groups.
Beside the planters, Danny added a narrow rolling cart.
It became a simple serving station for drinks, plates, and plant care supplies.
The cart was small enough to move indoors during rough weather. It also stopped the dining table from becoming a storage surface.
This final layer made the patio feel used rather than staged.
What Danny’s DIY Patio Makeover Cost and What He Would Change

The total cost of a DIY patio makeover can vary widely.
A renter using an umbrella, secondhand chairs, planters, and string lights may spend a few hundred dollars. A larger project with new flooring, lumber, a pergola, and a full seating set can cost several thousand.
Instead of setting one fixed budget, divide the work into three levels.
Start With Comfort
Spend first on the problem that stops you from using the patio.
That may be:
- Shade
- Safe flooring
- Comfortable seating
- Privacy
- Lighting
For Danny, the shade project made the biggest practical difference. The painted floor made the biggest visual difference.
Add the Room Shape
Next, create clear borders with a rug, bench, screen, or grouped planters.
These items make separate pieces feel like one outdoor living room.
Finish With Smaller Details
Cushions, table decor, lanterns, and serving pieces should come last.
They are easy to buy but cannot fix a poor layout.
Danny would build more storage into the first version if he completed the patio again.
Outdoor cushions need a dry place. Furniture covers can protect seating, benches, and grills when the patio is not in use.
IKEA offers covers and outdoor storage products made for this purpose.
Danny would still avoid buying a matching seven piece set before measuring.
A coordinated set can look simple in a store, but it may leave no room for walking, plants, or flexible seating.
Buy for your patio, not for the display.
The Best Patio Makeover Starts With One Annoying Problem
A bare patio does not become comfortable because you fill it with objects.
It becomes comfortable when each project solves a reason you avoid using it.
For Danny, paint fixed the unfinished floor. Shade made afternoons possible. The bench created a conversation area. A rug joined the furniture. Screens added privacy. Lighting extended the hours. Plants and a serving cart made the space feel alive.
Start your own DIY patio makeover by measuring the space and watching the sun.
Then choose the one project that will make you use the patio more often.
You do not have to finish the whole outdoor living room at once. Build it in the order that improves your daily life.