
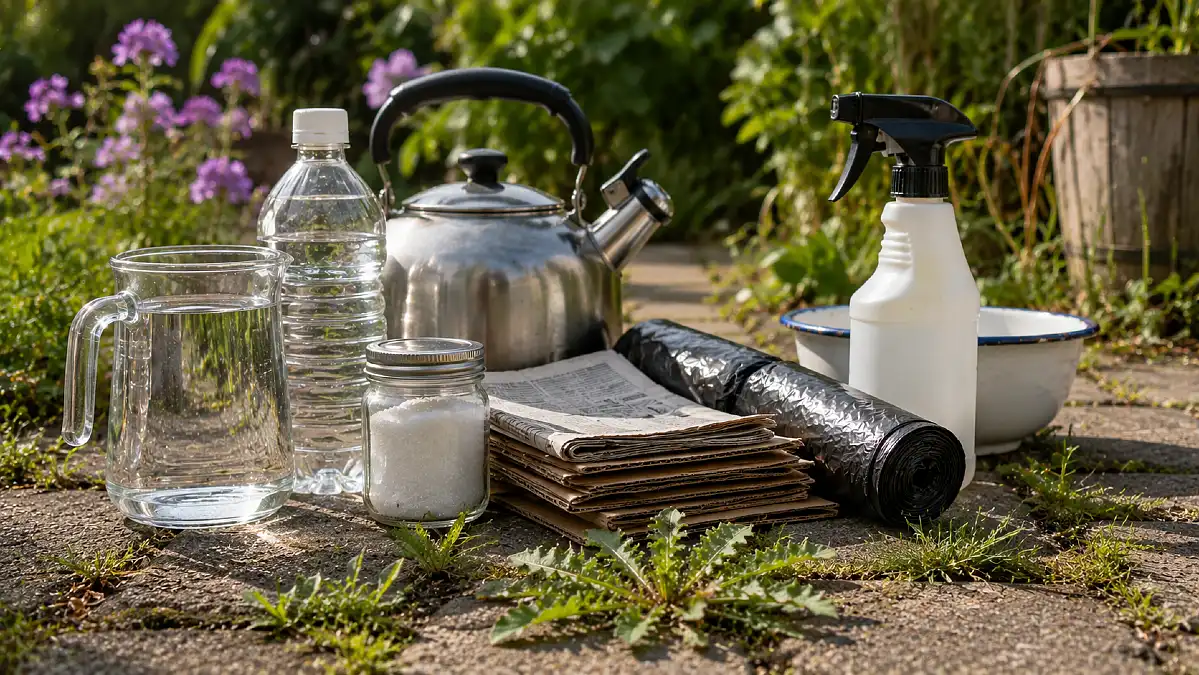
Weeds have a habit of appearing in the most annoying places. One day the driveway looks clean. A week later, green shoots are pushing through every crack.
Reaching for a bottle of weed killer may seem like the easiest answer. But a large container of herbicide is often more than you need for a few weeds beside a patio or path.
Several household items that kill weeds can handle small, targeted jobs. Some burn the leaves. Others block sunlight until the weeds die. A few can clear an entire future garden bed without spraying anything.
1. Pour Boiling Water on Weeds Growing in Cracks
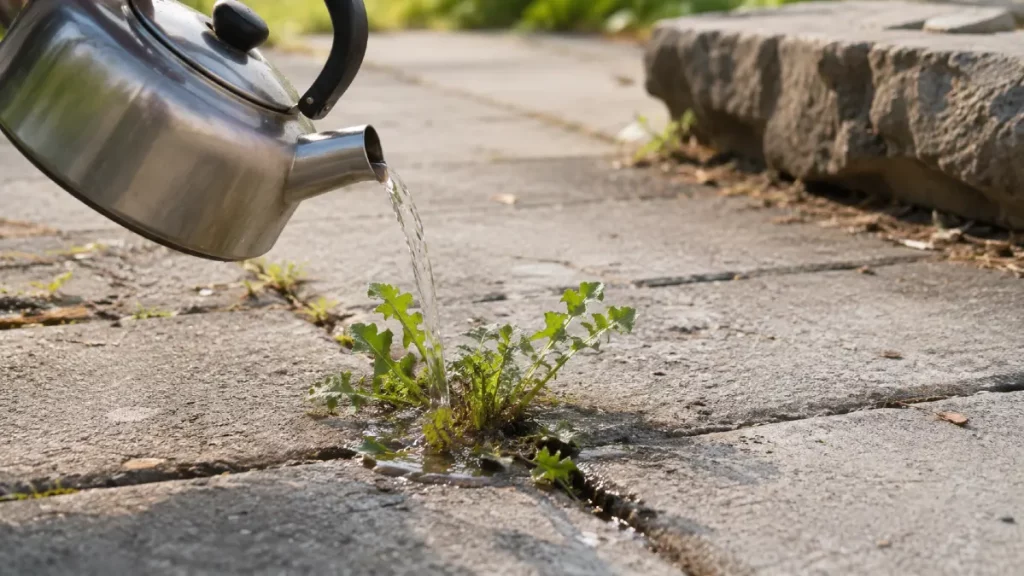
Boiling water is one of the simplest treatments for weeds growing between pavers, along curbs, or inside driveway cracks.
The heat damages the soft plant tissue almost at once. Young weeds may wilt within hours.
University of Maryland Extension says boiling water can kill some young annual weeds. It works best when the plants are small, tender, and growing in a hard surface rather than a planted bed.
How to use boiling water safely
- Bring a kettle of water to a full boil.
- Carry it carefully to the weed.
- Pour slowly over the center of the plant.
- Wet the leaves and the point where the stem enters the crack.
- Check the spot again after several days.
A kettle with a narrow spout gives you more control than a large cooking pot.
Use only enough water to soak the weed. A wide splash may burn nearby lawn grass, flowers, or shallow tree roots.
What boiling water cannot do
Boiling water usually kills exposed growth better than deep roots.
A dandelion, bindweed plant, or another perennial weed may return because its root system remains alive. University of Maryland Extension notes that hot water can suppress perennial weeds but may not permanently kill their underground structures.
Treat the returning growth promptly. Each new treatment forces the root to spend more stored energy.
Best use: Young weeds in pavement cracks
Avoid using it: Near wanted plants, lawns, tree trunks, and vegetable beds
2. Use White Vinegar on Young, Tender Weeds
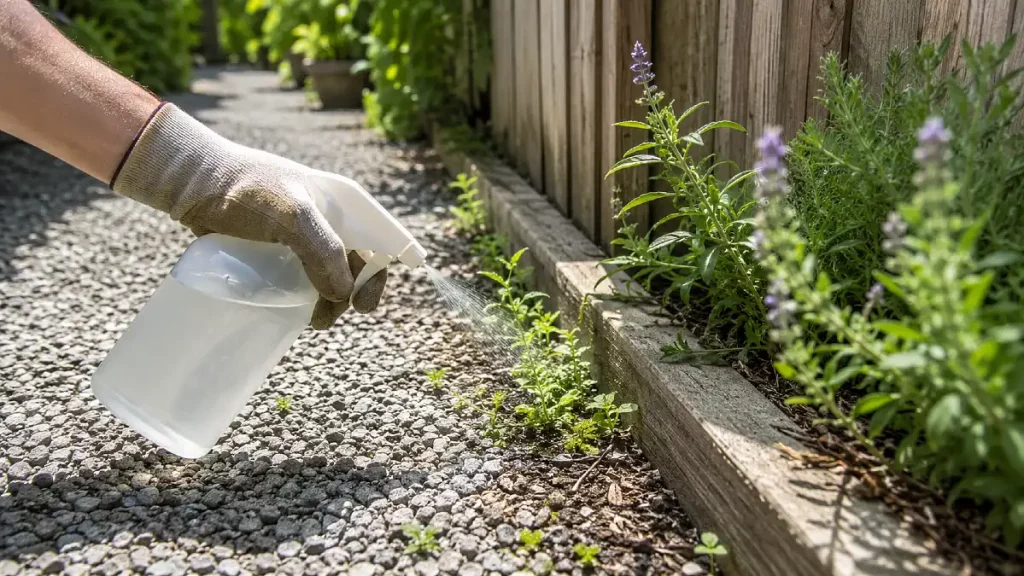
Plain white vinegar can burn young weed leaves. It is most useful when a small weed has just appeared and has not built a large root system.
Common household vinegar contains about 5 percent acetic acid. The acid damages the outer surface of green plant tissue. The EPA has described acetic acid products as fast acting, contact weed treatments.
The word contact matters. Vinegar works on the plant parts it touches. It does not always travel down into the roots.
How to apply household vinegar
Pour plain white vinegar into a clearly marked spray bottle. Use the bottle only for garden treatment.
Spray the leaves of the weed on a warm, dry day. Aim closely so the liquid does not land on other plants.
Do not spray when rain is expected soon. Rain can wash the vinegar away before it has enough contact time.
You may need to treat new growth again.
Where vinegar works best
Vinegar is most useful for:
- Tiny weeds in driveway cracks
- Young annual weeds beside a path
- Weeds growing in gravel
- Small plants far from flowers and lawn grass
University of Maryland Extension reports that vinegar treatments can damage weeds quickly, but results depend on the concentration, plant size, and weed type.
The main downside
Vinegar is not selective. It cannot tell the difference between a weed and a flower.
Any green plant hit by the spray may suffer leaf damage. Household vinegar may also burn the top of an established perennial weed while leaving its roots alive.
Do not assume that stronger vinegar is simply a better choice. Horticultural products with higher acetic acid levels can injure skin and eyes. Use only a registered product according to its label when working with stronger concentrations.
University of Minnesota Extension also warns that repeated vinegar use in lawns and gardens may affect soil conditions and healthy soil organisms.
Best use: Young annual weeds growing away from wanted plants
Avoid using it: Across lawns, planted beds, and areas with exposed roots
3. Reserve Table Salt for Permanent Hardscape Cracks
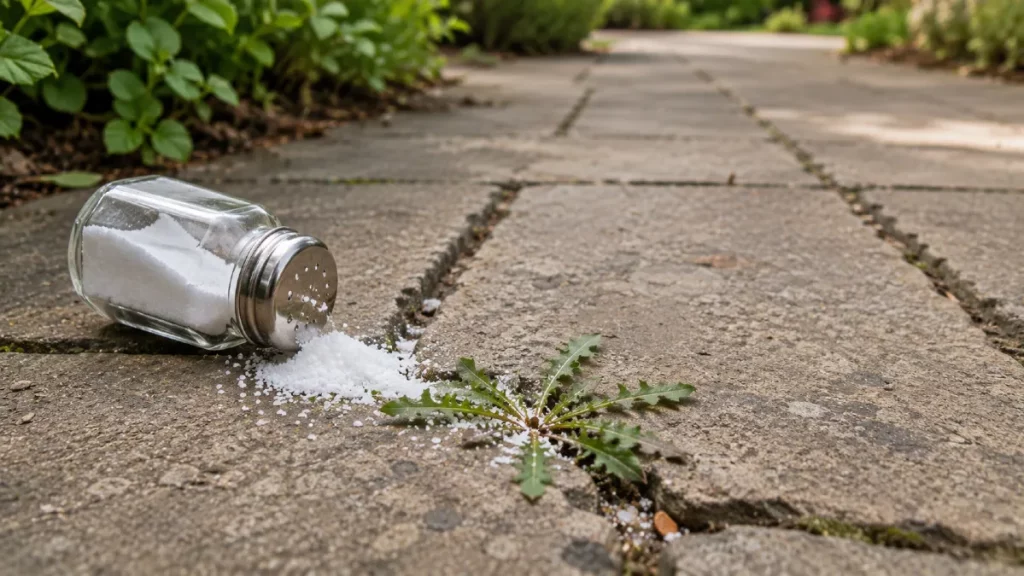
Salt can kill plants. That does not make it a good general weed treatment.
Salt pulls moisture away from plant tissue and interferes with the way roots take up water. A small weed growing in an isolated pavement crack may die after direct contact.
The problem starts when the salt moves beyond that crack.
Rain or watering can carry it into nearby soil. Once there, it may harm lawn grass, flowers, shrubs, soil organisms, and future plantings.
University of Minnesota Extension warns that adding salt to lawns or gardens can alter soil conditions and harm healthy soil microbes.
Utah State University Extension also lists salt among household remedies that can kill plants. However, it warns that these remedies may require high concentrations or repeated use, creating added cost and environmental concerns.
When salt may be useful
Consider salt only for a very small crack in a hard surface where you do not plan to grow anything.
Examples include:
- The center of a wide concrete driveway
- A crack far from a lawn
- A paved area with no soil bed nearby
- A space where runoff cannot reach plants
Use the smallest possible amount. Apply it directly to the weed rather than spreading it over the whole surface.
Where salt should never go
Do not use salt:
- In flower beds
- In vegetable gardens
- Along lawn edges
- Near trees or shrubs
- Beside storm drains
- On slopes where water carries it downhill
- In soil you may plant later
Boiling water or hand removal is usually the safer choice.
Salt earns a place on this list because it can handle an isolated hardscape weed. It is not a safe homemade weed killer for the rest of your yard.
4. Smother a Weedy Bed With Flattened Cardboard
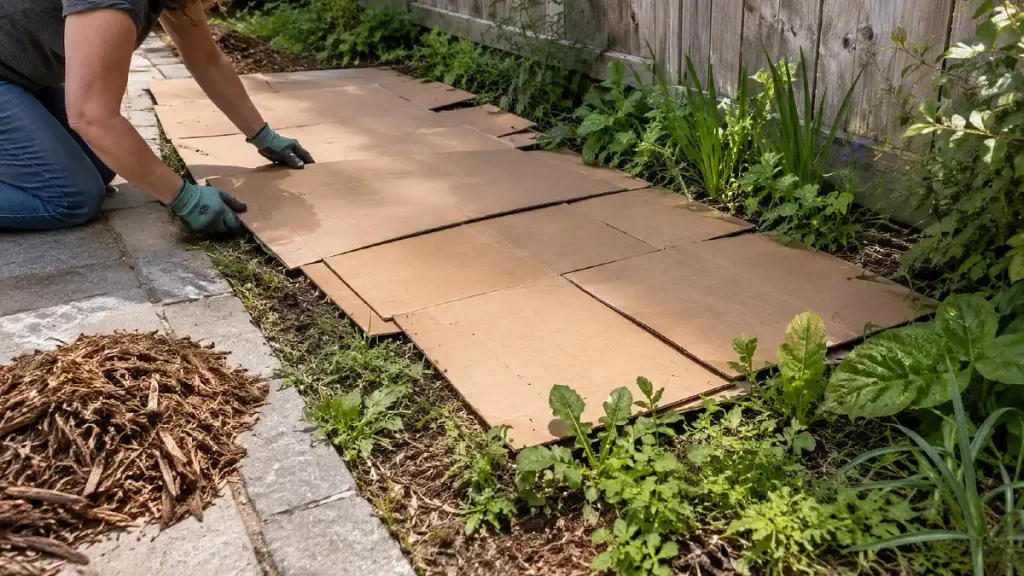
Cardboard works better than a spray when you need to clear a whole patch rather than treat one plant at a time.
It does not burn the weeds. It blocks their sunlight.
Without enough light, the covered plants cannot keep making the energy they need. Their leaves weaken, and the growth underneath begins to die.
Oregon State University Extension recommends sheet mulching with cardboard as a simple and low cost way to smother weeds. The cardboard forms a barrier over the soil and is then covered with mulch.
How to make a cardboard weed barrier
- Cut or pull down the existing weeds.
- Remove seed heads before they drop.
- Take tape, labels, and plastic packing material off the boxes.
- Flatten the cardboard.
- Overlap every edge so no soil is visible.
- Wet the cardboard to help it stay flat.
- Cover it with wood chips, bark, compost, or another mulch.
Do not leave gaps around the edges. Weeds often find the smallest opening.
The mulch keeps the cardboard from blowing away. It also improves the look of the bed while the material underneath breaks down.
Where cardboard works best
Cardboard is useful for:
- Turning lawn into a future flower bed
- Clearing weeds beneath shrubs
- Covering an unused vegetable bed
- Suppressing weeds along a fence
- Preparing a small planting area
University of Minnesota Extension also notes that cardboard boxes can be used in small garden systems to help kill surface vegetation before planting.
What may grow through it
Strong perennial weeds can survive beneath a thin or poorly fitted layer.
Bindweed, quackgrass, Canada thistle, and other spreading plants may escape through seams or emerge around the edges. Check the area often and remove new shoots before they gather strength.
Cardboard is best viewed as a weed suppression system rather than an instant cure.
Best use: Clearing garden beds and larger patches
Avoid using it: Directly against tree trunks or over plants you want to save
5. Use Newspaper Under Mulch to Stop New Weeds
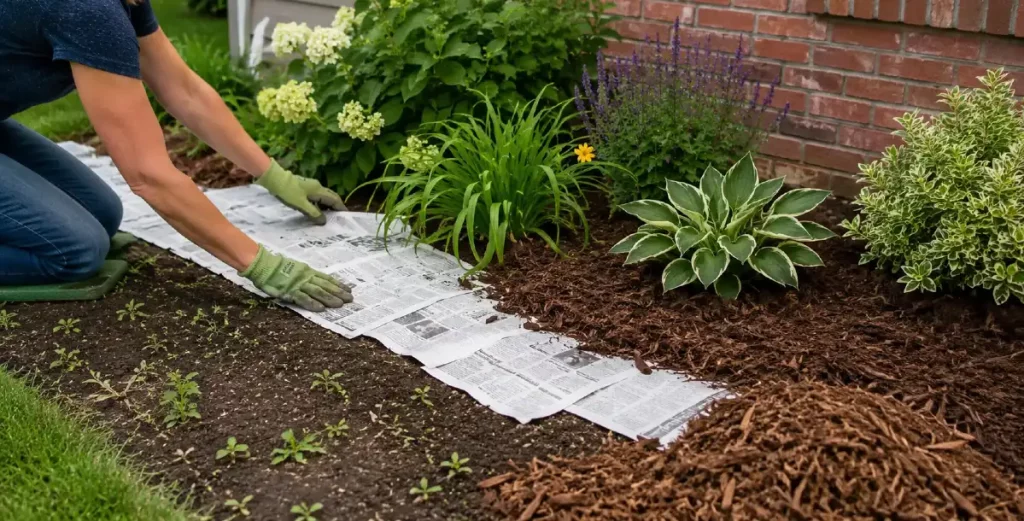
Old newspaper can form a weed barrier around established plants.
Like cardboard, it works by blocking light. It is thinner and easier to shape around flowers, shrubs, and curved bed edges.
Newspaper is especially useful when the bed is already mostly clear but small annual weeds keep returning.
How to lay newspaper for weed control
Use plain newspaper pages without glossy advertising inserts.
Place several sheets over the soil. Overlap each section so weeds cannot rise between the pages.
Wet the paper as you work. This helps stop it from blowing away.
Cover the entire layer with mulch as soon as possible. Exposed newspaper dries, tears, and moves easily.
Oregon State University Extension describes newspaper covered with mulch as an effective, low cost weed barrier. It also notes that the paper breaks down over time.
What newspaper can stop
This method is useful for:
- New annual weed seedlings
- Bare soil between ornamental plants
- Weeds trying to emerge beneath fresh mulch
- Small patches around shrubs
- Seasonal beds that are replanted later
What newspaper may not stop
Newspaper is much less reliable against established perennial weeds.
Oregon State University guidance warns that it may fail to smother tough weeds such as quackgrass, field bindweed, and dandelions.
Pull or dig those weeds first. Remove as much root as possible before covering the area.
Newspaper also breaks down faster than cardboard. That can be useful in a planted bed, but it means you may need to renew the barrier later.
Best use: Preventing annual weeds beneath mulch
Avoid using it: As the only treatment for deep rooted perennial weeds
6. Heat a Large Weedy Area With Clear Plastic
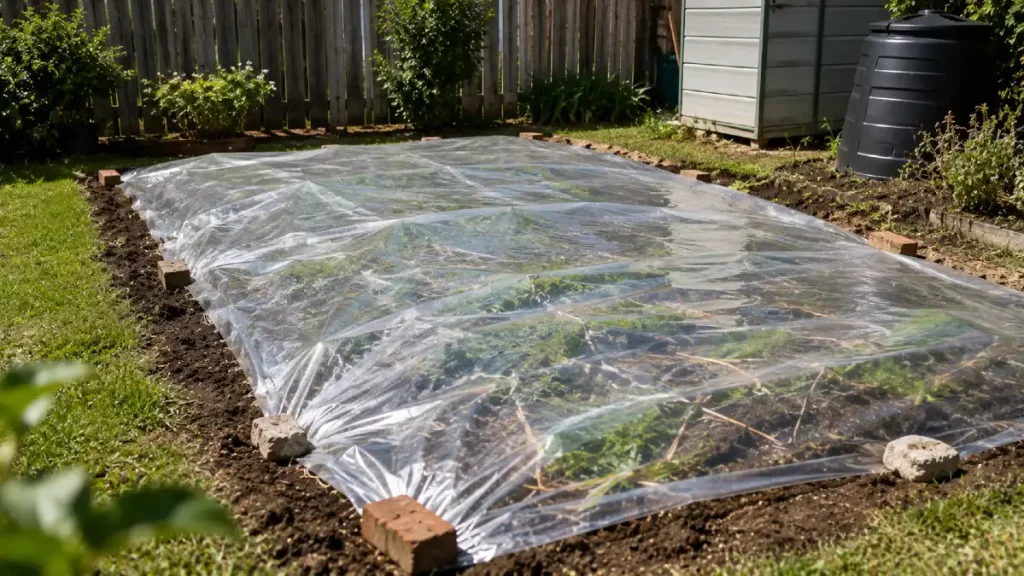
Clear plastic can turn summer heat into a weed control tool.
The method is called soil solarization. It works by trapping heat and moisture underneath tightly secured plastic.
The temperature beneath the sheet rises during hot, sunny weather. That heat can kill existing vegetation and reduce some weed seeds near the soil surface.
University of Minnesota Extension explains that solarization uses clear plastic to heat the soil. The plastic creates a greenhouse effect that traps heat and moisture beneath it.
How to solarize a small area
- Cut the weeds as low as possible.
- Remove sharp stems, stones, and sticks.
- Smooth the soil surface.
- Moisten the soil if it is dry.
- Stretch clear plastic tightly over the area.
- Bury or weigh down every edge.
- Leave the plastic in place during hot, sunny weather.
- Remove it once the vegetation underneath is dead.
Thin, clear plastic made for outdoor use is normally easier to heat than thick or cloudy material.
The sheet must touch the ground as closely as possible. Large air spaces reduce heat transfer.
How long does it take?
The answer depends on sunlight, air temperature, soil moisture, weed type, and climate.
University of Minnesota guidance says solarization may work in about two or three weeks in some hot, dry areas. Cooler conditions may require much longer.
Other University of Minnesota weed management guidance describes periods of four to six weeks for difficult perennial weeds during hot weather.
Check the plants through the plastic. Do not remove the cover simply because the leaves look pale. Wait until the growth has collapsed and died.
Where solarization works best
Use it for:
- A future vegetable bed
- A sunny patch of lawn being converted
- An empty flower bed
- A small area filled with annual weeds
- Soil that can remain unused for several weeks
Do not place clear plastic over the roots of trees, shrubs, or plants you want to keep. The trapped heat can injure them too.
Best use: Clearing an empty, sunny planting area
Avoid using it: Around living plants or during cool, cloudy weather
7. Block Light With an Old Opaque Tarp
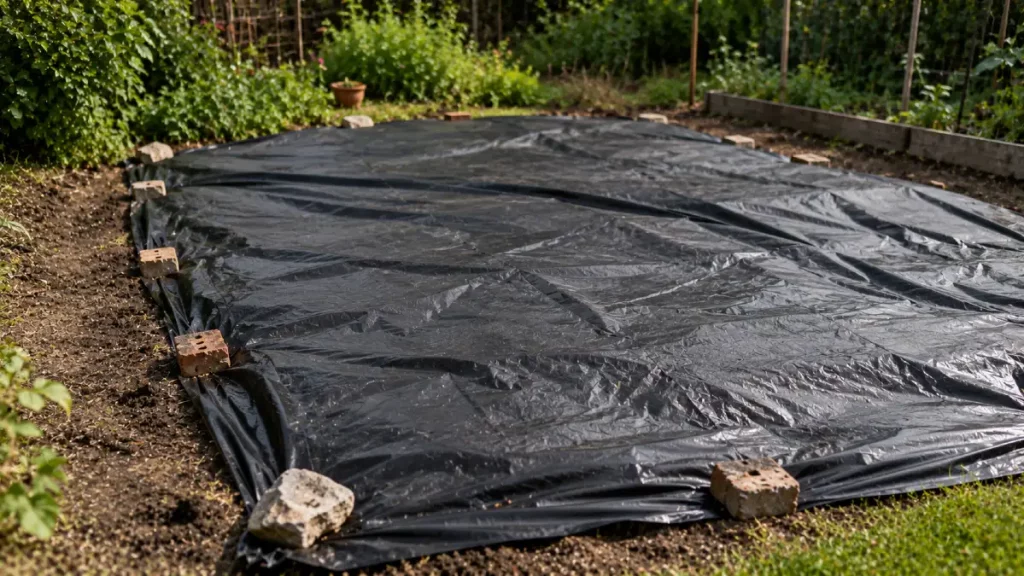
A black tarp or another opaque cover can kill weeds by shutting out light.
This method is known as occultation. Unlike solarization, it does not depend mainly on clear plastic trapping intense solar heat.
The cover blocks light and limits water reaching the plants. The vegetation underneath uses its stored energy, weakens, and eventually dies.
University of Minnesota Extension recommends opaque coverings as a way to remove existing vegetation and prepare an area for planting.
Household covers you may already have
Possible materials include:
- An old black tarp
- A heavy opaque plastic sheet
- A dark waterproof ground cover
- A damaged pond liner
- An old vinyl banner with no holes
Do not use thin fabric that allows light through. Hold the material up to the sun. If you can see bright light through it, weeds may continue growing underneath.
How to use an opaque cover
Cut tall weeds low before covering them.
Stretch the tarp across the whole area. Extend it beyond the edge of the weed patch so spreading plants cannot escape into the light.
Hold the edges down with bricks, boards, sandbags, or landscape pins. Check after storms and strong wind.
University of Minnesota guidance says occultation often takes longer than solarization. A common treatment period is about four to six weeks, but established vegetation and cool weather can extend the process.
Check before you plant
Lift one corner after several weeks.
The growth underneath should be brown, soft, and clearly dead. If stems are still green, replace the cover and wait longer.
Watch for pale shoots growing beyond the tarp. Pull them or extend the cover.
An opaque tarp is one of the best household weed killer alternatives when you are preparing a new bed and do not need an instant result.
Best use: Smothering a future garden bed
Avoid using it: Over wanted plants or where unsecured plastic may blow away
Which Household Weed Killer Works Best for Each Area?
The right option depends on where the weed is growing.
| Household item | Best location | How it works | Speed | Main risk |
|---|---|---|---|---|
| Boiling water | Driveway and patio cracks | Burns exposed plant tissue | Fast | Burns nearby plants and skin |
| White vinegar | Young weeds on hard surfaces | Damages green leaves | Fast | Harms any plant it touches |
| Table salt | Isolated permanent cracks | Disrupts plant water balance | Moderate | Damages soil and nearby plants |
| Cardboard | Empty beds and larger patches | Blocks sunlight | Slow | Tough weeds may escape through gaps |
| Newspaper | Mulched ornamental beds | Blocks new weed growth | Slow | Breaks down and needs renewal |
| Clear plastic | Sunny empty beds | Traps heat in the soil | Several weeks | Can overheat wanted roots |
| Opaque tarp | Future planting areas | Blocks light and water | Several weeks | Needs secure edges and enough time |
For one weed in a crack, boiling water is usually the simplest choice.
For a young weed far from other plants, vinegar may be useful.
For a full bed, cardboard, clear plastic, or an opaque tarp gives better coverage than spraying each plant.