
That pile of logs in your backyard isn’t just firewood waiting to happen—it’s a treasure trove of DIY possibilities.
You see those logs and think “maybe someday I’ll do something with them.” But store-bought rustic home decor costs a fortune. A simple log picture frame runs $25. Wooden planters cost $40 each. Log furniture can hit $200 for basic pieces.
Meanwhile, you’ve got free raw materials sitting outside getting rained on.
The problem is most people think wood log crafts require fancy tools and years of woodworking experience. You picture complicated joints, expensive equipment, and projects that take months to finish. So those logs just sit there.
Here’s the truth: most DIY wood log ideas need just a saw, some sandpaper, and basic finishing supplies. You can make rustic wood projects that look like they came from expensive craft stores using tools you probably already own.
Essential Tools & Materials for Wood Log Projects
Basic Hand Tools You’ll Use Weekly
- ✓Handsaw (e.g., Irwin Universal 15″)
- ✓Drill/driver (budget corded, e.g., SKIL 7.5A) + bits
- ✓Assorted sandpaper (80/120/180/220 grit; 3M Pro Grade)
- ✓Measuring tape + pencil + square (layout accuracy)
- ✓Wood glue (Titebond III) & clamps (starter 4″/6″)
“A basic toolkit costs under $75 and works for 90% of log projects.”
Brand/model names are examples—choose what’s locally available.
Protective Gear & Setup
- ✓Eye protection (3M Virtua or equivalent)
- ✓Cut-resistant gloves; hearing protection if using power tools
- ✓Dust mask/respirator (N95 or better when sanding)
- ✓Stable work surface + clamp your work, never your hand
Choosing the Right Log
- ✓Moisture: Use a moisture meter; air-dried logs at/under 20% are easier to sand and finish. “Green” logs are carve-friendly but may crack as they dry.
- ✓Wood type: Softwoods (pine, cedar) = easier cutting; Hardwoods (oak, maple, birch) = durable, heavier rustic feel.
- ✓Condition: Avoid deep rot, active insects, soft spots; prefer straight grain and minimal end-checks.
Tip: Remove bark for faster drying and fewer insects; seal end-grain to reduce cracks.
Finishes That Suit Rustic Wood Projects
- ✓Penetrating oils (e.g., Watco Danish Oil) for warm, low-sheen look
- ✓Wipe-on polyurethane (Minwax Wipe-On Poly) for higher protection
- ✓Stains: test on offcuts; start light—wood darkens over time
- ✓Prep: sand through 120→180→220; remove dust before finishing
Outdoors? Favor exterior oils/sealers; re-coat seasonally for best life.
Starter Toolkit – Example Under $75*
*Illustrative only. Prices vary by region/brand; use locally available equivalents.
How to Prepare Your Wood Logs for DIY Projects (So They Don’t Crack or Warp)
Bad wood prep ruins good projects. You spend hours building something, then watch it split apart because you skipped the basics. Here’s how to get your logs ready the right way.
Start with seasoning your logs. Fresh wood holds too much water. It will crack and twist as it dries. Stack your logs with spacers between them for air flow. Small logs (under 6 inches) need 6-12 months to dry. Thick logs take 1-2 years. You’ll know they’re ready when the bark starts peeling off easily.
Clean your logs before you cut. Use a drawknife or chisel to remove bark. Check for bug holes – tiny round holes mean insects are eating your wood. Dark spots or soft areas mean rot. Don’t use logs with these problems.
Test if your wood is dry enough. Hit two pieces together. Dry wood makes a sharp crack sound. Wet wood sounds dull and heavy.
Measure twice, cut once. Mark your cuts with chalk or pencil. Use a straight board as a guide for clean cuts. Always cut a bit longer than you need – you can trim later.
Store your prepared logs right. Keep them off the ground on blocks or pallets. Cover the top to block rain, but leave the sides open for air flow. This prevents cracking from uneven drying.
Look for logs with tight bark and no soft spots. Good logs feel solid when you tap them. Bad logs sound hollow or show dark stains on the ends.
Take time with wood log preparation now. Your DIY wood projects will last years instead of falling apart in months.
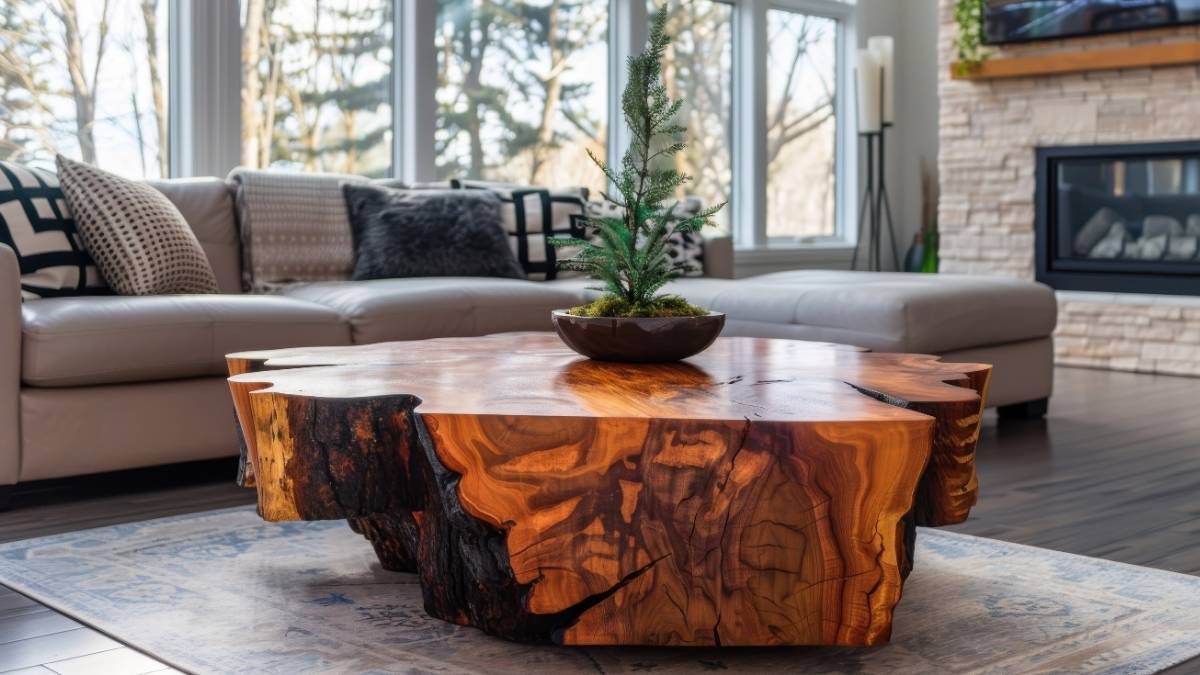
Indoor DIY Wood Log Decor Ideas That Actually Look Good (Not Cheap)
Store-bought rustic decor costs a fortune. Plus it looks fake. You want that cozy cabin feel without spending hundreds on mass-produced “wood” that’s really plastic. Here are log projects that give you real rustic charm for way less money.
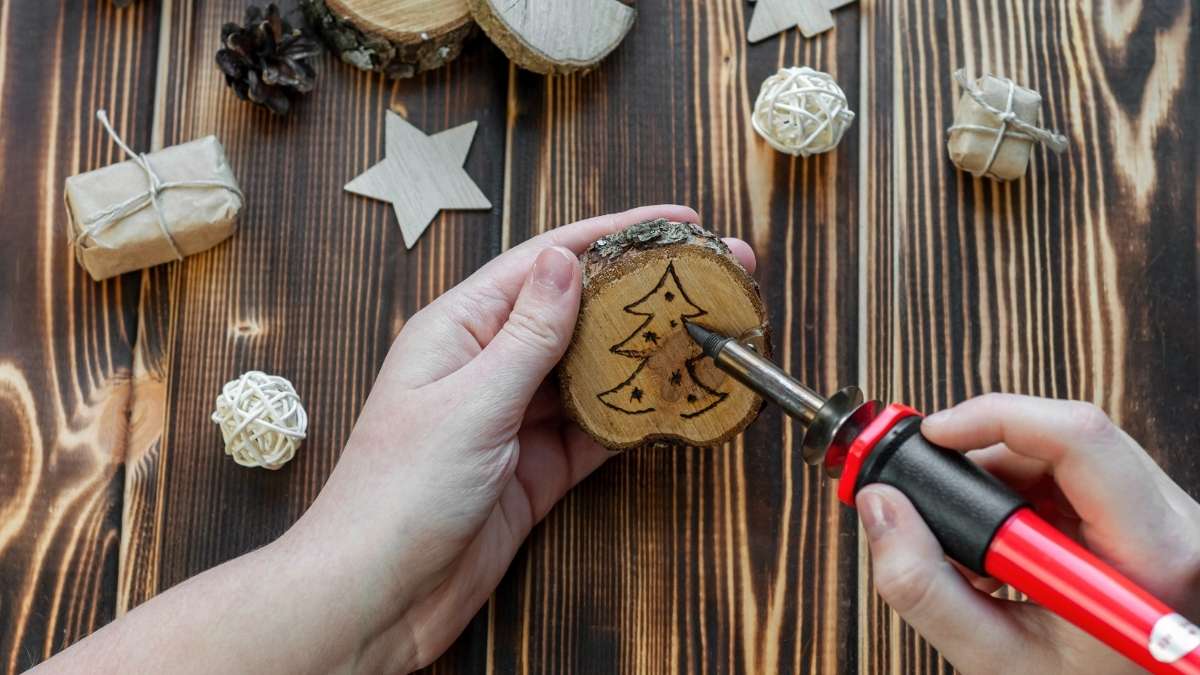
Log Slice Gallery Wall: 15 Pieces in 2 Hours for Under $30
Cut a 6-inch log into 1-2 inch slices. Sand them smooth and apply clear wood stain. Mount different sizes on your wall in a random pattern. This works great behind a couch or in a hallway.
The trick is mixing slice sizes. Use 3-inch, 5-inch, and 8-inch pieces. Leave 2-3 inches between each piece. Your wall will look like expensive custom art instead of a craft project gone wrong.
Make Photo Frames That People Actually Want to Touch
Take 4-inch log slices and hollow out the center with a router. Leave a 1-inch border around the edge. Sand until smooth. Your photos sit perfectly in the hollow center.
These frames work for 5×7 or 8×10 photos. People always ask where you bought them. The rough wood edges make any photo look more interesting.
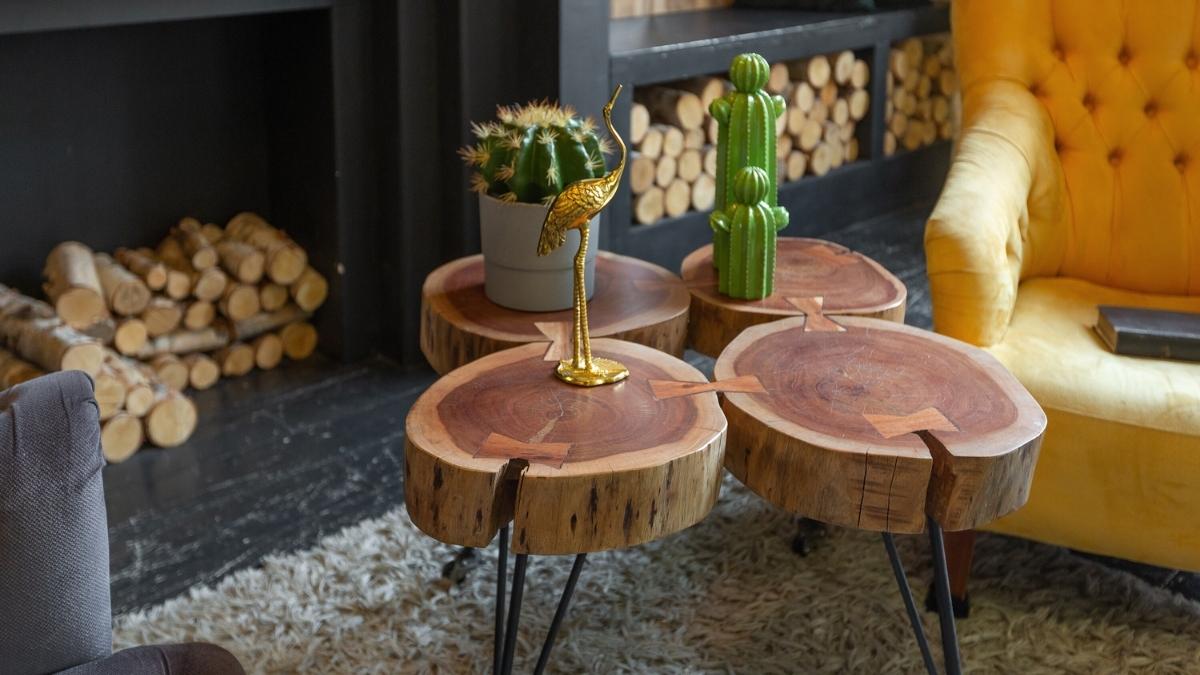
3-Log Coffee Table That Supports 150+ Pounds
Find three logs that are 16-18 inches tall and 10-12 inches wide. Sand the tops flat. Bolt a round wood top (30-36 inches across) to all three logs.
This table costs about $40 to make but looks like it came from a $300 furniture store. It holds books, drinks, and even feet without wobbling. The key is making sure your logs are exactly the same height.
Log Candle Holders in 15 Minutes Each
Drill 3-inch holes into log pieces that are 4-6 inches tall. Make the holes 1.5 inches deep. Drop in pillar candles or glass votives.
Group three different heights together for your dining table. The uneven heights look better than matching ones. These holders catch wax drips and won’t tip over like tall skinny holders.
Turn Hollow Logs into Planters That Don’t Leak
Find logs with hollow centers or drill them out. Line with plastic plant pots that fit inside. Plant succulents or small houseplants.
The plastic liner means you can water plants without ruining your log. When plants die (they will), you just swap in new ones. No replanting or mess.
Log Accent Lighting for Under $25
Drill holes through small logs to run string lights inside. The light glows through cracks and knots in the wood. Use battery-powered LED strings so you don’t need outlets.
Stack 2-3 of these glowing logs on a shelf or mantle. They give off warm light without looking like Christmas decorations in July.
Simple Log Stools for Extra Seating
Cut logs 18-20 inches tall and sand the top smooth. Add furniture pads to the bottom so they don’t scratch floors. These work as plant stands, footrests, or extra chairs when people come over.
Pick logs that are 12-14 inches wide. Smaller logs tip over. Bigger logs are too heavy to move around easily.
Wall Shelves from Split Logs
Cut logs in half lengthwise. Mount the flat side to your wall with heavy-duty brackets. The curved side faces out and holds books, plants, or decorations.
These shelves look way more interesting than flat boards. They work best for lightweight items – don’t put your heaviest books on them.
The Secret to Making Log Decor Look Expensive
Sand everything smooth. Cheap-looking log crafts are always rough and splintery. Spend time with 220-grit sandpaper. Apply one coat of clear protective finish.
Mix log pieces with other materials. All-log everything looks like a theme restaurant. Add metal accents, glass, or fabric to balance the rustic wood.
These rustic wood projects take a weekend, not a month. Start with one or two pieces. See how they look before you fill your whole house with log home decor.
Outdoor DIY Wood Log Projects That Save You Hundreds (And Actually Last)

Your yard needs help but outdoor furniture costs crazy money. A simple wooden bench runs $200. Garden borders cost $15 per foot. You want your space to look good without emptying your wallet. Here are outdoor wood projects that cost less and last longer than store-bought stuff.
Create a 4-Foot Garden Border with 6 Logs in 1 Afternoon
Buy 6 logs that are 8 inches wide and 4 feet long. Dig a shallow trench where you want your border. Bury each log 2-3 inches deep. Pack dirt around them to keep them steady.
This border costs about $30 compared to $60 for store-bought edging. It keeps mulch in place and grass out of your flower beds. The logs will darken with weather but won’t fall apart like plastic borders.
Log Pathway Stepping Stones That Don’t Wobble
Cut logs into 3-4 inch thick slices that are 12-16 inches across. Dig holes slightly smaller than each slice. Drop the log slices in and pack soil around the edges.
Space them 18-20 inches apart so people can walk normally. These stepping stones handle rain better than concrete pavers because wood absorbs water instead of getting slippery. Cost: about $3 per stepping stone vs. $8 for stone pavers.
Build Fire Pit Seating for 8 People Under $100
Find 4 logs that are 16-18 inches wide and 18-20 inches tall. These become your seats. Sand the tops smooth so people don’t get splinters. Arrange them in a circle around your fire pit.
Add outdoor cushions for comfort. The logs work as seats, tables, or footrests. Store-bought fire pit benches cost $150 each. These cost $20 each and move anywhere you need them.
Raised Garden Beds from Split Logs
Cut logs in half lengthwise. Use the flat sides as walls for raised beds. Stack two layers high and secure the corners with rebar or long screws.
A 4×8 foot raised bed costs $15-20 in logs vs. $80 for cedar boards. The logs will last 5-8 years before you need to replace them. That’s long enough to grow hundreds of dollars worth of vegetables.
Log Planters That Drain Properly
Hollow out large logs or use naturally hollow ones. Drill 4-5 drainage holes in the bottom. Line with landscape fabric before adding soil.
These planters work great for herbs, flowers, or small vegetables. They cost $10-15 to make vs. $40-60 for ceramic planters. When they wear out, you can compost them instead of throwing them away.
Bird Houses That Birds Actually Use
Cut 6-inch logs into 8-10 inch sections. Hollow out the inside, leaving 1-inch walls. Drill a 1.5-inch entrance hole. Add a slanted roof cut from a log slice.
Different hole sizes attract different birds. Small holes (1.25 inches) work for wrens. Larger holes (1.5 inches) attract bluebirds. These houses cost $5 to make vs. $25 at stores.
Weather-Proofing Tips That Actually Work
Don’t use paint or thick stains on outdoor log projects. They trap moisture and cause rot faster. Use clear wood sealers that let the wood breathe.
Raise log furniture off the ground with small blocks. Direct ground contact makes logs rot within 2 years. Even 1-inch blocks add 3-4 years of life.
Replace log projects every 5-8 years. That sounds bad, but it’s still cheaper than buying expensive furniture that lasts 10-15 years. Plus you get to update your style.
The Money Truth About DIY vs. Store-Bought
Log garden borders: $5 per foot vs. $15 store-bought
Fire pit seating: $20 per seat vs. $150 store-bought
Raised beds: $20 for 4×8 vs. $80 store-bought
Planters: $15 each vs. $50 store-bought
Even if your DIY garden decor only lasts half as long, you still save 60-70% over buying new.
Start Small, Build Bigger Later
Pick one project for your first weekend. See how it looks and how long it takes. Most people underestimate the sanding time – it’s the longest part of any rustic outdoor furniture project.
These outdoor wood projects give you a custom look without custom prices. Your neighbors will think you hired someone. You’ll know you just spent a Saturday with some logs and basic tools.
Functional DIY Wood Log Ideas for the Home (That Actually Save You Money)
Your house is cluttered but storage solutions cost too much. A simple coat rack runs $40. Kitchen organizers cost $25 each. You need storage that works without breaking your budget. Here are log projects that organize your home and save you hundreds.
Log Coat Rack Holds 20+ Items and Costs Under $15 to Make
Find a log that’s 4-6 feet long and 8-10 inches wide. Sand it smooth. Screw 6-8 wooden pegs or dowels into the log, spacing them 6 inches apart. Mount it to your wall with heavy brackets.
This rack holds coats, hats, bags, and dog leashes. It supports way more weight than those flimsy metal hooks that bend after a few months. Total cost: $12-15 vs. $40-60 for store-bought racks.
Kitchen Log Projects That Are Actually Food Safe
Make cutting boards from hardwood logs like maple or oak. Never use pine or cedar – they have oils that taste bad and aren’t safe for food. Cut logs into 2-inch thick slices. Sand until completely smooth. Apply food-grade mineral oil every month.
Log trivets protect your counters from hot pots. Cut 1-inch thick slices and sand them smooth. Group 3-4 different sizes together. They cost $2 each to make vs. $15 for ceramic trivets that break when you drop them.
For utensil holders, hollow out 6-inch log sections. Line with food-safe plastic containers that you can remove and wash. The log looks great but the plastic does the actual food storage.
Bathroom Storage That Handles Moisture
Turn logs into towel bars by drilling holes through the ends and running a dowel or pipe through them. Mount the log ends to your wall. The towel bar sits away from the wall so towels dry faster.
Make soap dispensers by drilling holes in small log sections. Drop in pump bottles from dollar stores. When the pump breaks, you just replace the bottle, not the whole dispenser.
Seal bathroom log projects with marine-grade polyurethane. Regular wood stain won’t handle shower humidity and will peel off within months.
Organization Solutions for Every Room
Create magazine racks by cutting logs in half lengthwise. The curved side holds magazines and mail. Mount them to walls in your entryway or office. They cost $3 to make vs. $20 for metal racks.
Key holders work great near your front door. Screw small hooks into a log slice. Add a small shelf on top for sunglasses or wallets. Everyone knows where to find their keys.
Log phone charging stations keep cords organized. Drill holes for charging cables to run through. Your devices sit on top while cables stay hidden underneath.
Pet Projects That Actually Work
Large logs make great dog beds when you hollow them out and add cushions. They’re cooler than fabric beds in summer and warmer in winter. Plus dogs can’t chew them up like they do with expensive pet beds.
Raised feeding stations help older dogs eat easier. Cut two log sections the right height for your dog. Drill holes for metal bowls. Food and water bowls sit at shoulder height instead of floor level.
The Truth About DIY Storage Solutions
Log storage projects take longer than you think. Plan a full weekend for anything bigger than a simple coat rack. The sanding and finishing eat up most of your time.
But they last way longer than cheap storage from discount stores. A $15 log coat rack will still work in 10 years. Those $20 plastic organizers break within 2-3 years.
Start with one functional wood crafts project. See how much use it gets before making more. Some families need more coat storage. Others need better kitchen organization. Build what you actually use, not what looks good on Pinterest.
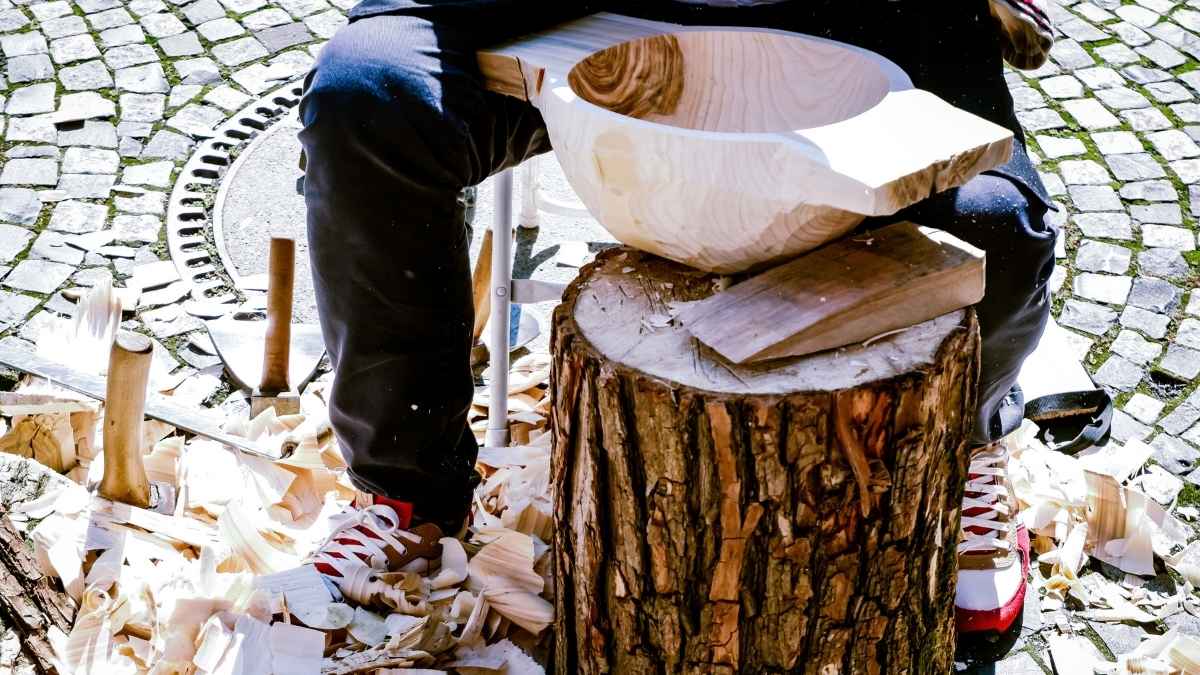
Advanced DIY Wood Log Projects for Experienced Crafters (When Simple Isn’t Enough)
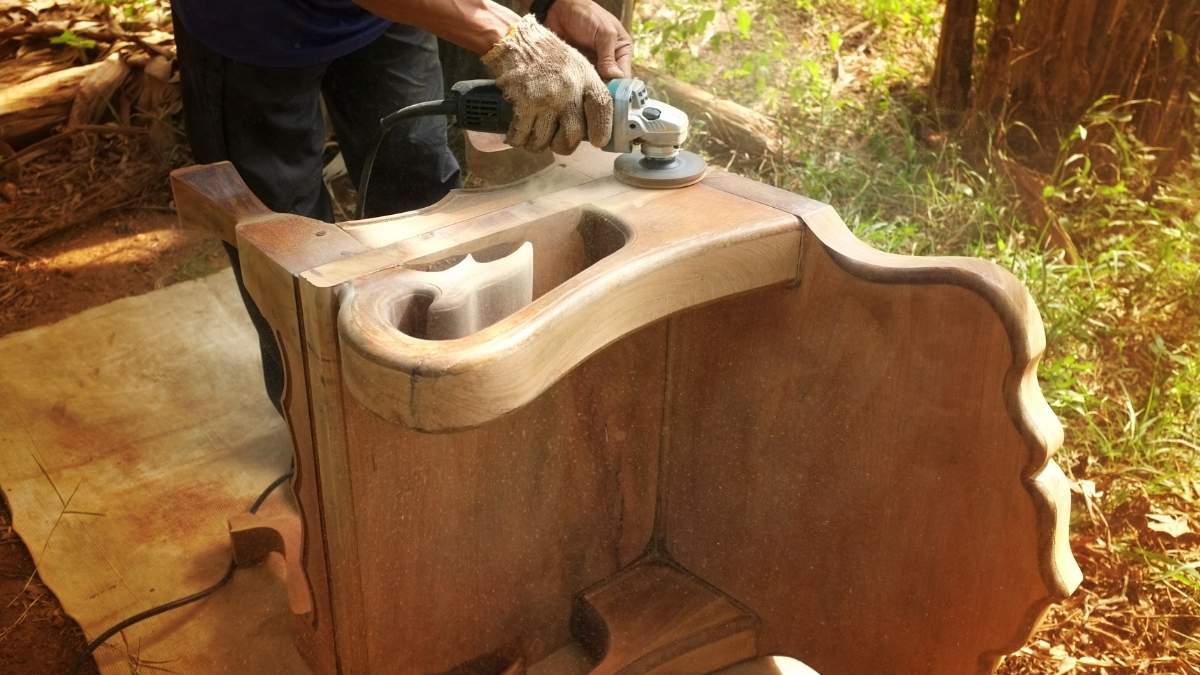
You’ve made log shelves and picture frames. Now you want real furniture that looks like it belongs in a cabin. Big projects that make people ask “Did you really build that?” Here’s what it takes to make log furniture that rivals expensive store pieces.
Weekend Project: Log Dining Table for 6 People
This isn’t really a weekend project. Plan 3-4 weekends minimum. You need a chainsaw, circular saw, router, and belt sander. The table uses 3 large logs for the base and thick planks for the top.
The hardest part is making the log joints fit tight. You’ll cut notches where logs cross. Each notch must be perfect or your table will wobble. Measure twice, cut once doesn’t work here – you need to test-fit everything multiple times.
Cost: $150-200 in materials vs. $800+ for similar tables in stores. But you’ll spend 40-50 hours of work to save that money.
Advanced Joinery That Actually Holds Together
Forget simple screws and glue. Real log furniture uses mortise and tenon joints, dovetails, and log notching. These joints get stronger over time as the wood settles.
You need sharp chisels, a good router, and lots of practice wood. Your first joints will look rough. Make 10-15 practice joints before starting your real project. Bad joints fail within months when the wood expands and contracts.
Large-Scale Projects Take Months, Not Weekends
A log pergola needs 12-16 logs plus rafters and hardware. Figure 60-80 hours of work spread over 6-8 weekends. You’re not just building – you’re engineering something that won’t fall down in high winds.
Gazebos are even bigger commitments. Plan 100+ hours and $500-800 in materials. But you save $3,000-5,000 compared to hiring contractors.
Power Tools You Actually Need
Chainsaw for rough cutting (get a good one – cheap chainsaws are dangerous)
Circular saw with sharp blades
Router with multiple bits
Belt sander and orbital sanders
Planer for smooth surfaces
Drill press for precise holes
Don’t buy cheap versions of these tools. They’ll frustrate you and make dangerous cuts. Rent expensive tools for single projects.
Advanced Finishing for Professional Results
Sand everything to 220 grit minimum. Big furniture shows every scratch and tool mark. Apply wood conditioner before stain on softwoods like pine. This prevents blotchy color.
Use multiple thin coats of polyurethane instead of one thick coat. Sand lightly between coats with 320 grit paper. The final surface should feel like glass.
Safety Gets More Important on Big Projects
Chainsaw kickback can kill you. Take a safety class before starting. Always wear eye protection, ear protection, and steel-toe boots. Big logs weigh hundreds of pounds – use proper lifting techniques or get help.
Work slowly when you’re tired. Most accidents happen in the last hour of long work sessions.
Start Smaller Than You Think
Your first advanced project should be a simple bench or small table. Learn the joinery techniques on something that won’t cost $200 if you mess up.
Advanced wood projects and rustic carpentry take years to master. But each project teaches you something new. Your 5th dining table will be way better than your first one.
These projects separate hobbyists from serious woodworkers. The time investment is real, but so is the satisfaction of building log furniture making pieces that last generations.
How to Make Your Log Projects Last 15+ Years (Instead of Falling Apart in 2)

You spent weekends building log furniture. Now you’re watching it crack, fade, and attract bugs. Poor finishing kills good projects fast. Properly finished logs last 15-20 years outdoors vs. 3-5 years untreated. Here’s how to protect your work.
Pick the Right Finish for Your Wood Type
Softwoods like pine and cedar need penetrating oil stains. They soak deep and move with the wood as it expands. Semi-transparent stains work best – they show the wood grain but add color protection.
Hardwoods like oak and maple can handle thicker finishes. Use semi-solid stains or even solid color stains. These woods are dense enough that thick finishes won’t peel off as easily.
Indoor Projects Need Different Care Than Outdoor Ones
Inside projects only need clear polyurethane or paste wax. No UV protection required. Two coats of satin poly gives you easy cleanup and scratch resistance.
Outdoor projects face sun, rain, and temperature swings. Use marine-grade spar varnish or outdoor deck stains with UV blockers. These cost more but handle weather punishment.
Stop Cracks Before They Start
End-grain sealer is your secret weapon. Log ends suck up moisture fast, which causes splitting. Brush sealer on cut ends within hours of cutting. This simple step prevents 80% of cracking problems.
Apply finish in thin, even coats. Thick coats look good at first but peel off in sheets later. Two thin coats beat one thick coat every time.
Your Yearly Maintenance Schedule
Spring: Check for new cracks or loose joints. Clean with mild soap and water. Let dry completely before applying fresh finish to damaged areas.
Fall: Apply new finish coats to outdoor projects every 2-3 years. Indoor projects need fresh finish every 5-7 years.
Fix Small Problems Before They Become Big Ones
Small cracks: Clean out debris and fill with exterior wood filler. Sand smooth and apply matching stain.
Loose joints: Remove old glue, apply new wood glue, and clamp for 24 hours. Don’t skip the clamping time.
Bug holes: Spray with boric acid solution to kill insects. Fill holes with wood putty after bugs are gone.
The One Finish Mistake That Ruins Everything
Never apply finish to wet or damp wood. It looks dry on the surface but holds moisture inside. The finish traps that moisture and causes rot from the inside out.
Wait for 2-3 sunny days after rain before finishing outdoor projects. Use a moisture meter if you’re not sure – wood should be below 15% moisture content.
Skip the Expensive Brands
Generic deck stains from home stores work as well as name brands that cost twice as much. The key is proper prep work and thin coats, not expensive finish.
Good wood finishing and log maintenance takes time, not money. Spend your money on quality brushes that don’t leave streaks. Your DIY wood care routine matters more than the brand name on the can.
Conclusion
Wood logs give you endless options for DIY wood log ideas that actually save money. Simple projects like picture frames and candle holders take just hours to complete. Even beginners can make professional-looking pieces with basic tools and patience.
You’ll save 60-80% compared to store prices on most rustic home decor items. That $40 coat rack costs you $12 in materials. The $60 garden border costs $20 in logs. Your wallet will thank you, and your home gets a custom look that nobody else has.
Most wood log crafts need just a saw, sandpaper, and basic finish. You don’t need expensive tools or years of experience to get started. Pick one project that solves a real problem in your home – storage, seating, or organization.
Start with one simple project this weekend and share your creation on social media with #DIYWoodLogIdeas. Your first project won’t be perfect, but it will be yours. And that’s better than anything you can buy at a store.
