
Turn your pool into an all-day retreat with a cabana that gives shade, storage, and a place to lounge—without blowing the budget. The right cabana turns “quick dip” backyards into mini resorts: a dry place for towels and tech, a shaded zone that cuts UV exposure, and—if you plan it—room for a changing nook or a wet bar.
Here’s the catch: most buyers pick a style first, then discover they sized it wrong, placed it in the hot sun at 4 p.m., or ran afoul of electrical and barrier rules. That’s where delays and surprise costs happen.
This guide strips the process down to what works in 2025: the exact cabana sizes that fit common pools, realistic pool house cost ranges for kits vs. custom builds, the must-know code distances for outlets and lighting, and which shade materials actually block UV. You’ll also get a planning checklist so your pool cabana ideas move from Pinterest to permitting without drama. Whether you’re DIY-savvy or hiring a pro, you’ll learn how pool house cabanas deliver comfort, safety, and long-term value—on a timeline you control.
Pool House Cabanas 101: Types, Sizes & Placement
Cabana Sizing & Placement—What Pros Check First
Use this at-a-glance guide to validate footprint choices, pass common inspection checks, and place the cabana for real shade—not just looks.
Which footprint supports your actual use?
| Footprint | Comfortable Capacity | Best For | Upgrade Path |
|---|---|---|---|
| 10×12 ~120 sq ft | 2–3 seated + gear | Day hub, shade + storage | Add fold-down counter; curtain rails |
| 12×16 ~192 sq ft | 4–6 seated | Lounge + snack service | Under-counter fridge; ceiling fan |
| 12×20 ~240 sq ft | 6–8 seated | Lounge + changing nook | Long counter; towel closet |
Fast compliance checks most AHJs look for
-
Receptacle 6–20 ft Provide at least one convenience outlet in this band; outdoor outlets GFCI. (NEC 680 guidance)
-
Switches ≥5 ft from water Or separate by a barrier as allowed. Keep low-voltage and data in their own raceways.
-
Underground wiring route Stay outside the 5-ft pool envelope unless using methods permitted for pool zones; confirm depth before pour.
-
Barrier reality check Many jurisdictions follow ISPSC 305; typical 48″ min barrier with self-closing, self-latching gates.
The quickest wins happen when you set electrical and barrier positions on paper before you place the cabana footing. — Field note, residential pool inspectors & plan reviewers
A 10-minute sun test for real afternoon shade
- At 4:00 p.m. stand where seating will go. Mark the edge of your shadow with tape or a stake.
- Place a mock roof line (string on two poles at proposed eave). If the shadow doesn’t cover seating, rotate or move the cabana 1–3 ft.
- Add side protection on the west: a louver, UPF 50 curtain, or a 24–36″ overhang for late-day sun.
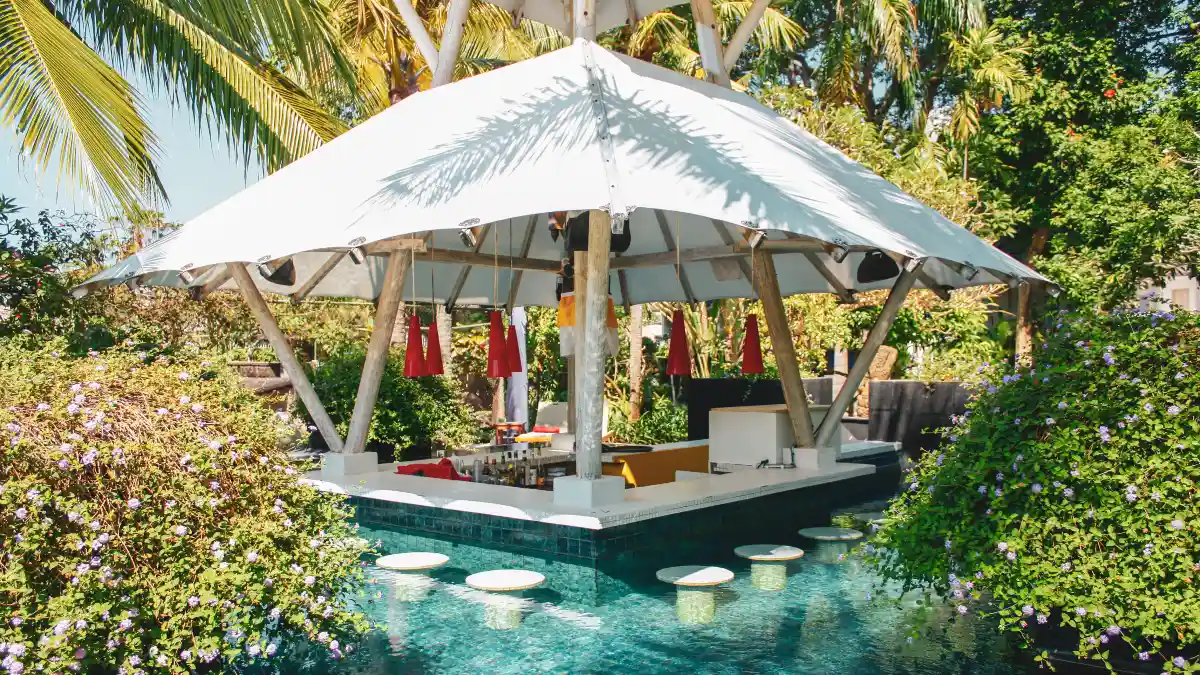
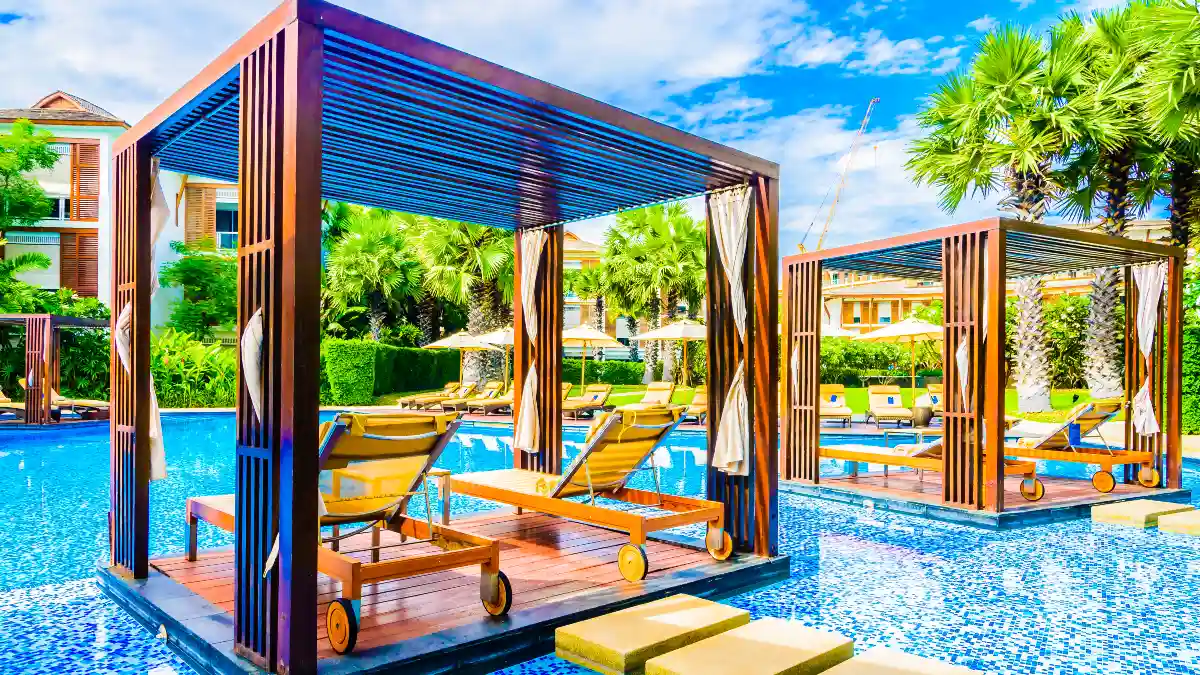
Start with use, not looks. If the goal is shade and storage for a family of four, you don’t need a pavilion meant for catered parties. The sweet-spot sizes most homeowners end up choosing—confirmed by manufacturers and trade editors—are 10×10 to 12×14 for compact lounging, with larger footprints when you add a changing room or bar. (This Old House and major vendors showcase these ranges repeatedly.)
What the sizes actually fit (with real-world examples):
- 10×12 (≈120 sq ft): Two loungers + bistro table + a 24–30″ deep storage wall. Popular as an entry kit size; you’ll find multiple 10×12 cabana models in current catalogs.
- 12×16 (≈192 sq ft): Lounge seating for 4–6 plus a compact serving counter (under-counter fridge optional). Ideal when you want “hangout + snacks” without plumbing.
- 12×20 (≈240 sq ft): Room for a small changing room (3×5 or 4×6), a longer counter, and dedicated towel/gear storage. Manufacturers commonly showcase this size for “pool house” use cases.
Vendor size menus you can count on. Space Makers Sheds (SMSheds) lists 10×12 up to 12×32 as standard pool cabana sizes—useful because those longer lengths swallow a changing stall without squeezing lounge space. They also note that permits may be required for larger structures, which mirrors local rules.
Placement that works (and passes inspection):
- Sightlines: Keep clear lines from house windows and main seating to the pool for supervision. Angle doors so wet foot traffic doesn’t cross power or grill areas.
- Shade path: Watch the 3–6 p.m. sun; rotate or offset the cabana so its roof throws shade where you actually sit.
- Utilities: If you’ll add power, place the cabana so the required GFCI receptacle (NEC 680) sits 6–20 ft from the water and switching stays ≥5 ft from the pool (or is barrier-separated). Underground wiring routes must respect pool offset/depth rules.
- Setbacks & height: Check zoning setbacks and lot-coverage caps. Many jurisdictions exempt ≤200 sq ft accessory structures from building permits, but zoning still applies (and pool barriers are separate).
Bottom line: For most backyard cabana needs, start with 10×12 to 12×16; step to 12×20 if you want a changing room or longer counter. Place it for afternoon shade and service runs that won’t fight electrical and barrier rules. That’s the path to pool house cabanas that feel intentional, not improvised.
Budgeting in 2025: Kit vs. Custom Pool House Cost

Decide kit vs. custom first—your budget follows. In 2025 pricing, prefab/kit cabanas are the fastest route: about $7,500–$45,000 installed for a ~300 sq ft footprint (HomeGuide’s latest pool house report). Custom builds swing higher because you’re paying for design, detailing, and site-specific labor.
Benchmark the ranges you’ll actually see this year:
- Prefab/kit (installed): $7.5k–$45k for ~300 sq ft; expect basic electrical rough-in options and limited footprints/finishes.
- Custom pool house: Typical $150–$600 per sq ft; national project data shows $15k–$240k+ total depending on size and amenities (HomeAdvisor/Angi 2025). Median custom builds land around $72k.
- Shed-style cabana builds: Many carpentry shops quote $4k–$25k for smaller, unplumbed structures using shed construction methods; luxury “mini-houses” go much higher once plumbing/HVAC/insulation enter the picture. (Builder price lists and shop portfolios commonly show these tiers.)
What moves the number (line-item view):
- Structure: Framing/engineered posts, roof system, sheathing, exterior cladding.
- Foundation: Slab vs. pier footings (slab adds $1.5k–$6k on small builds).
- Electrical: Trench/conduit, GFCI circuits, required 6–20 ft receptacle, lighting/switching set ≥5 ft from the water; $1.2k–$4k typical for simple runs.
- Plumbing (optional): Cold line + drain for a sink/outdoor shower can add $2k–$8k+ depending on tie-in distance and frost protection.
- Finishes: Doors/windows, counters (compact stone or HDPE), storage systems, ceiling fans (IP-rated if in splash zones).
- Soft costs: Permit/plan review, potential engineering (wind/snow), inspections, and 10–15% contingency.
How to choose smartly:
- If you want shade + storage quickly, a kit keeps you in the lower band and speeds schedule.
- If you need a changing room or wet bar, run the numbers on a 12×16–12×20 custom; by the time you expand a kit and add trades, the gap narrows.
- Treat plumbing and engineered design (for high wind/snow) as binary cost switches—they materially change totals.
Use these ranges to set your pool house cost ceiling, then request itemized quotes so you can compare apples to apples (structure, foundation, electrical, plumbing, finishes, soft costs).
Codes & Safety That Matter in 2025 (Don’t Skip This)
This is where projects stall—know the numbers before you buy. The National Electrical Code (NEC) Article 680 sets clear distances around pools, and inspectors enforce them. Educators who teach the NEC (e.g., Mike Holt Enterprises) and licensing resources are consistent on the key points:
Electrical (NEC 680, 2020/2023 adoptions):
- Required convenience receptacle: Provide one 15- or 20-amp, 125-V receptacle no closer than 6 ft and no farther than 20 ft from the pool’s inside wall. This deters dangerous extension-cord use. (NEC 680.22(A)(1) as summarized by Electrical License Renewal and training materials.)
- GFCI protection: Outdoor dwelling receptacles generally require GFCI, and all outlets serving pool areas within the 6–20 ft envelope are treated conservatively by inspectors. (Mike Holt training notes; state and town handouts echo this in plain language.)
- Other outlets & equipment: Keep non-required receptacles ≥6–10 ft depending on use; switches should be ≥5 ft from the inside wall unless separated by a barrier; equipment disconnects must be in sight and outside the 5-ft zone. (Municipal checklists and NEC explainer summaries.)
- Underground wiring: Respect setbacks and depth; routes too close to the pool require raceways and specific wiring methods—plan your conduit path before pouring concrete.
Barriers/enclosures (ISPSC/IRC):
Most U.S. jurisdictions reference the International Swimming Pool and Spa Code (ISPSC) for barriers—Section 305 requires a pool/spa barrier, commonly 48 inches minimum height, with specific rules for openings, gates, and climbable elements. Local summaries (e.g., Frederick County, MD and Illinois municipalities) point back to ISPSC 305 as adopted in 2021 or 2024 code cycles. Always verify your city’s adopted year and amendments.
Permits:
The 2021 IRC R105.2 exempts many one-story detached accessory structures ≤200 sq ft from building permits—but zoning, electrical, and pool-barrier rules still apply. Numerous jurisdictions publish the same exemption with local caveats (e.g., overhang limits, height, or adding heat). If you plan 12×16 (192 sq ft) you might be exempt from a building permit, yet you’ll still need electrical permits/inspections. Check your city’s “work exempt from permit” page.
Structural loads (wind/snow):
Cabanas are “buildings” for load purposes. The IBC Chapter 16 wind maps (2021/2024) guide design wind speeds (often 105–115+ mph in many regions, higher in coastal or tornado-prone zones). If you’re in a special wind or high-snow region, ask for stamped drawings; several states updated wind provisions in 2023–2025.
Action checklist to stay compliant:
- Place the required GFCI receptacle 6–20 ft from water; keep switches ≥5 ft.
- Map underground conduit routes now to avoid rework.
- Confirm your city’s ISPSC 305 adoption; plan for a 48″ min barrier with compliant gates.
- Ask your building department if a ≤200 sq ft cabana is building-permit-exempt; still pull electrical (and plumbing, if any).
- In high wind/snow zones, request engineered posts/anchors or sealed drawings.
Follow these and your electrical code for pool cabana and pool barrier requirements become guardrails, not hurdles—keeping your project moving and your people safe.
Shade & Comfort: Materials that Actually Protect
If your cabana doesn’t manage heat and UV, it’s just décor. Start with fabric or roof systems that actually block radiation. The Skin Cancer Foundation explains that UPF 50 fabric blocks ~98% of UV, letting only 1/50th of rays through; dermatology reviews in PubMed Central echo the same performance for UPF 50+ textiles. That’s the threshold to look for in canopies, curtains, and soft roof panels. Choose products labeled UPF 50 or 50+ rather than generic “UV resistant,” which often has no tested rating.
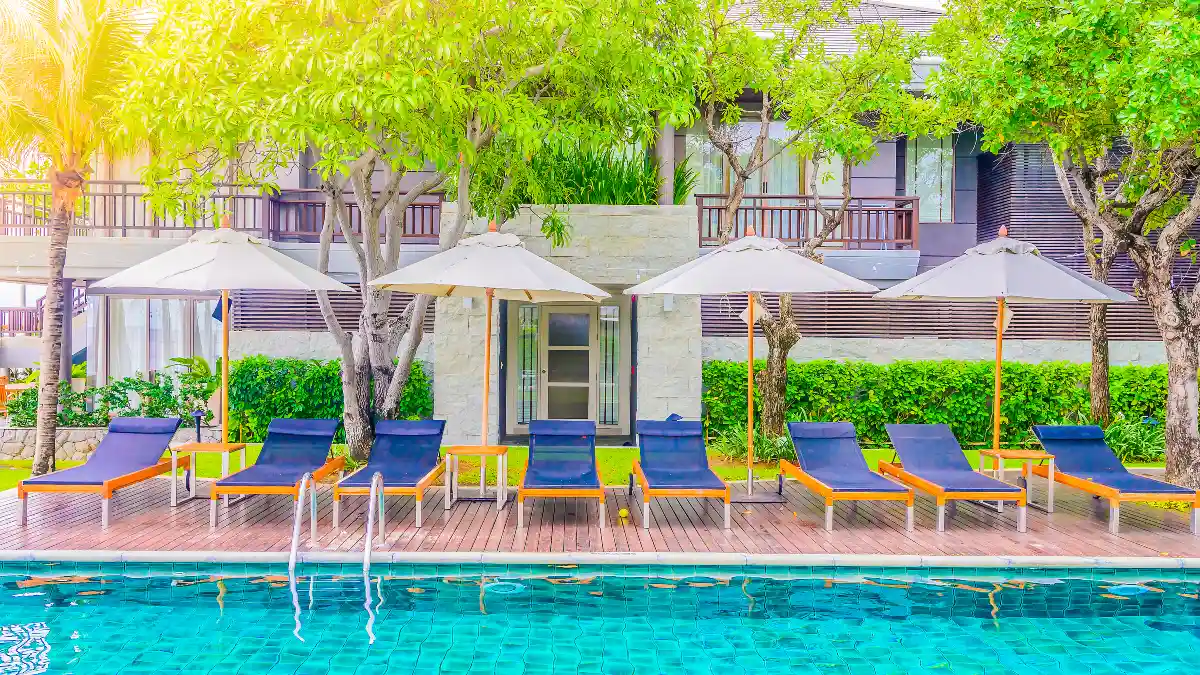
For heat safety, think beyond comfort—think physiology. The CDC recommends staying in shade during hot periods, taking breaks, and shifting outdoor activity to cooler dayparts. Translating that into cabana design means: orient the opening away from late-afternoon sun, add a solid roof or louver zone where people actually sit from 3–6 p.m., and provide airflow (open sides, a ceiling fan rated for outdoor/wet locations). If you entertain mid-day, plan a deeper overhang (24–36″) on the west or add a retractable side screen to block low-angle sun.
Hardware and lighting must survive water and dust. The IEC 60529 standard defines the IP rating you’ll see on fixtures and enclosures. Aim for IP65 or higher in splash zones: IP65 is dust-tight and resists water jets; IP66 handles more powerful jets (storm-driven rain, pressure wash near the deck), while IP67 adds temporary immersion protection (good for low fixtures close to splash). For cabana ceilings set back from direct spray, IP44 can pass, but move to IP65+ if wind routinely blows rain through. Label every light and junction box in your spec with the target IP rating so your electrician doesn’t default to indoor gear.
Quick picks (what to buy/spec):
- Roofing: Rigid roof (polycarbonate with UV layer) or UPF 50+ fabric canopy; add louver panels on west face.
- Soft goods: Replaceable UPF 50 curtains with tie-backs; darker colors typically block more light/UV.
- Fans & lights: Wet-location, IP65+ near edges; sealed drivers; corrosion-resistant fasteners.
- Layout: Put lounge seating where the roof throws shade at 4 p.m. today (check with a one-day sun path).
These moves deliver a shade cabana that feels 10–15 °F cooler in use while measurably cutting UV exposure. Include “UPF canopy” and “outdoor lighting IP rating” in your specs so vendors quote apples to apples.
Design Ideas That Work: Layouts, Storage & Utilities
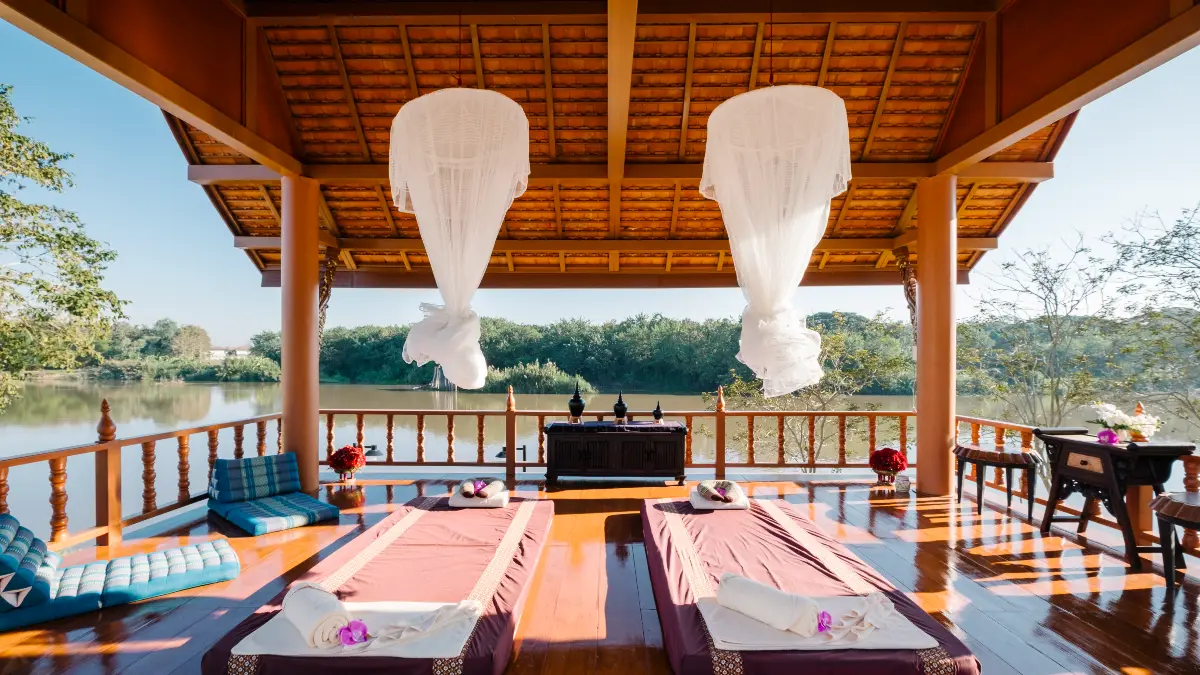
Zone it like an indoor room. A simple, high-function layout is: lounge zone + storage wall, with upgrades for a mini-bar and an outdoor shower (if allowed locally). Keep wet traffic direct from pool to towel hooks and seating; keep drink prep on the dry side of the plan. Manufacturers’ real projects show why this works: a 12×16 cabana fits seating for 4–6 with a 24–30″ deep storage wall, while a 12×20 swallows a small changing room and a longer counter without feeling cramped. Use these as templates, then adjust doors and windows to match your yard’s sightlines.
Storage that stays tidy. Dedicate a full-height wall to: open cubbies for towels, ventilated bins for toys, and a narrow vertical locker for poles/nets. Pool chemicals should live outside the human space in a lockable, ventilated cabinet (corrosive fumes and spills are the enemy of appliances and finishes). If you’re short on depth, use shallow (12–16″) shelving with bungee or rail fronts so gear doesn’t fall when doors are opened in wind.
Power and low-voltage—design the path early. NEC 680 restricts underground wiring within 5 ft of the pool’s inside wall unless it’s specifically serving permitted pool equipment with the right methods. That means your conduit path to the cabana should arc outside the 5-ft zone or drop to compliant depth/raceway solutions. Plan the run before you pour slabs or set pavers. Reserve space for a weather-rated subpanel or switchgear outside the 5-ft zone, and pre-pull data/low-voltage for speakers or a display so you’re not trenching twice.
Two proven footprints (steal these):
- 10×12 “Day Hub” — Two loungers + 30″ storage wall + small bistro; no plumbing.
- 12×20 “Family Base” — Sectional lounge + 5-ft changing nook + 6–8 ft counter with under-counter fridge; optional outdoor shower behind the cabana if your city allows it. Real-world vendor plans at these sizes confirm circulation stays comfortable. Use them as your baseline for pool cabana ideas that actually fit people and stuff.
Plan Like a Pro: Timeline, Permits & Contractor Checklist

Permits & compliance first. Expect three buckets: structure, electrical, and any plumbing (sink or shower). Most jurisdictions also require a compliant pool barrier; local handouts typically cite ISPSC Section 305 (often 48″ minimum height with self-closing, self-latching gates). Verify what your city actually adopted (2021 vs. 2024 code cycles) before you order materials. Frederick County’s summaries are representative of how jurisdictions refer you to ISPSC 305.
Engineering where it matters. Many regions now reference 2024 IBC Chapter 16 loads (and ASCE 7-22). If you’re in a high-wind corridor or snow country, ask your builder for stamped drawings or hardware schedules (posts/anchors/roof uplift). This isn’t overkill: newer maps refine wind speeds and tornado considerations in certain zones; it’s about keeping a lightweight cabana on its footings in a storm.
Pre-construction checklist (print this):
- Locate utilities (811 in the U.S.) and mark trench paths away from the 5-ft pool envelope.
- Confirm setbacks/lot coverage with zoning; a ≤200 sq ft cabana may be building-permit-exempt under the IRC, but electrical and barrier rules still apply.
- Pick slab vs. footings based on soil, drainage, and weight (slab helps with furniture stability and water runoff control).
- Order long-lead items (doors, roofing, outdoor-rated lights/fans).
- Schedule inspections: trench, rough electrical, final.
- Get it in writing: IP ratings for fixtures, GFCI locations (6–20 ft receptacle), and barrier details in the bid.
Adoption timing reality check. States and cities are actively updating codes in 2024–2025. For example, the Washington State Building Code Council is running a 2024 adoption cycle with meetings and effective dates rolling into 2025—typical of how adoptions phase in. Translation: always check your building department’s “Codes in Effect” page before finalizing drawings.
Conclusion
Pick a size based on use (most families land in 10×10–12×14, with 12×20 for a changing room or longer counter). Set a realistic 2025 budget—kits for speed and savings, custom when you need plumbing or tailored finishes. Place outlets and switches to meet NEC 680 distances, confirm your ISPSC/IRC barrier rules, and choose UPF 50 canopies with IP-rated fixtures so the space stays cool, dry, and safe.
In wind/snow regions, ask for engineering tied to the latest IBC/ASCE 7 loads. Grab the one-page checklist (sizes, costs, critical code distances), then call your local building department to confirm what’s adopted on your street. Pool house cabanas can be comfortable, code-compliant, and on budget in 2025.
