
Picture this: it’s early morning, and instead of rushing indoors to start your workday, you settle into your private garden nook with a steaming cup of coffee, surrounded by fragrant jasmine and the gentle sound of rustling leaves. This isn’t a luxury reserved for sprawling estates—it’s the new reality for thousands of homeowners who’ve discovered the transformative power of garden nooks.
The pandemic fundamentally reshaped how Americans think about outdoor spaces. According to recent housing market analysis, 61% of first-time homebuyers now prioritize larger yards over interior square footage—a complete reversal of pre-2020 trends. This shift reflects something deeper than simply wanting more space; it represents a fundamental reimagining of how we live, work, and find peace in our increasingly connected world.
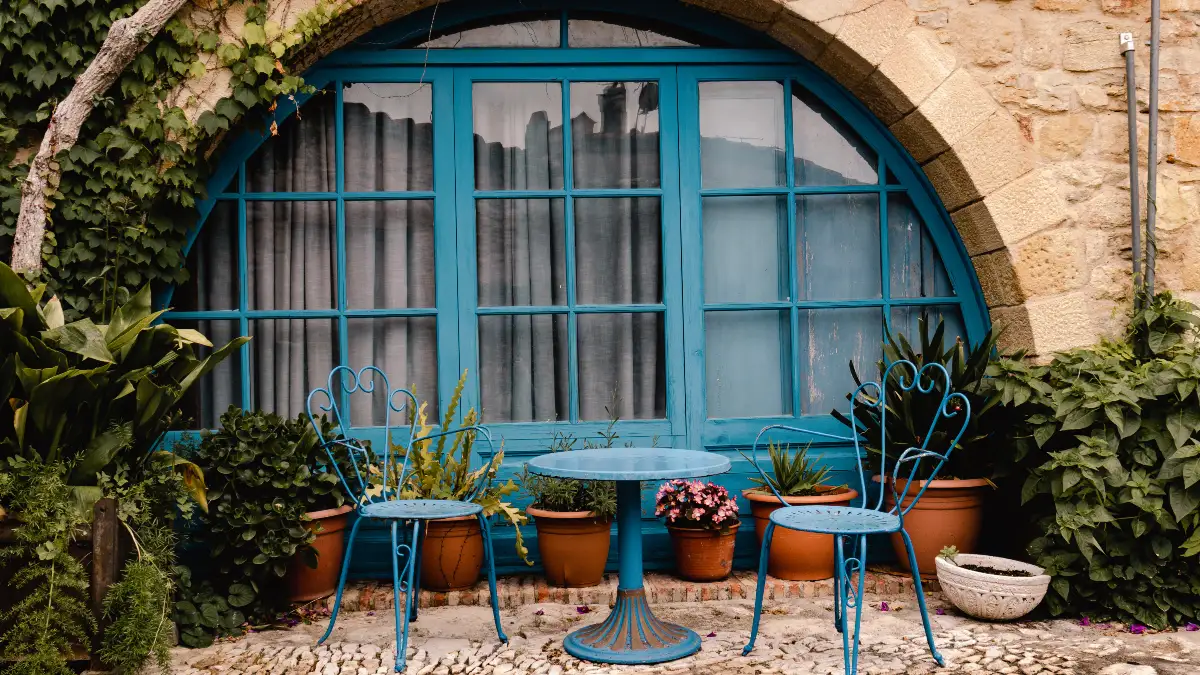
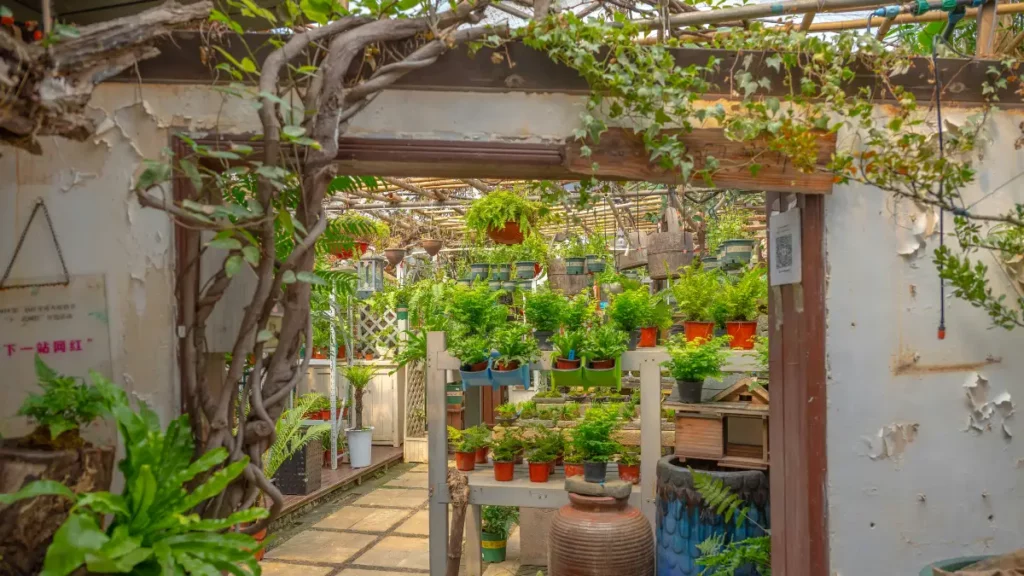
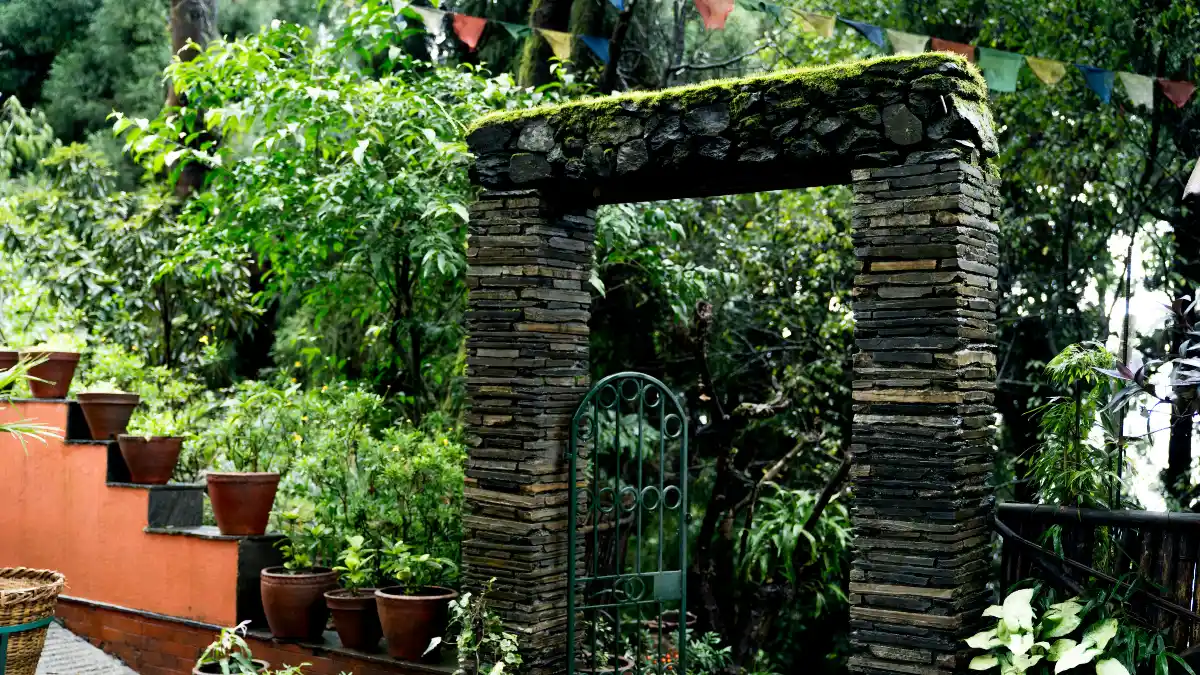
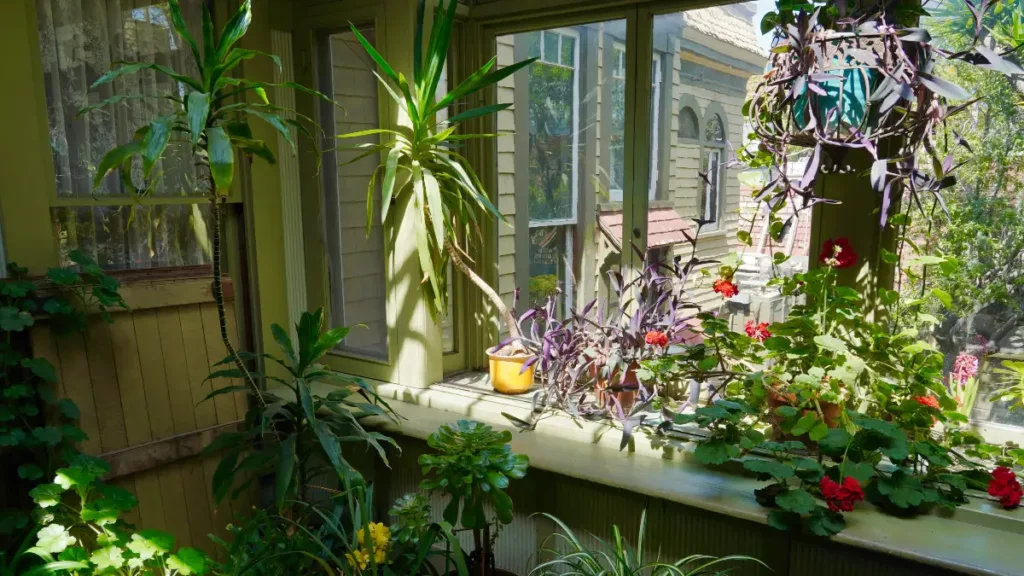
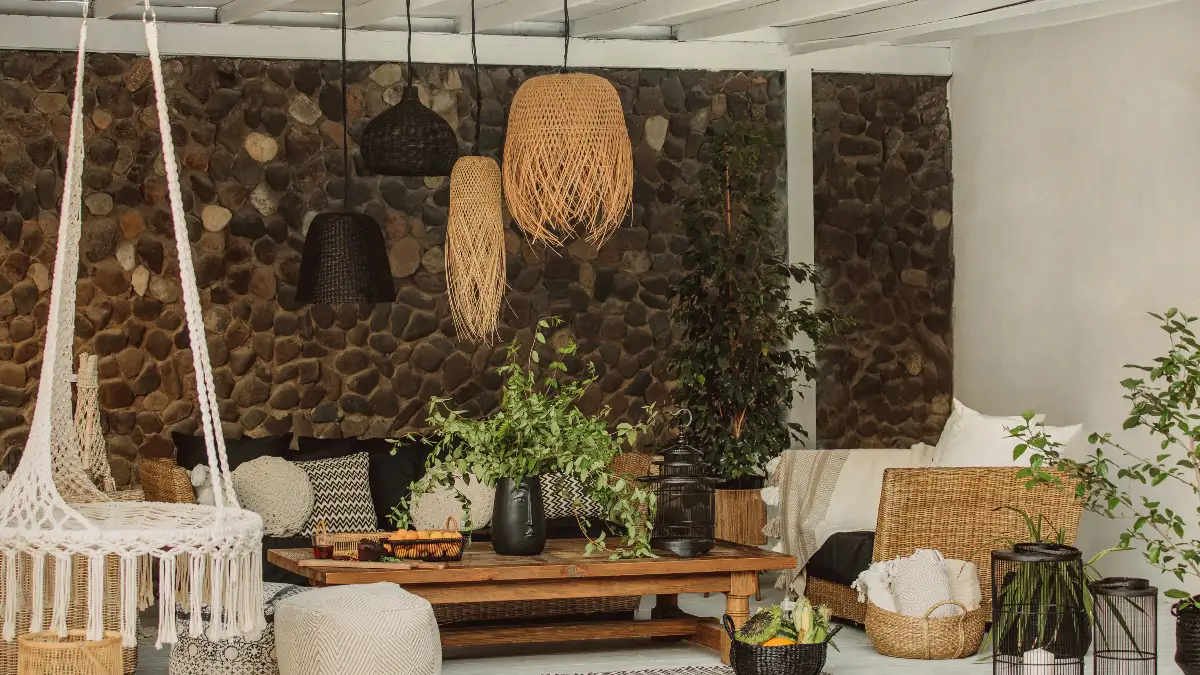
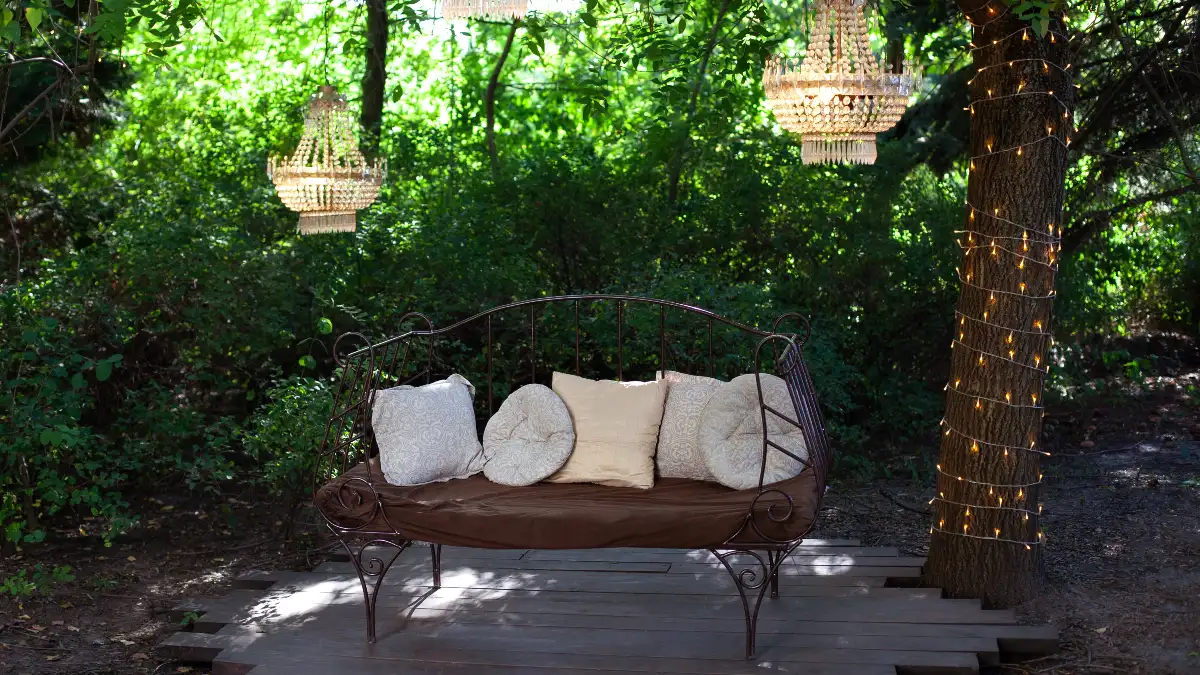
Garden nooks—intimate outdoor spaces designed for relaxation, work, or entertainment—have emerged as the solution for creating “multiple worlds within a single garden,” according to leading landscape architects. These carefully crafted spaces offer what busy homeowners crave most: a sense of sanctuary without the expense of major renovations or the commitment of permanent structures.
2025’s Hottest Garden Nook Trends
The most transformative trend reshaping garden design in 2025 is the concept of “nomadic” outdoor spaces—areas designed to adapt seamlessly throughout the day and seasons. Morning coffee nooks transform into evening storytelling spots, while workspace corners double as meditation retreats, reflecting our increasingly fluid relationship with how and where we spend time.
This trend responds directly to post-pandemic lifestyle changes where homes must serve multiple functions. NOA outdoor living, the leading outdoor experience center in Europe, reports that creating different ‘worlds’ within a single garden has become standard practice, with terraces, vegetation, and furniture all playing specific roles in this spatial theater.
The practical applications are remarkably sophisticated. A single corner might feature a height-adjustable table that serves as a laptop desk at 8 AM, transforms into a lunch spot by noon, and becomes a craft station for evening projects. Modular seating systems with hidden storage accommodate everything from work supplies to garden tools, while weather-resistant cushions can be quickly swapped to match the day’s intended use.
Smart homeowners are incorporating “seasonal migration” into their design philosophy, creating spaces that respond to sun patterns, temperature changes, and social needs. Think of an intimate reading nook hidden in greenery that becomes a private spot for an outdoor shower, or a morning terrace for breakfast that converts to a sunny aperitif station for evening gatherings.
Wellness and Mental Well-Being Take Center Stage
Garden nooks in 2025 are increasingly designed as therapeutic sanctuaries that promote relaxation and mindfulness, moving far beyond simple aesthetics to address genuine psychological needs. Research confirming that even 10-30 minutes in nature reduces stress and improves mental health has made wellness-focused design a priority rather than a luxury.
The integration of sensory gardens designed to nurture relaxation and engage all five senses has become particularly popular, incorporating plants and decor that stimulate sight, smell, touch, hearing, and even taste. Elevated platforms create intimacy and separation from daily stresses, while meditation pods and reading rooms nestled into garden corners provide dedicated spaces for mental restoration.
Leading designers report unprecedented demand for cold plunge pools, outdoor spa features, and dedicated yoga platforms, as homeowners invest in personal wellness infrastructure. The $1.8 trillion wellness industry growth in 2024 has directly influenced outdoor design, with features like aromatherapy plant gardens, meditation labyrinths, and sound gardens becoming standard rather than exceptional.
Water features ranging from simple fountains ($500-$3,000) to sophisticated rain gardens provide both visual appeal and therapeutic sound, while carefully selected aromatic plants like lavender, rosemary, and jasmine create natural sensory experiences that promote calm and focus.
Indoor-Outdoor Cohesion Dominates Design Philosophy
The boundary between interior and exterior spaces continues to disappear, with seamless material transitions using natural stone, concrete, and wood creating unified living environments. This trend reflects a fundamental shift in how we conceptualize home—not as separate indoor and outdoor areas, but as one integrated living system.
Upholstered outdoor furniture that rivals interior comfort has revolutionized expectations for outdoor living. Weather-resistant fabrics now offer the same luxury feel as indoor textiles, while outdoor kitchen appliances approach indoor sophistication. Smart technology integration allows homeowners to control lighting, sound, and even temperature from unified systems that treat indoor and outdoor spaces as one environment.
Material continuity plays a crucial role in successful indoor-outdoor integration. Limestone, with its tones ranging from buff and cream to beige and light browns, creates natural bridges between interior and exterior surfaces, while its durability ensures long-term beauty with minimal maintenance. When you choose high-quality stone, it’s incredibly durable and long-lasting, working just as well in sleek, contemporary spaces as in traditional or rustic schemes.
Trending Design Elements Reshaping Garden Nooks
Sustainable materials have moved from niche preference to mainstream demand, with FSC-certified woods, recycled metals, and eco-friendly composites becoming standard rather than premium options. Sustainable luxury has seen a 187% increase in popularity over the past twelve months, according to Google Trends analysis, proving that environmental consciousness and aesthetic appeal are no longer competing priorities.
Smart lighting systems featuring warm-toned LEDs (2700K-3000K) with app integration have become essential rather than optional, allowing precise control of ambiance throughout different activities and seasons. These systems often incorporate minimal blue light emissions to avoid disrupting insects, birds, and other wildlife, reflecting growing awareness of ecological responsibility in garden design.
Climate adaptation features including drought-tolerant plants, permeable surfaces, and rain gardens address practical concerns while creating beautiful, sustainable spaces. 62% of design experts agree that drought-tolerant plants are the top landscaping trend for 2025, combining beauty with reduced maintenance and environmental responsibility.
Biophilic integration through native plant landscapes, vertical gardens, and wildlife-friendly features connects garden nooks to their local ecosystems while reducing maintenance requirements. This approach creates spaces that feel naturally integrated rather than imposed upon their environment, resulting in more sustainable and visually coherent designs.
The resurgence of warm neutrals and earth tones has replaced the cool gray palettes dominant in previous decades, with colors like sage green, terracotta, and soft taupe creating more welcoming and psychologically comfortable environments. These palettes work particularly well with sustainable materials and native plantings, creating cohesive designs that feel both contemporary and timeless.
Popular Garden Nook Styles for Every Taste
Modern Minimalist Nooks: Clean Lines Meet Sustainable Sophistication
Cost Range: $5,000-$15,000
Modern minimalist garden nooks have evolved far beyond stark, sterile spaces to embrace sustainable sophistication that prioritizes both environmental responsibility and aesthetic refinement. These spaces feature clean lines and geometric shapes while incorporating organic elements that prevent them from feeling cold or unwelcoming.
Current color palettes center around sage green, terracotta, and soft taupe, creating warmth within minimalist frameworks. These earth-toned neutrals work beautifully with sustainable materials while providing psychological comfort—a crucial consideration for spaces designed for daily use and relaxation.
Key Design Elements:
- Recycled aluminum frames ($20-40 per sq ft) provide structural integrity while supporting environmental values. These materials offer exceptional durability and require minimal maintenance, making them ideal for busy homeowners who want beautiful spaces without constant upkeep.
- Geometric planters in matte finishes create visual interest through form and texture rather than excessive color. These containers work particularly well when arranged in groups of odd numbers, creating dynamic compositions that feel planned yet natural.
- Monochromatic plant schemes featuring multiple shades of green with occasional accent colors create depth without visual chaos. Popular choices include different hostas varieties, ornamental grasses in varying heights, and structural evergreens that provide year-round interest.
- LED strip lighting for architectural accent highlights clean lines after dark while consuming minimal energy. Warm-toned LEDs (2700K-3000K) create ambiance without the harsh blue light that disrupts wildlife, aligning with ecological responsibility trends.
Sustainable Material Integration: Modern minimalist nooks increasingly feature FSC-certified woods, recycled metals, and eco-friendly composites that prove sustainability and style aren’t mutually exclusive. Textured planters with asymmetrical designs add visual interest while using recycled materials, demonstrating that environmental consciousness can enhance rather than limit design possibilities.
Rustic and Natural Styles: Embracing Organic Authenticity
Cost Range: $3,000-$12,000
Rustic garden nooks celebrate organic materials and natural imperfections, creating spaces that feel discovered rather than constructed. These designs work particularly well for homeowners who want their outdoor spaces to feel like natural extensions of local landscapes.
The woodland wonderland aesthetic incorporates natural stone, reclaimed wood, and weathered metals to create spaces that appear to have evolved naturally over time. This approach often costs less than formal designs while providing more character and environmental integration.
Popular Features:
- Pressure-treated lumber structures ($20-40 for 8ft posts) provide affordable durability while maintaining natural aesthetics. Cedar and pine options offer different visual textures and natural weather resistance, with cedar providing superior longevity despite higher initial costs.
- Boulder seating arrangements eliminate furniture costs while creating permanent, comfortable seating that improves with age and weather. Large stones can often be sourced locally, reducing transportation costs and ensuring regional visual compatibility.
- Native shrub privacy screens provide natural barriers while supporting local wildlife and requiring minimal maintenance once established. These living walls offer year-round interest through seasonal changes and often cost significantly less than constructed privacy solutions.
- Climbing plant supports using natural materials like sturdy branches or rustic timber create infrastructure for vertical gardens while maintaining authentic aesthetics.
Rock Garden Integration: Rock gardens pair beauty with purpose, offering wildlife habitat while requiring minimal maintenance once established. They work particularly well in drought-tolerant landscapes, providing structure and visual interest while supporting water-wise gardening principles that are increasingly important in many regions.
Zen and Wellness-Inspired: Creating Therapeutic Sanctuaries
Cost Range: $4,000-$20,000
Zen-inspired garden nooks focus on creating therapeutic spaces that promote mental well-being and mindfulness. These designs incorporate Japanese aesthetic principles while adapting to local conditions and personal needs.
Japanese-influenced design elements including water features, bamboo elements, and minimalist plantings create spaces that encourage contemplation and stress reduction. Sand gardens with raked patterns provide meditation focus while requiring minimal water and maintenance—important considerations for sustainable design.
Essential Components:
- Water feature installation ($500-$3,000) ranges from simple fountains to sophisticated rain gardens. The therapeutic sound of moving water has scientifically proven stress-reduction benefits, making this investment valuable for both wellness and property value.
- Bamboo screening ($15-25 per linear foot) provides privacy while maintaining the light, airy feeling essential to Zen aesthetics. Bamboo grows quickly and can be harvested sustainably, aligning with environmental responsibility values.
- Zen plant selections focus on ornamental grasses, evergreens, and plants with strong structural qualities that provide year-round interest without constant change. These choices support meditation and contemplation by offering consistency and subtle beauty.
- Natural stone pathways guide movement through the space while providing sensory experiences through different textures and temperatures under feet.
Wellness Integration: Modern Zen nooks often incorporate dedicated yoga platforms, meditation pods, and spaces for outdoor showers, recognizing that wellness involves both mental and physical practices. These additions transform simple aesthetic spaces into functional wellness centers that support daily health routines.
Cottage and Nostalgic Styles: Embracing Timeless Comfort
Cost Range: $2,500-$18,000
Cottage-style garden nooks satisfy the growing demand for nostalgic touches that bring comfort and familiarity to outdoor spaces. These designs celebrate abundance, imperfection, and the accumulated beauty of spaces that feel loved and lived-in.
Vintage elements including antique furniture, weathered pots, and flower canopies create secret garden atmospheres that transport users away from contemporary stresses. Arched trellises and climbing rose structures provide vertical interest while supporting the abundant plantings that characterize cottage gardens.
Signature Elements:
- Wrought iron details ($200-800 per piece) add period-appropriate character while providing practical functions like plant supports and decorative accents. Vintage or reproduction pieces often cost less than contemporary alternatives while providing more character.
- Mixed perennial borders ($8-15 per sq ft planted) create the layered, abundant plantings that define cottage style. These investments provide years of beauty while often requiring less maintenance than annual plantings once established.
- Climbing rose structures ($150-500 per trellis) support the romantic elements that make cottage gardens so appealing. Modern disease-resistant varieties provide traditional beauty with contemporary durability.
- Cottage-style furniture ($300-1,500 per set) ranges from simple wooden benches to elaborate iron pieces, allowing budget flexibility while maintaining authentic aesthetics.
Abundant Planting Philosophy: Cottage gardens embrace the “more is more” philosophy, with layered plantings that provide continuous color and interest throughout growing seasons. This approach often costs more initially but provides exceptional value through reduced maintenance and continuous expansion as plants mature and self-seed.
The charm of cottage-style gardens lies in their apparent spontaneity, even though successful cottage gardens require careful planning to ensure continuous bloom and proper plant combinations. Beloved classics like cottage pinks (Dianthus), roses, and poppies create the foundation, while self-seeding annuals and spreading perennials fill gaps and create the abundant, naturalistic feeling that defines this style.
Each of these styles offers distinct advantages depending on personal preferences, maintenance capabilities, and budget considerations. The key to success lies in choosing a style that aligns with both your aesthetic preferences and practical capabilities, ensuring your garden nook provides years of enjoyment rather than becoming a maintenance burden.
How Much Can You Really Build for Your Budget?
You want a beautiful garden nook. But you’re staring at Pinterest photos wondering, “What will this actually cost me?” Here’s the truth about what you can build at every budget level.
The $200-$2,000 Range: Small Spaces, Big Impact
Problem: You have a tiny budget but want something that looks amazing.
Solution: Focus on one perfect corner instead of trying to do everything.
Project 1: The $400 Reading Corner That Looks Like $2,000
What you get: A cozy spot where you’ll actually want to spend time.
Shopping list:
- Weather-resistant bench: $150-400
- 3 large planters: $30-50 each
- Shade plants (hostas, astilbe): $15-25 each
- Solar string lights: $25-75
- Outdoor cushions: $40-80
Total cost: $365-730
Build time: One weekend Skill level: Beginner (if you can carry a planter, you can do this)
Step-by-step:
- Pick your corner. Look for morning sun, afternoon shade.
- Place your bench first. Sit on it. Can you see something pretty? Good.
- Put planters in a triangle around the bench. Odd numbers look better.
- Plant your flowers. Water them.
- Hang lights 6-8 feet high on existing structures.
- Add cushions and test your new reading spot.
Why this works: You’re not trying to transform your whole yard. You’re making one spot perfect.
Project 2: The Morning Coffee Nook for $750
What you get: A place where drinking coffee feels like a mini vacation.
Shopping list:
- Small bistro set: $200-400
- Pea gravel (3 bags): $50
- 5 herb containers: $100-150
- Herbs (lavender, rosemary, thyme): $60-100
- Solar lantern: $40-80
- Small outdoor rug: $50-100
Total cost: $500-880
Build steps:
- Mark a 6×6 foot square with spray paint.
- Remove grass and weeds.
- Add 2-3 inches of pea gravel.
- Place furniture where you get morning sun.
- Arrange herb pots so you can smell them from your chair.
- Test with your morning coffee.
Pro tip: Plant herbs you actually cook with. Nothing beats fresh rosemary in your eggs.
The $2,000-$10,000 Range: Real Transformation
Problem: You want something impressive but don’t want to hire a contractor.
Solution: Build a pergola. It’s easier than you think.
The $3,500 DIY Pergola That Adds $8,000 in Home Value
What you get: Instant backyard drama plus shade for years.
Materials (8×8 foot pergola):
- 6 pressure-treated posts (6x6x8′): $280
- 4 beam boards (2x10x10′): $200
- Hardware kit: $300
- Concrete mix: $150
- Wood stain: $100
- Tools (if needed): $200-400
Total materials: $1,230 Your time: 3 weekends Skill needed: Moderate (you should know how to use a drill)
Weekend 1: Dig and Pour
- Mark your 8×8 square
- Dig 6 holes, 2 feet deep
- Set posts in concrete
- Let cure for 48 hours (seriously, don’t rush this)
Weekend 2: Build the Frame
- Attach beam boards to posts
- Check everything is level
- Add cross beams
Weekend 3: Finishing
- Sand rough spots
- Apply stain
- Clean up and enjoy
Safety warning: Call 811 before you dig. Hitting a gas line ruins everything.
Permit needed? Most areas require permits for structures over $1,000. Check your city website.
The $6,500 Garden Room Build
What you get: An outdoor space that feels like another room of your house.
Phase 1 ($3,000): Foundation
- Composite decking tiles: $8-15 per sq ft
- Privacy screens: $400
- Basic lighting: $300
Phase 2 ($2,000): Comfort
- Built-in bench with storage: $800
- Weather-resistant cushions: $400
- Container garden setup: $500
- Better lighting: $300
Phase 3 ($1,500): The Good Stuff
- Automatic watering system: $600
- Sound system: $400
- Final decorative touches: $500
Why phase it: You spread the cost over 6-12 months. Plus you learn what you actually use.
The $10,000-$25,000 Range: Go All Out
Problem: You want the full outdoor living experience.
Solution: Combine multiple elements into one amazing space.
The $18,000 Complete Outdoor Living Suite
What you get: Everything. Kitchen prep area, dining space, lounging area, and garden.
Major components:
- Custom pergola (12×16 feet): $8,000
- Built-in seating and storage: $3,500
- Outdoor kitchen basics: $4,000
- Professional lighting system: $2,000
- Irrigation and plantings: $2,500
Build timeline: 6-12 months Skill level: Advanced (or hire help for electrical/plumbing)
Project management tips:
- Start with the pergola. Everything else builds around it.
- Run electrical during construction, not after.
- Plan your plant areas before you build. Moving a tree later is expensive.
- Buy materials in phases. Lumber prices change.
ROI: In warm climates, expect to get back $15,000-$30,000 in home value. In cold areas, maybe half that.
When Should You Hire a Pro Instead?
The honest truth: Some jobs you shouldn’t DIY, no matter how many YouTube videos you watch.
Red Flags: Call a Professional
You need permits. If your city requires permits, they often require licensed contractors too.
Electricity is involved. Outdoor electrical work has special safety rules. One mistake can kill you.
You’re digging deep foundations. Frost lines, drainage, soil types – professionals know this stuff.
Gas connections. Never, ever DIY gas work. Your insurance won’t cover DIY gas accidents.
You’re attaching to your house. Structural connections need engineering calculations.
Cost Reality Check
Basic pergola:
- DIY: $800-4,000
- Professional: $2,500-8,000
Why the difference? Labor, permits, insurance, and they won’t make rookie mistakes.
Patio installation:
- DIY: $3-10 per sq ft
- Professional: $8-35 per sq ft
Garden room:
- DIY kit: $6,000-18,000
- Custom professional: $20,000-50,000
What You Actually Get Back
Patios: 100% of your money back, sometimes more Outdoor kitchens: 130-200% return in warm states, 60-80% in cold states
Pergolas: About 55% return, but you get to enjoy them now General outdoor improvements: 60 cents to $2 back for every dollar spent
Joe Perkins, landscape architect, puts it this way: “A good designer saves you money by picking materials that last and layouts you won’t want to change. DIY often means doing it twice.”
How to Pick the Right Pro
Red flags to avoid:
- Door-to-door sales
- Wants full payment upfront
- No local address
- Pressure to sign today
- No insurance proof
Green flags to look for:
- Local references you can visit
- Detailed written estimates
- Proper licensing and insurance
- Timeline that seems realistic
- Answers questions without getting defensive
Getting quotes: Get 3 quotes. The cheapest usually isn’t the best deal. The most expensive might be padding the price. The middle quote with the best references often wins.
When DIY Makes Sense
You have time. Professional projects take 1-3 weeks. DIY takes 3-12 weeks.
You enjoy learning. Building stuff is fun if you like figuring things out.
Your design is simple. Straight lines and basic shapes work for beginners.
Mistakes won’t be dangerous. A wonky planter looks rustic. A wonky electrical connection kills people.
Which Plants Actually Work in Garden Nooks?
The problem: You see pretty Pinterest plants, then they die in your shady corner.
The solution: Pick plants that want to live where you want to put them.
Shade Plants That Won’t Let You Down
For spots that get 3-6 hours of filtered sun:
Hostas: The Reliable Choice
Cost: $8-25 per plant
Why they work: Nearly impossible to kill. Come in 40+ varieties.
Best types:
- ‘Blue Mouse Ears’ (tiny, perfect for pots): $12
- ‘Sum and Substance’ (huge, makes a statement): $20
- ‘Patriot’ (green with white edges): $15
Plant spacing: Small ones 12 inches apart. Big ones need 3 feet.
Care: Water when dry. That’s it.
Astilbe: Color That Lasts
Cost: $15-25 per plant
Bloom time: Late spring through summer
Colors: White, pink, red, salmon
Why they work: Flowers last 6-8 weeks. Leaves look good all season.
Care tip: They like moist soil. Mulch around them.
Heuchera (Coral Bells): Year-Round Color
Cost: $12-20 per plant
Leaf colors: Purple, lime green, silver, burgundy
Why they’re great: Colorful leaves from spring to frost. Deer don’t eat them.
Container tip: These look amazing in pots. Use 12-inch pots minimum.
Climbing Plants for Your Pergola
Clematis: The Show-Off
Cost: $20-35 per plant
Bloom times: Spring, summer, or fall (depending on type)
Easy varieties:
- ‘Jackmanii’ (purple, blooms all summer): $25
- ‘Nelly Moser’ (pink with dark stripes): $30
- Sweet Autumn Clematis (white, fragrant): $20
Planting tip: Plant the crown 2 inches below soil level. They like cool roots, warm tops.
Climbing Hydrangea: Worth the Wait
Cost: $30-50 per plant
The catch: Takes 3-5 years to really take off
The payoff: Gorgeous white flowers and excellent winter structure
Where to use: North-facing walls where nothing else grows.
Herb Gardens That Make Sense
Problem: You plant herbs, forget to use them, they die.
Solution: Plant herbs you actually cook with, in containers you walk by daily.
The Essential 5 Herbs
- Lavender ($12-18): Smells amazing, bees love it, nearly indestructible
- Rosemary ($8-15): Use it year-round, looks good in winter
- Thyme ($6-12): Spreads to fill spaces, handles neglect
- Sage ($8-15): Beautiful silver leaves, great for fall cooking
- Basil ($3-6): Replant each year, worth it for fresh pesto
Container sizes: Use 14-18 inch pots. Smaller pots dry out too fast.
Pro tip: Group containers near your kitchen door. You’ll actually use the herbs.
Four-Season Planning (So Your Nook Isn’t Boring in Winter)
Spring (March-May): Wake-Up Time
Plant bulbs under your pergola in fall:
- Crocuses (first color of spring): $0.50 each
- Daffodils (deer proof): $1 each
- Tulips (if squirrels don’t eat them): $1 each
Summer (June-August): Peak Show
Your perennials bloom now. Add containers with:
- Begonias (shade-loving, colorful): $4-8 each
- Caladiums (tropical leaves): $6-12 each
- Coleus (colorful foliage): $3-6 each
Fall (September-November): Second Act
Plan for:
- Fall clematis blooms
- Hosta leaves turning yellow (pretty, not dead)
- Late-season containers with mums and ornamental peppers
Winter (December-February): Bones Matter
Keep it interesting:
- Evergreen climbers (ivy, some honeysuckle)
- Ornamental grasses (leave them standing)
- Good lighting (makes everything prettier)
Katherine Aul Cervoni, garden designer, says: “Plant for all four seasons, not just summer. Something evergreen gives you winter structure.”
How to Keep Your Garden Nook Looking Good Without Going Broke
The reality: Even low-maintenance gardens need some maintenance.
The goal: Spend 2-3 hours per month keeping things nice, not 2-3 hours per week fixing problems.
Spring Jobs (March-May): Set Up for Success
What needs doing:
- Check pergola bolts (10 minutes with a wrench)
- Clean wood surfaces before treating them
- Cut back dead plant parts
- Apply fresh mulch around plants
- Test any irrigation systems
Wood treatment schedule:
- Cedar pergolas: Stain every 2-3 years ($75-150 in materials)
- Pressure-treated lumber: Stain after first year, then every 3-4 years
- Pine pergolas: Wait 3-6 months after building before staining
DIY wood treatment: $2-4 per square foot of pergola surface
Professional treatment: $6-12 per square foot
Plant care:
- Divide hostas every 3-4 years (they get too big otherwise)
- Cut back ornamental grasses to 6 inches
- Prune climbing plants according to their type
Summer Jobs (June-August): Keep Things Alive
Weekly tasks (15 minutes):
- Check plant water needs
- Deadhead spent flowers
- Look for pest problems early
Monthly tasks (1 hour):
- Deep water containers
- Check pergola for loose parts
- Trim climbing plants that are getting out of hand
- Spot-treat any weeds
Heat wave protection:
- Move containers to shadier spots
- Water early morning, not evening (prevents fungal problems)
- Don’t fertilize during extreme heat
Fall Jobs (September-November): Prepare for Winter
Before first frost:
- Bring tender containers inside or to protected spots
- Winterize any water features
- Plant spring bulbs while you remember where you want them
- Clean up fallen leaves (they harbor pests and diseases)
Climbing plant care:
- Group 1 clematis: Don’t prune (they bloom on old wood)
- Group 2 clematis: Light pruning only
- Group 3 clematis: Cut back hard in late fall
- Climbing roses: Tie down long canes so wind won’t break them
Winter Jobs (December-February): Plan and Maintain
Monthly checks:
- Clear snow off pergola roof (too much weight can cause damage)
- Check that containers aren’t sitting in ice
- Look for animal damage to plants
Off-season projects:
- Research new plants for next year
- Service tools and equipment
- Plan any additions or changes
Order plants and materials: Winter ordering often gets better prices and guarantees availability.
Professional Maintenance: When It’s Worth It
Annual inspection: $100-200
What they check:
- Structural safety of pergola
- Proper wood treatment needs
- Plant health and pest issues
- Irrigation system function
Full-service maintenance: $400-800 per year
What’s included:
- All seasonal tasks
- Plant pruning and care
- Wood treatment
- Problem diagnosis and solutions
DIY vs. professional costs:
- Your time: 2-4 hours per month
- Your costs: $200-400 per year in materials
- Professional service: $600-1,200 per year
- Savings: You save $400-800 but spend 30-50 hours
When Problems Need Immediate Attention
Safety issues (fix immediately):
- Loose pergola connections
- Cracked wood that could fall
- Electrical problems with lighting
- Slippery surfaces from algae or moss
Plant problems (fix within a week):
- Insect infestations on valuable plants
- Fungal diseases spreading to healthy plants
- Climbing plants pulling down structures
Cosmetic issues (fix when convenient):
- Faded wood stain
- Overgrown plants
- Weeds in containers
- Dead annual flowers
The truth about maintenance: A well-built garden nook with the right plants needs less work than a lawn. But it needs the right kind of work at the right time.
Budget for maintenance: Plan to spend 3-5% of your initial build cost each year on upkeep. A $5,000 pergola needs $150-250 per year in maintenance to stay beautiful.
Most important rule: Fix small problems before they become big problems. A $20 bottle of wood stain now beats a $2,000 pergola replacement later.
What to Buy First (Without Breaking the Bank)

Your problem: You watch DIY videos where people have every tool ever made. You have a hammer and some hope.
The truth: You can build most garden nook projects with 4-6 basic tools. Here’s what matters and what doesn’t.
The Must-Have Tools ($200-500 Total)
Circular saw (7¼”): $150-300
Why you need it: Every pergola project needs straight cuts. Hand saws take forever and look messy.
What to buy: Dewalt DWE575SB or Ryobi CSB125. Both cut clean and last years.
Money-saving tip: Home Depot rents these for $45 per day. Try before you buy.
Impact driver: $100-200
Why it beats a regular drill: Drives screws without stripping heads. Essential for outdoor hardware.
Best value: Milwaukee M12 or Ryobi 18V. Get the battery combo packs.
What you’ll use it for: Every screw, bolt, and connection in your project.
Post level: $25-50
Why it matters: Crooked pergola posts look wrong forever.
What to get: A simple magnetic one works fine. Don’t overthink this.
Pro tip: Check posts are plumb (straight up) before the concrete sets.
4-foot level: $30-75
For what: Making sure your beams are straight across.
Good enough option: Stanley STHT43102. Gets the job done.
Expensive but worth it: Stabila levels stay accurate for years.
Professional Tools (Buy These Later)
Miter saw: $200-500
When you need it: Making perfect angle cuts for fancy trim work.
Skip it if: Your project uses basic 90-degree cuts only.
Rent instead: $40 per day at most tool rental places.
Router: $100-300
What it does: Rounds over edges, makes decorative profiles.
When to buy: If you love the look of rounded edges and plan more projects.
Alternative: Buy pre-rounded lumber instead.
Post-hole digger: $75-150
Manual vs. powered: Manual costs less but your back will hate you.
When to rent: For more than 6 holes, rent a powered auger.
Time saver: Renting saves hours of digging by hand.
Where to Shop Smart
Big Box Stores: Your Best Starting Point
Home Depot wins for:
- Complete projects (they have everything)
- Free delivery over $45
- Tool rental when you need something once
- Good return policy for defective tools
Lowe’s beats Home Depot for:
- Military discounts (10% year-round)
- Bulk orders (better pricing on lots of lumber)
- Contractor support (if you need help planning)
Local lumber yards excel at:
- Premium materials (better quality wood)
- Custom cutting (they’ll cut your pieces to size)
- Expert advice (the guy has built 500 pergolas)
- Supporting local business
Online Shopping Strategy
Amazon works best for:
- Hardware and small tools
- Prime shipping when you need it fast
- Reviews from actual users
- Hard-to-find specialty items
Yardistry (online pergola kits): $1,200-4,000
What you get: Pre-cut, pre-drilled lumber with hardware
Why consider it: No measuring, cutting, or figuring out hardware
The trade-off: Costs more than buying raw materials
Backyard Discovery: Complete outdoor living systems
Good for: If you want everything to match perfectly
Not good for: Custom sizes or unique spaces
The Hardware That Actually Matters
Don’t Cheap Out on Connections
Simpson Strong-Tie Outdoor Accents: $15-50 per bracket
Why they’re worth it: Look good and hold strong for decades
Where they matter most: Any connection you can see
Money-saving tip: Use basic galvanized hardware where it’s hidden
GRK Structural Screws: $25-40 per box
What makes them special: Self-drilling tips, no pilot holes needed
Time saved: Hours of pre-drilling
Worth the extra cost: When you’re doing lots of connections
Galvanized carriage bolts (3/8″ x 8″): $3-5 each
For major connections: Post to beam attachments
Why this size: Strong enough for outdoor structures, not overkill
How many you need: 2-4 bolts per major connection point
Wood Treatment Products That Work
Osmo UV Protection Oil: $45-65 per gallon
Best for: Cedar pergolas (lets the wood breathe)
Coverage: About 350 square feet per gallon
Application: Easy with brush or roller
Olympic Maximum: $35-50 per gallon
Best for: Pressure-treated lumber
Why it works: Penetrates deep, lasts 3-4 years
Color options: 50+ stain colors available
Copper Green Wood Preservative: $25-35 per gallon
When to use: Any fresh cuts you make in pressure-treated lumber
Why it matters: Cut ends aren’t treated and will rot first
Easy application: Just brush it on cut ends
Tool-Buying Strategy That Saves Money
Start with corded tools. They cost less and work for most homeowners.
Buy battery tools in the same brand. Batteries are expensive. One brand means you can share batteries between tools.
Rent expensive tools first. Try a miter saw for a day before buying one.
Buy used for tools you’ll rarely use. Check Facebook Marketplace for good deals.
Invest in tools you’ll use often. A good drill lasts 10 years. A cheap one lasts 10 projects.
Shop end-of-season sales. October-November has the best tool deals.
How Much Should You Really Spend?
Your worry: You don’t want to spend too little and get junk. You also don’t want to spend too much and regret it.
The solution: Match your budget to what you’ll actually use and enjoy.
Realistic Budget Categories
Starter Projects ($200-1,000): Test the Waters
What this gets you: A corner that looks intentional and inviting.
Focus on: Furniture, containers, and plants that make an immediate difference.
Skip: Permanent structures you might change later.
Best projects: Reading corner, coffee nook, container garden display.
Why start here: You learn what you actually use before committing to bigger projects.
Weekend Warrior ($1,000-5,000): Make Real Changes
What this includes: DIY pergolas, enhanced patios, integrated lighting.
Timeline: Projects you can finish in 2-4 weekend sessions.
Skills needed: Basic tool use, following instructions, measuring twice.
Best ROI: Projects that add both beauty and function.
Perfect for: People who like building things but have day jobs.
Comprehensive Transformation ($5,000-15,000): Go Big
What you get: Multiple coordinated elements that create complete outdoor living.
May include: Custom pergola, built-in seating, outdoor kitchen prep, professional lighting.
Consider hiring help for: Electrical work, complex structural connections.
Timeline: 3-8 months depending on scope and weather.
Good for: Experienced DIYers or people willing to learn as they go.
Luxury Installation ($15,000+): The Full Experience
What this means: Custom design, professional installation, integrated systems, premium materials.
Professional help needed: Design, permits, electrical, plumbing, structural work.
Your role: Making decisions and writing checks.
ROI expectation: 60-130% depending on your area and housing market.
Makes sense when: You know exactly what you want and have the budget to do it right.
Money-Saving Strategies That Actually Work
Timing Your Purchases
Fall material buying saves 20-30% on end-of-season inventory.
What goes on sale: Outdoor furniture, plants, some building materials.
What doesn’t: Lumber prices don’t follow seasons much anymore.
Best deals: October through December at big box stores.
Off-season professional services cost less November through February.
Why contractors discount: They need work during slow months.
Savings: 15-25% on labor costs.
Trade-off: You wait until spring to enjoy your new space.
Bulk buying with neighbors gets better prices on materials.
What works: Lumber orders, mulch, plants from nurseries.
How to organize: Start with your immediate neighbors, use group texts.
Savings: 10-15% on large orders.
Phase Your Construction Smartly
Year 1: Build the bones
Focus on structure and essential plantings. Get your pergola or seating area built.
Year 2: Add comfort and beauty
Enhanced lighting, better cushions, more plants, decorative elements.
Year 3: Perfect the details
Automated watering, sound systems, premium finishes, special touches.
Why this works: You spread costs over time and learn what you actually want as you use the space.
Avoid These Budget Mistakes
Buying cheap tools for big projects. They break when you need them most.
Starting too big. Build one perfect corner before trying to do your whole yard.
Skipping permits. The fine costs more than the permit.
Not planning for maintenance. Budget 3-5% of project cost per year for upkeep.
Buying plants at full retail. Shop end-of-season sales or start from smaller plants.
Forgetting about winter. If you live where it snows, plan for 4-season interest.
When to Start Your Project (Timing Is Everything)
Your question: When should you actually start building your garden nook?
The answer: It depends on what you’re building and where you live. Here’s when each project works best.
Late Winter Planning (January-February): Dream and Prepare
Perfect for: Research, design, and ordering materials.
Why this time works: You have time to think without rushing.
Pinterest searches go up 300% during these months as people plan spring projects.
What to do now: Measure your space, browse ideas, get contractor quotes if needed.
Order materials now if: You’re building something big and want first pick of lumber.
Don’t order plants yet: Wait until closer to planting time.
Early Spring Rush (March-April): Ground Work Season
Best for: Ground preparation, structure installation, initial plantings.
Why nurseries love this time: Peak season for plant selection and sales.
Weather considerations: Ground needs to be workable, not frozen or muddy.
Permit processing: Cities are busy with spring projects. Apply early.
Start with: Site prep, foundation work, structural assembly.
Wait on: Final plantings until frost danger passes.
Late Spring Finishing (May-June): Plant and Polish
Perfect timing for: Final plantings, system testing, furniture arrangement.
Social media peaks: #gardening hashtags get highest engagement now.
Plant availability: Best selection at nurseries, everything is actively growing.
Weather advantage: Warm enough to work comfortably, not too hot yet.
Focus on: Plants, comfort elements, fine-tuning your layout.
Avoid: Major construction (too much else is growing and could get damaged).
Summer Maintenance (July-August): Enjoy and Adjust
Main job: Use your space and see what works.
Minor projects: Small adjustments, additional lighting, container rearrangements.
Too hot for: Major building projects in most climates.
Perfect for: Evening projects after work, weekend morning tasks.
Learn what you need: More shade? Better lighting? Different furniture arrangement?
Fall Improvement Season (September-November): Final Touches
Excellent for: Final improvements, winterization, planning next year.
Plant deals: End-of-season sales save 30-50% on plants and materials.
Cooler weather: Comfortable working conditions return.
Next year prep: Plant bulbs, plan additions, order materials for spring.
Good projects: Lighting upgrades, plant additions, weatherproofing tasks.
Project-Specific Timing
Pergola construction: Start in late spring, finish in early summer.
Why: You want to enjoy it during peak outdoor season.
Avoid: Starting in late summer (you’ll finish when it’s too cold to use).
Planting projects: Spring for perennials, fall for trees and shrubs.
Container gardens: Start in late spring, refresh mid-summer.
Lighting installation: Fall is perfect (you’ll appreciate it during shorter days).
Weather and Regional Considerations
Northern climates: Shorter construction season means planning ahead matters more.
Southern climates: Avoid mid-summer construction (too hot), winter building is possible.
Rainy regions: Plan around wet seasons for concrete work and painting.
Windy areas: Avoid structural work during high wind seasons.
Real Projects, Real Results (What Actually Happened)
You want to know: Will this actually work for someone like me?
Here are three real projects with honest budgets, real problems, and actual results.
Small Space Success: The $800 Balcony Office
The challenge: Maria had an 8×10 foot apartment balcony. No privacy, no shade, nowhere to work from home when weather was nice.
The budget: $800 total (she was firm about this number).
What she did:
- Bamboo privacy screens: $150
- Small bistro table and chairs: $200
- 6 large planters with wheels: $180
- Shade plants (hostas, ferns): $120
- String lights and small outdoor rug: $100
- Outdoor cushions and small storage box: $150
Total spent: $900 (went over by $100 but worth it).
The results after one year:
- Uses the space for work 3-4 days per week during good weather
- Has hosted 6 dinner parties for 4 people
- Plants are thriving (she was worried about killing them)
- Neighbors constantly ask for advice about their balconies
What she learned: “I should have bought the privacy screens first. Everything else looks better when you can’t see the parking lot.”
Would she change anything? “I’d get a bigger storage box and maybe one more plant. But I love having my outdoor office.”
Big Impact: The $12,000 Pergola That Added $20,000 in Value
The challenge: Tom and Sarah had a huge backyard with no focal point. “It felt like a boring lawn with some trees around the edges.”
The budget: $12,000 professional installation (they got three quotes).
What they got:
- Custom 16×12 cedar pergola: $8,500
- Professional installation and permits: $2,000
- Surrounding planted areas with automatic irrigation: $1,200
- Outdoor furniture and lighting: $800
Total project cost: $12,500
The results after two years:
- Home appraised for $18,000-$24,000 more than similar houses without pergolas
- Family uses the space 4-5 evenings per week during summer
- Hosted their daughter’s graduation party for 30 people
- Neighbors say it’s the most attractive yard on the street
Problems they didn’t expect:
- Clematis grew faster than expected and needed more pruning
- Had to add more outdoor electrical outlets for holiday lights
- Automatic irrigation needed adjustment the second year
Tom says: “Best money we ever spent on the house. We should have done this five years ago.”
Low-Maintenance Dream: The $6,500 Retirement Garden
The challenge: Bob and Linda (both 68) wanted a beautiful garden space without high upkeep. “We’re tired of weekend yard work.”
The budget: $6,500 mixing DIY and professional help.
Their smart approach:
- Hired professionals for: Irrigation installation ($1,800), electrical work ($800)
- DIY projects: Plant selection and planting, furniture arrangement, decorative elements
- Professional design consultation: $400 (3-hour session with landscape designer)
What they chose:
- Native plants that need little water or care: $900
- Automatic drip irrigation for all planted areas: $1,800
- Composite decking (no staining needed): $2,200
- Quality outdoor furniture that weathers well: $1,200
Results after 18 months:
- Yard maintenance time went from 8 hours per week to 45 minutes
- Plants look better than their old high-maintenance garden ever did
- Water bill actually decreased 20% (native plants use less water)
- Space gets used daily for coffee, reading, and entertaining
Linda explains: “The designer taught us that more plants actually means less weeding. I never knew that.”
Bob adds: “The automatic watering was the best investment. Everything stays healthy without us having to remember.”
What surprised them: “We thought low-maintenance meant boring. Our yard is the prettiest it’s ever been.”
What These Projects Teach Us
Small spaces can work great if you focus on what matters most to you.
Professional help makes sense when you know exactly what you want and have the budget.
Smart plant choices matter more than how much you spend on plants.
Automatic systems pay for themselves in time saved and better results.
Each project had problems that got solved. Don’t expect perfection from day one.
All three families use their spaces regularly because they planned for their actual lifestyle, not just what looks pretty.
What the Experts Actually Say (Honest Advice)
The problem with most expert advice: It sounds good but doesn’t help you make real decisions.
What you need: Honest opinions from people who build these projects every day.
Design Philosophy That Makes Sense
Helen Elks Smith, FSGD, explains design reality:
“The walls of a building are the transition—views and movement between inside and out require input from both specialists. The best design solutions come from looking at your project from different aspects.”
What this means for you: Don’t just think about how your pergola looks. Think about how it connects to your house, your view, and how you move through the space.
Practical application: Before you build anything, sit in the space at different times of day. Morning light is different from evening light. Plan for both.
Plant Wisdom That Actually Works
Lisa Nunamaker, FASLA, shares the secret to easy maintenance:
“Plant more plants! Fill your flower beds as thickly as you can. More plants usually mean less maintenance because fewer opportunities exist for weeds.”
Why this surprises people: Most think more plants equals more work.
The reality: Dense plantings shade out weeds and create their own healthy ecosystem.
How to apply this: When you think you have enough plants, add 25% more. Your future self will thank you.
Best plants for this approach: Ground covers like wild ginger, low-growing hostas, and spreading perennials that fill in naturally.
Budget Reality Check
Professional design firms tell the truth about costs:
“Even a very small garden will cost at least $20,000 for complete re-design including fees, planting, and hard landscaping. However, the recovery value can be 100% to 200% of landscaping costs when you sell.”
What this means: Professional landscape design costs serious money.
But here’s the good news: You can get 80% of the results for 40% of the cost by doing parts yourself.
The smart approach: Hire a designer for a consultation, then do the work yourself.
Maintenance Secrets from People Who Do This Daily
Professional maintenance crews know: The biggest problems come from putting the wrong plant in the wrong spot.
Their top 3 mistakes they fix:
- Shade plants in sunny spots (they burn and look terrible)
- Plants that grow too big for their space (constant pruning battles)
- High-water plants next to low-water plants (irrigation nightmares)
How to avoid these: Spend 30 minutes researching each plant before you buy it. Check mature size, water needs, and light requirements.
Construction Reality from Contractors
What pergola builders wish DIYers knew:
- “Most people don’t dig post holes deep enough” (should be 1/3 the height of the post)
- “Concrete needs 48 hours to cure, not 24” (rushing this causes failures)
- “Level matters more than you think” (small errors become big eyesores)
Their advice: Measure twice, cut once. Check level three times. Don’t rush the concrete.
What Garden Centers Won’t Tell You
Plant survival rates by purchase timing:
- Spring purchases: 85% survival rate
- Summer purchases: 70% survival rate
- Fall purchases: 90% survival rate (plants focus on root growth)
Why fall is better: Plants establish roots in cool weather, then have all spring to grow.
Exception: Wait until spring for tender plants that might not survive winter.
The Honesty About ROI
Real estate agents see the numbers:
- Pergolas add value in warm climates, less in cold areas
- Outdoor kitchens pay back well if they match the neighborhood
- Container gardens add zero resale value but maximum enjoyment
- Good lighting adds more value than most people expect
The bottom line: Build for your enjoyment first. Resale value is a bonus, not the main reason.
Your Garden Nook Starts Now
Here’s what you know now that you didn’t know when you started reading: Creating a beautiful garden nook isn’t about having unlimited money or professional skills. It’s about matching what you build to how you actually live.
Garden nooks represent more than pretty spaces. They’re investments in mental well-being, property value, and lifestyle enhancement. Whether you start with a $200 container garden corner or invest in a $25,000 complete outdoor living suite, the key is matching your project to both your vision and your practical capabilities.
The 6.5% annual growth in outdoor living spaces reflects a fundamental shift in how we use our homes. People want spaces that extend their living area outdoors. Garden nooks offer the perfect entry point into this trend, providing immediate gratification while building skills and confidence for larger future projects.
What Successful Garden Nooks Have in Common
They solve real problems. The best projects address actual needs: more space for entertaining, a quiet spot for morning coffee, or privacy from neighbors.
They fit the owner’s lifestyle. A reading nook works if you read outside. An outdoor kitchen works if you cook and entertain. Build for how you live, not how you think you should live.
They work in all seasons. Even if you only use them actively for 6 months, they should look good year-round from your windows.
They’re maintained appropriately. The most beautiful garden nook becomes an eyesore if it’s not maintained at the level it was designed for.
Your Next Steps
Start with function, not form. Ask yourself: What do I want to do in this space? Work? Read? Entertain? Cook? Exercise? Start there.
Plan for all seasons. Think about what your space will look like and how you’ll use it in spring, summer, fall, and winter.
Begin where you are. You don’t need to wait until you can afford the perfect project. Start with what you can do now, then build on it.
Remember that the best garden nook is one you’ll actually use. A simple, well-planned space that gets used daily beats an expensive space that sits empty.
The Truth About Getting Started
You don’t need to be an expert. Every expert started as a beginner. The difference is they started.
You don’t need unlimited money. Some of the most charming garden nooks cost less than a weekend getaway.
You don’t need a perfect plan. You need a good enough plan and the willingness to adjust as you learn.
You don’t need perfect weather. You need to start when you can and adapt to your climate.
Your Perfect Outdoor Sanctuary Awaits
The hardest part is beginning. Once you start, each small success builds confidence for the next project.
The most rewarding part is creating a space that’s uniquely yours, designed around your needs and preferences.
The best time to start is now. Planning season is ending. Building season is here.
Your garden nook doesn’t have to be perfect to be wonderful. It just has to be yours, functional, and loved. Begin planning today. Your future self will thank you every time you step into your personal outdoor sanctuary.
