
Corners are the most wasted square feet in a yard—yet the easiest places to score quick wins in beauty, yield, and privacy. Left alone, they collect weeds, downspout splash, and awkward shadows. Designed well, they become micro-gardens that look intentional and work hard.
The catch? Corners are tricky. Angled fences and walls create mixed sun/shade, wind tunnels, and heat traps. Space is tight, access is awkward, and irrigation is usually an afterthought. That’s why many “corner garden ideas” fail: the layout ignores light and reach, the plants don’t match the microclimate, and watering isn’t efficient.
This guide fixes that. You’ll learn how to map sun and wind accurately (full sun means six or more hours a day—per Penn State Extension and the Royal Horticultural Society), pick a shape that actually fits (triangular, L-shaped, or vertical), choose proven plants for sun or shade, install drip watering that saves time, and keep maintenance simple.
Then you’ll get four ready-to-copy “corner recipes” you can build in a weekend—whether you’re tackling a small corner garden by the stoop or a fence-line nook that needs screening. We’ll keep the advice practical, numbers-based, and suited to modern, peat-free corner garden design and corner flower bed ideas.
Map Your Corner’s Microclimate (sun, wind, water)
Place smarter, grow faster
Use this snapshot to size up light, heat, wind and water in any corner before you pick plants. It complements your section’s how-to and gives you quick, numbers-based targets.
Light bands at a glance
Walls, wind & working with them
| DIY infiltration rate | What it means | Action |
|---|---|---|
| 1–3 in/hr | Ideal for most beds | Proceed; add 2–3" mulch to moderate swings |
| 0.2–1 in/hr | Slow drainage | Raise bed slightly; add organic matter; choose tolerant plants |
| >3 in/hr | Very fast drain | Boost compost; use drip + mulch to hold moisture |
Quick tools that save time
Start with light, not plants. For placement decisions, use the standard definitions: full sun = 6+ hours/day, part sun/part shade = 4–6 hours, light shade = 2–4 hours, shade <2 hours. These thresholds come from university and RHS guidance and keep plant choices realistic for small spaces where shadows shift quickly. Track actual sun, not guesses: log two or three clear days and average.
Walls change everything. South- and west-facing masonry stores heat by day and releases it at night, creating warmer pockets that ripen fruit faster and reduce frost risk. That’s ideal for heat-lovers, but can stress shade perennials; north- and east-facing corners are cooler, better for woodland layers. Note wind: sheltered corners reduce transpiration and breakage, while funnelled wind at gate openings desiccates pots.
Water and runoff. Corners near downspouts may swing soggy-to-dry. Observe after a rain: if water pools for more than an hour, use moisture-tolerant species or regrade slightly and add a shallow swale or a small rain-garden-style depression. Ensure a hose bib or quick-connect is within 25–50 ft for easy drip setup.
Tools to make it easy. Use SunCalc (web or app) to visualize the sun’s path by season; then confirm with your phone’s compass and a simple time-lapse or notes every hour. Mark clearly on a quick sketch: hours of direct sun, wind direction, and wet/dry spots. This map drives every decision in the next steps and prevents wasted spending.
Choose a Layout that Fits (triangular, L-shaped, or vertical)

Work with the geometry. Corners reward triangular and L-shaped beds that open to a path. Keep maximum bed width at or under 4 ft so you never step into the soil—this protects structure and saves your back (Alabama Cooperative Extension and multiple universities recommend ~4 ft reach). If the bed touches a fence, cheat the interior width to ~30–36″ and go taller to maintain root volume.
Plan the paths first. Access determines success in tight spaces. University of Georgia’s CAES Field Report gives clear targets: 12″ minimum where space is tight, 18–24″ comfortable, and ~4 ft if you’ll push a wheelbarrow or need accessibility. Oregon State University notes 14–16″ walkways are common in production-style raised beds—useful when squeezing more growing area without sacrificing reach. Sketch these widths before you buy materials.
Where vertical wins. If floor space is scarce, add height: a slim trellis, obelisk, or wall-mounted espalier panel converts dead airspace into yield or bloom. UMN recommends obelisks and simple 6-ft pole tripods for vines in pots and beds; espaliered apples or pears against a sunny wall are classic space-savers (RHS and Wisconsin Horticulture). Anchor posts 18–24″ deep and keep the structure 6–8″ off masonry for airflow.
Pro tip: In extremely tight small corner garden sites, choose a tall, narrow focal element (obelisk or columnar shrub) where the diagonals meet, then step plant heights down toward the path. That preserves sightlines and light.
Build the Bed Right (soil depth, drainage, mulch)
Depth and structure. Most ornamentals and veg are happy with 6–12″ of rooting depth; beds 18–24″ high are ergonomic for frequent tending. Go taller only with proper bracing: beds higher than 18–24″ can require retaining-wall-like support so they don’t bow or tip (University of Missouri Extension).
Soil testing cadence. Test before filling a new bed, then keep a simple rhythm: vegetable corners every 1–2 years; ornamental/shrub corners every 2–3 years (UGA CAES). If you garden on very sandy soils, NC State suggests testing every 2–3 years (clays 3–4 years) to stay ahead of pH drift and nutrient tie-ups. Take samples in fall if you can; lime needs 2–3 months to react.
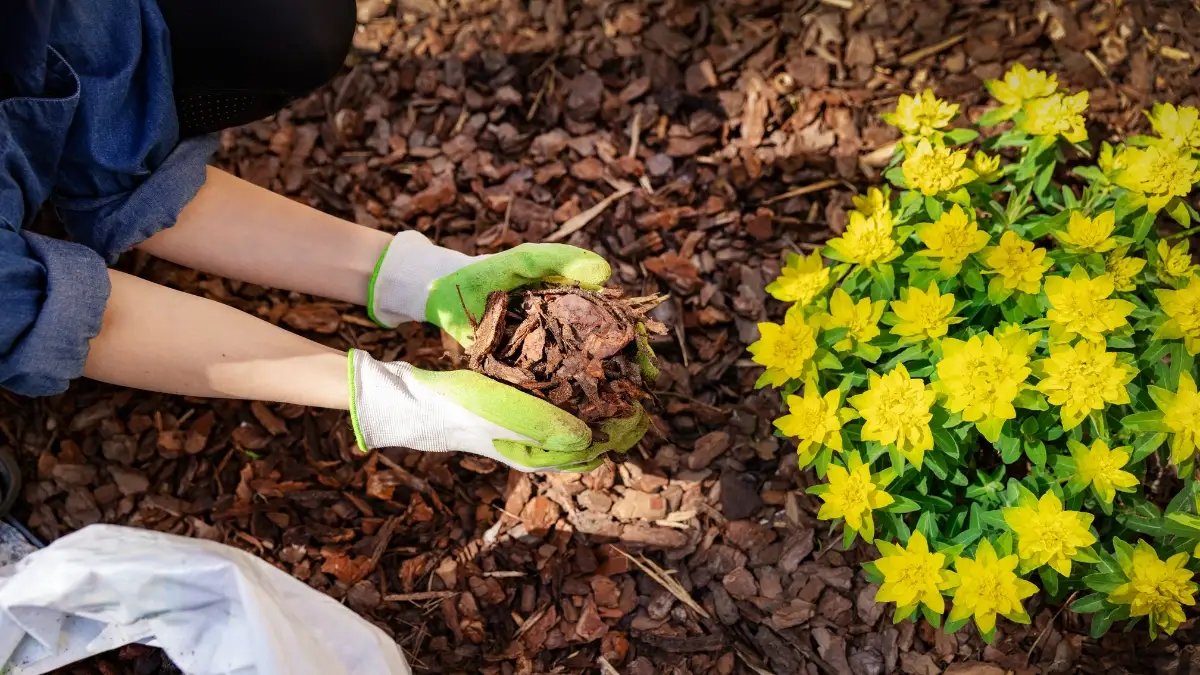
Mix and mulch (peat-free). Fill with a well-draining, peat-free blend (composted bark, coir, wood fiber plus mineral grit per RHS). Top with 2–3″ of organic mulch to suppress weeds and cut evaporation (University of Maryland Extension). In corners that catch roof splash, pull mulch a few inches back from stems to avoid rot. Peat-free options are now widely supported across the UK/EU market and increasingly available elsewhere; choosing them reduces carbon impact while still delivering strong plant performance.
Drainage details that matter. On patios, choose bottomless metal or wood frames set on permeable base; in containers, ensure large, unobstructed drainage holes and avoid saucers that keep roots wet. If your corner tends to pond, raise the bed slightly and add coarse mineral “chimers” (grit or expanded shale) to the first few inches for faster surface dry-down.
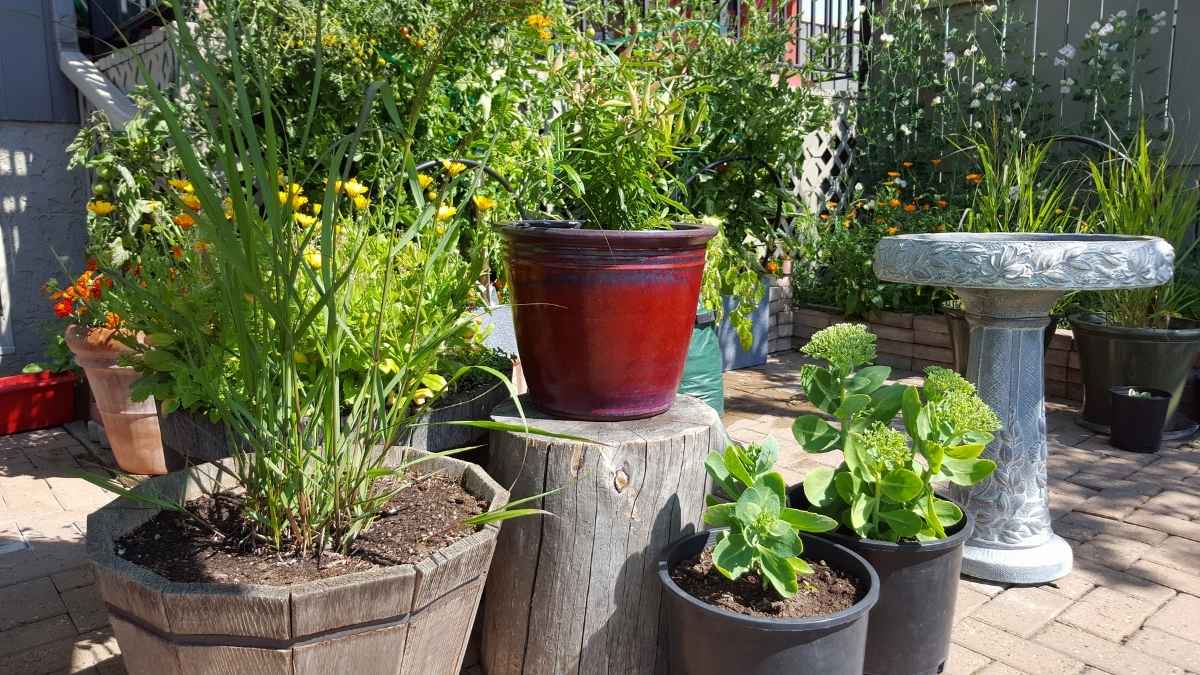
Four Plug-and-Play Corner Plans (with plant lists)

Use these as “modules.” Each one includes spacing, container sizes (where relevant), and a one-hour weekly care routine.
Plan A — Sunny Edible Corner (full sun, heat-tolerant)
- Layout: L-bed or triangle facing south/west; 3–4 ft trellis at the back.
- Back row (trellis): Cucumbers thinned to 8–12″ apart; train vertically to 3–4 ft for straighter, cleaner fruit and closer row spacing (University of Minnesota; Penn State). Tie new growth every 6–12″ to keep air moving.
- Mid layer: Bush peppers at 12–24″ in beds; in pots use 3–5+ gal per plant (West Virginia University) for stability and yield; bigger containers hold moisture longer and boost fruit set (OSU & UMD container guidance). Stake once fruits set.
- Front edge & gaps: Heat-loving basil and thyme in 1–2 gal pots or as a low edging; tuck in compact marigolds for pest confusion and color.
- Optional swap: Determinate tomato in ≥5-gal grow bag or bucket (University of Arizona). Prune lightly and ensure sturdy support.
- Weekly care: Check ties, harvest often, and run drip 2–3×/week in heat (adjust to climate).
- Why it works in corners: Tall-to-short layering keeps sun on the front edge; the trellis turns dead airspace into yield.
Plan B — Shade/Part-Shade Woodland Corner (cooler walls, tree shade)
- Layout: Triangle with the point facing the path; one dwarf conifer as year-round anchor.
- Structure: A compact conifer (e.g., Pinus mugo ‘Ophir’ or Picea glauca ‘Conica’) provides four-season form without outgrowing the space (RHS small conifer picks).
- Layers: Ferns (Dryopteris/Polystichum), hostas, heuchera, pulmonaria—all listed by RHS for shade and partial shade performance. Place the most slug-resistant hostas where splashing occurs.
- Soil: Even moisture, organic mulch 2–3″, and no peat.
- Weekly care: Trim tattered leaves, top up mulch mid-summer, and water deeply once or twice a week if dry.
Plan C — Balcony/Patio Vertical Corner (tiny footprint)
- Layout: Narrow trough (10–14″ wide) with a slim obelisk or three 6-ft poles tied as a teepee. Anchor well and leave 18″ of path clearance.
- Climbers: Compact annual vines (black-eyed Susan vine, mini cucumbers), or dwarf pole beans. UMN specifically recommends obelisks/teepees for annual climbers in containers.
- Edible option: Patio/dwarf tomatoes in ≥5-gal containers (University of Arizona). One plant per pot; keep foliage off hot walls in midsummer.
- Watering: Containers dry fast—install a micro-drip line with 0.5–1.0 gph emitters and mulch the surface with 1″ of fine bark.
Plan D — Pollinator-Forward Front Corner (bloom succession)
- Layout: Triangle that faces the sidewalk; tallest plants at the back for sightline safety.
- Planting strategy: Choose three native species per season (spring/summer/fall) from your Xerces Society regional list to ensure nectar continuity and support for specialist bees and caterpillar host plants. For example, in many Southeast sites: spring Zizia aurea, summer Monarda fistulosa, late Liatris spicata. Xerces’ regional sheets flag top performers and water needs.
- Edges: Low sedges or groundcovers to stop mulch from migrating onto the path.
- Care: Cut back in late winter, not fall—spent stems and leaves support overwintering insects.
Vertical Wins for Tight Corners (trellis, string, espalier)

Vertical structures let you harvest height when floor space is scarce—core to smart corner garden design.
Cucumber trellis (quick wins). University of Minnesota Extension recommends thinning vining cucumbers to 8–12 inches and training them up a 3–4 ft trellis; weaving or clipping the leader every 6–12 inches keeps leaves dry, improves airflow, and yields straighter fruit. Add a reminder tag to re-tie after wind or heavy harvest weeks.
String training (tomato twine). For indeterminate tomatoes, run a top bar (or overhead hook), drop twine, and support stems with tomato clips. University of Maryland Extension notes that upright support reduces fruit rots, speeds harvest, and concentrates work in one aisle. Maryland Grows (UMD’s blog) also stresses replacing weak twine and using clips where tension is highest.
Espalier against warm walls. A sun-facing fence or masonry corner becomes a microclimate “battery.” Training apples or pears flat against wires creates a living screen that fits where shrubs don’t. The Royal Horticultural Society outlines the classic setup: a central leader with 3–4 horizontal tiers, wires 15–18 in apart, and consistent summer pruning to keep arms fruiting rather than shading the bed.
Build it to last. Set trellis posts 18–24 in deep, keep wood/metal 6–8 in off hot walls for airflow, and pre-install anchor points for string systems before planting. In very narrow vertical corner garden layouts, pick a single tall focal (obelisk) and layer shorter plants forward so the corner stays sun-positive.
Watering That Saves Time
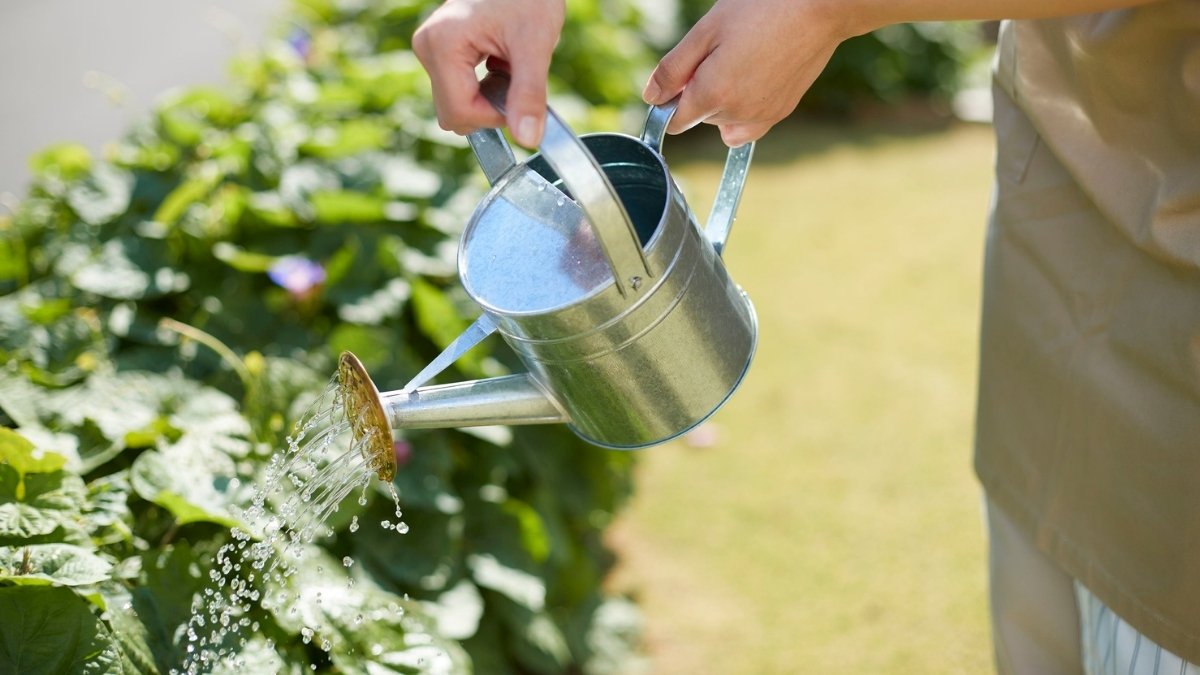
Go drip for efficiency. Utah State University Extension pegs drip irrigation at ~90% efficient when designed correctly—far higher than overhead methods—because water lands at the root zone instead of evaporating. In arid settings, University of Nevada, Reno (2025) reports drip (and smart controllers) can cut applied water by ~50–70% while maintaining plant health; cite that upper range only for hot, dry climates.
Mulch right. Keep 2–3 inches of organic mulch on the bed to slow evaporation and reduce soil splash; rake it back a few inches from stems, especially in tight corners that catch roof drip.
Dial in emitters. For mixed beds, start with 0.5–1.0 gph emitters on small shrubs/perennials and short soak cycles (e.g., 20–30 minutes), then adjust by feel: soil should be evenly moist 2–4 inches down the next morning. USU’s calculator tables reinforce the 90–95% efficiency target for drip—useful when you translate minutes into gallons.
Containers need extra care. Success hinges on drainage holes and adequate soil volume. UNH Extension emphasizes proper potting media and drainage; University of Tennessee notes that smaller/shallow containers heat and dry faster, while larger, deeper pots dry more slowly (but watch drainage). Bottom line: bigger pots = fewer waterings, provided the mix drains freely.
Where this fits: Automating drip in a small corner garden is the single best time-saver you can add to your corner garden ideas playbook.
Smart Maintenance (seasonal checks, soil tests, pruning)

Spring—test and tune. Before planting, pull a soil test. UGA’s CAES Field Report advises every 1–2 years for vegetable beds and every 2–3 years for ornamentals; apply lime 2–3 months before planting so it has time to react.
Summer—thin, tie, top up. Keep vertical crops clipped to string or trellis and remove dense interior growth that traps humidity. Penn State Extension notes that staked/trellised plants have better airflow and lower disease pressure, particularly for tomatoes and cucumbers. Re-tie after storms, and refresh mulch to hold moisture.
Fall—cleanup that helps wildlife. Instead of scalping beds, leave 12–24 inches of hollow stems and a light layer of leaves to support overwintering beneficials; Xerces and UMD highlight leaf litter and standing stems as key habitat. Do the heavy cleanup late—when spring temps consistently warm—so you don’t eject sleeping pollinators.
All year—5-minute checks. Walk the corner weekly: clear emitters, look under dense foliage for early disease signs, and re-secure any loose ties. This rhythm safeguards the investment you just made—and keeps corner garden ideas thriving with minimal effort.
Conclusion
Corners are design goldmines. Map the sun and wind, choose a corner-efficient shape (triangular, L-shaped, or vertical), build real rooting depth with tested soil and 2–3 inches of mulch, match plants to your light (edibles for sun; layered shade natives for part shade), and automate drip so watering takes minutes, not hours.
Utah State University Extension’s data on ~90% drip efficiency and University of Nevada, Reno’s arid-climate savings show why irrigation is the lever that multiplies your results; Penn State Extension’s trellising guidance keeps disease in check; and UGA’s CAES Field Report keeps your soil dialed year after year.
